Week 1 - Section 1 - Getting to know Edison
| Site: | ΕΛ/ΛΑΚ Moodle |
| Course: | Advanced Coding - June 2017 |
| Book: | Week 1 - Section 1 - Getting to know Edison |
| Printed by: | Guest user |
| Date: | Friday, 31 July 2026, 1:50 PM |
Description
In the first week we will learn about the edison robot, its capabilities, sensors and communication with the software. We will also learn how to use the EdWare, the software for programming edison robots.
Chapter 1.1 - The hardware
Edison is your new robot buddy who will teach you about electronics, 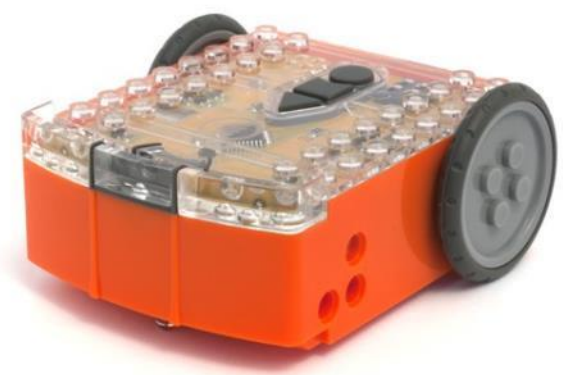 programming and robotics in a fun and engaging way.
He’s equipped with all the sensors, outputs and motors needed to introduce you to the amazing world of robotics. That’s great, but what is robotics? Well that’s not an easy question to answer. Edison’s creator, Brenton O’Brien says “a robot is a machine that can behave autonomously”.
This means that a robot can think or make decisions on its own and act on those decisions. Many other people have different definitions, but we like this one as it’s nice, simple and applies to what you’re about to learn. Robotics wouldn’t be possible without electronics, so Edison has his own electronics and you can see it all through his  transparent top. There are resistors, capacitors, transistors, motors and more, but the most important electronic part is Edison’s microcontroller. The microcontroller is like Edison’s brain. It’s where all his ‘thinking’ happens. Edison’s microcontroller is very similar to the processor chip inside a computer, only much smaller. And just like a processor chip in a computer, Edison’s microcontroller has programs. The programs allow Edison to make decisions and ‘think’ for himself. The most amazing thing about Edison, and what you’re about to learn, is that YOU get to write Edison’s programs! You can tell Edison how to think, behave and respond to his environment. Programming Edison is surprisingly easy.
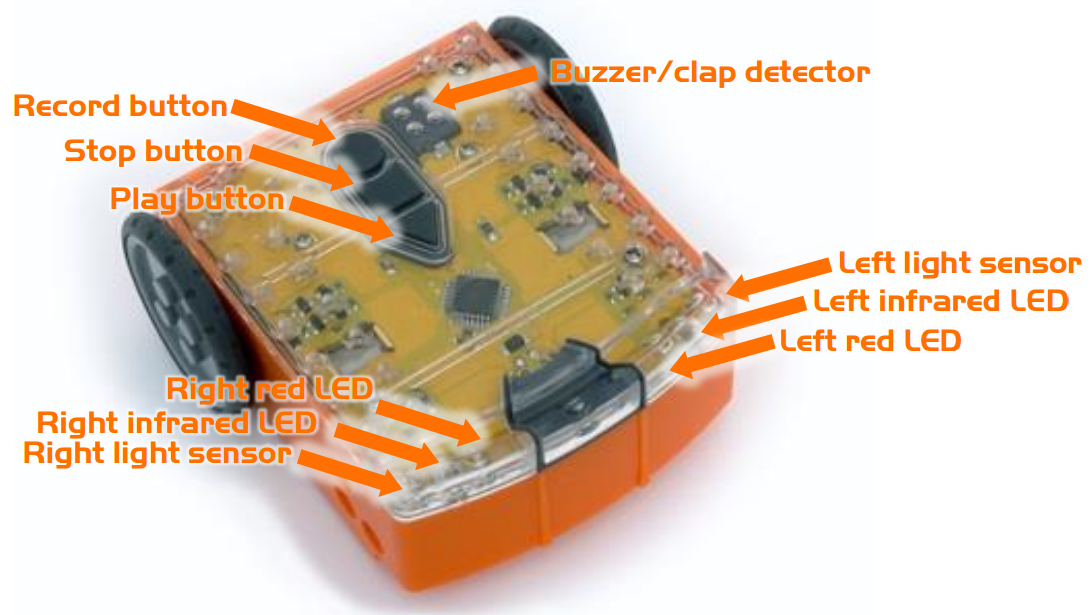
Edison uses sensors and motors to interact with the world. In the images below you can see Edison’s sensors, buttons and switches.
Play button – Start program
Stop button – Press to stop a program
Record button – 1 press = download program, 3 presses = read barcode

Edison’s line tracking sensor is made up of two parts a red LED light and a light sensor.
The line tracking sensor also reads special barcodes that activate pre-installed programs.
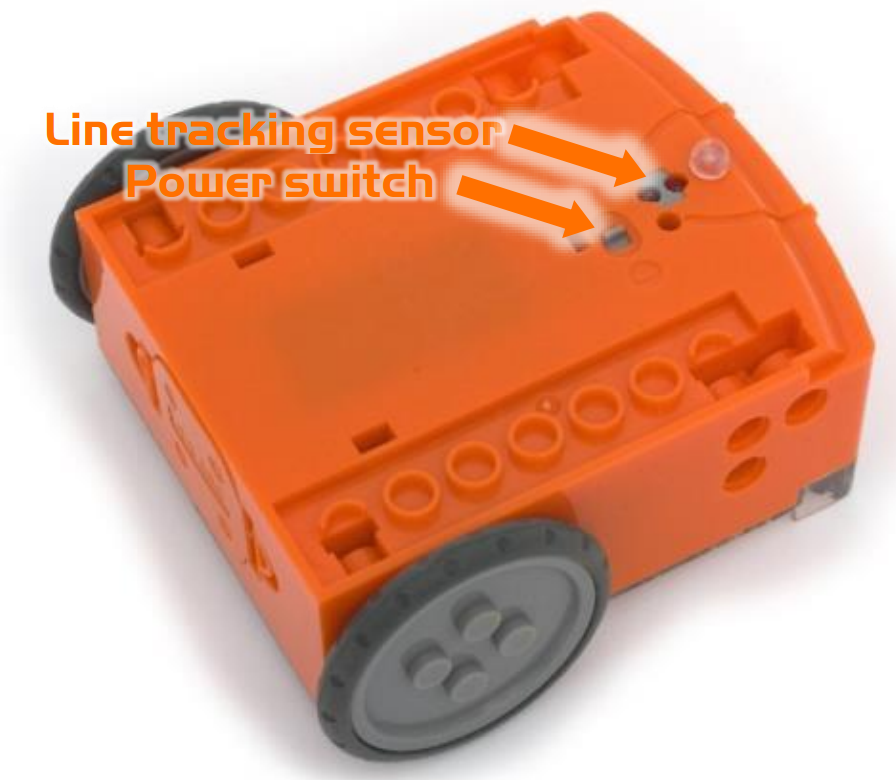
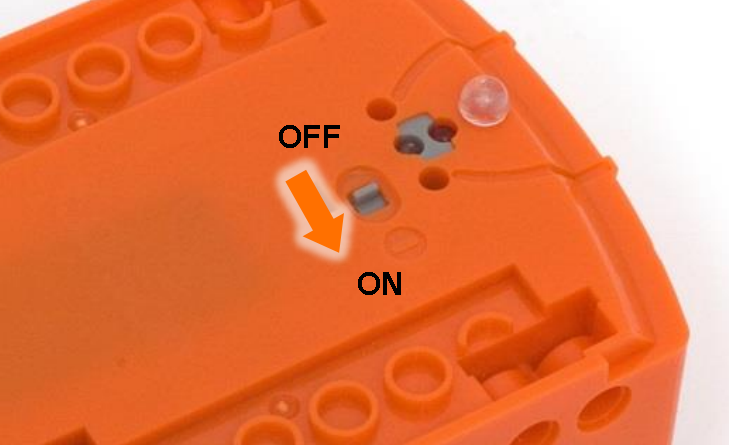
After 5 minutes of inactivity Edison robot will go to sleep mode. To enable it again turn it off and on.
Chapter 1.2 - Communications
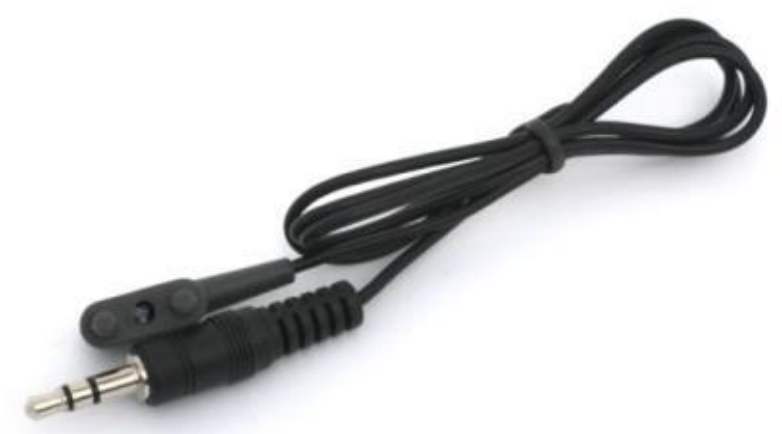
The
EdComm cable is used to download your programs to Edison. It connects into the
headphone socket on your computer or tablet.

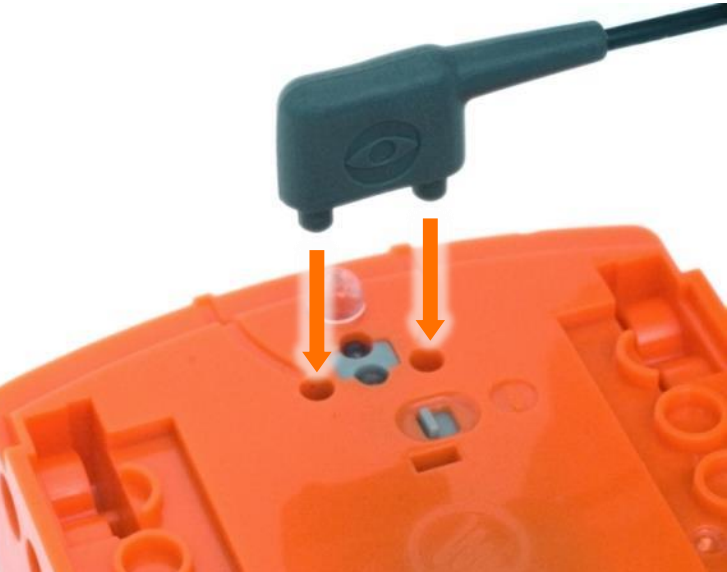
To
download a program connect the EdComm cable to the headphone socket
on the computer or tablet and turn
up the volume to full. Plug the other end of the EdComm cable into Edison as
shown.
Chapter 1.3 - The software - EdWare
This is EdWare and is the software used to program the Edison robot.
To get familiar with EdWare and programming, grab icons from the palette on the left and drag them onto the programming area. Place the icons between the ‘start’ and ‘end’ icons.
Select an icon and adjust the settings in the icon property box to control how Edison responds to that icon. Use the help text as a guide while programming. Everything you need to know about an icon can be found here. The variables section is where you can create and view little pieces of Edison’s memory.
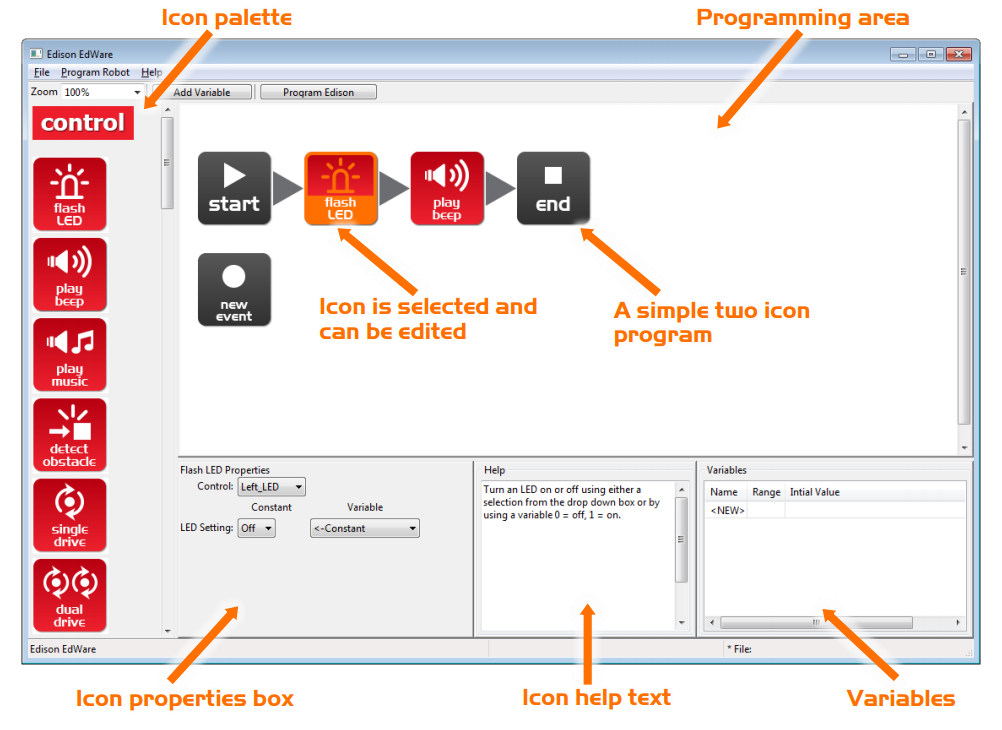
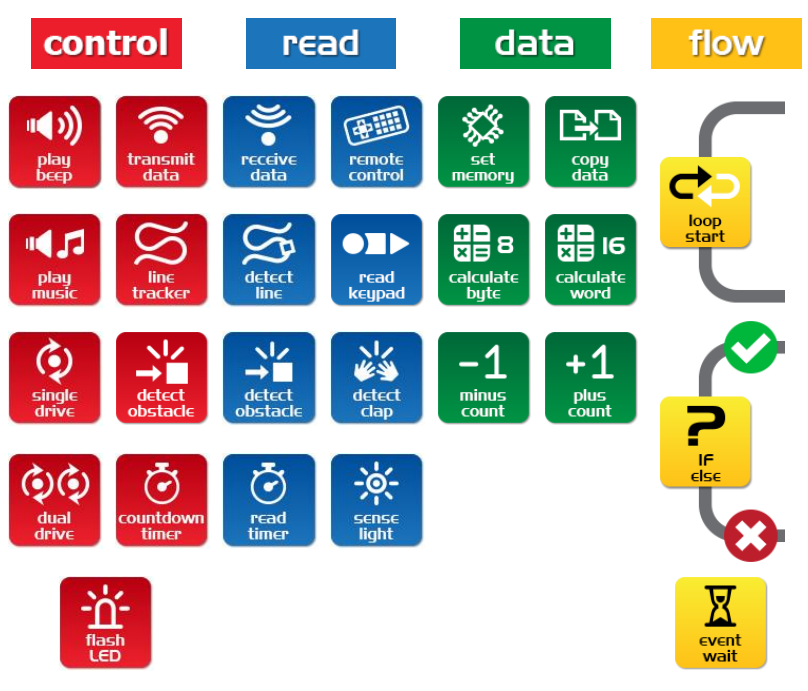
There are four main types of icons used in EdWare. These are control icons (red), read icons (blue), data icons (green) and flow icons (yellow).
Chapter 1.4 - Blink A LED
Simple loop program to make the left LED flash.
The traditional first program to write is to make a LED light flash. This is a very simple program and as the name suggests turns on and off the left LED light. Drag across the icons to form the program below, then click on each icon and set the properties box as shown.
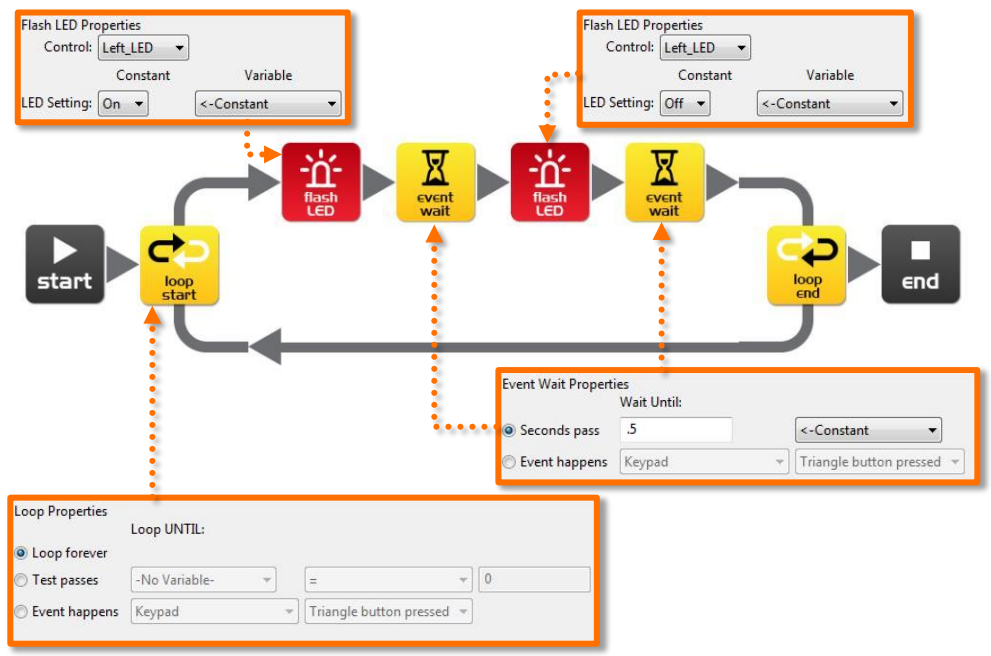
How the program works
Edison’s microcontroller (brain) follows each icon as a step and the arrows show the direction of the steps. Let’s follow the steps in the program above.
Step 1: the program begins at the start icon
Step 2: the program follows the arrow out of the top of the loop icon
Step 3: the LED is set to on by the flash LED icon
Step 4: the program waits for 0.5 seconds by the event wait icon (keep the LED on)
Step 5: the LED is set to off by the flash LED icon
Step 6: the program waits for 0.5 seconds by the event wait icon (keep the LED off)
Step 7: what happens here is very important! Rather than following the arrow to the right of the loop end icon, the program moves out of the bottom of the icon and goes back to the loop start icon. This happens because the loop icon is set to ‘Loop forever’. The program therefore once again goes to the first flash LED icon and turns on the LED and then follows the same sequence outlined above. This will continue forever or at least until the batteries go flat!
Chapter 1.5 - Downloading the program

The next step after creating the program is to download it to the robot.
To download the program, connect the EdComm cable to the headphone socket on the computer or tablet and turn up the volume to full. Plug the other end of the EdComm cable into Edison as shown.

To download the test program follow these steps:
1. Press Edison’s record (round) button once
2. In EdWare press the ‘Program Edison’ button and then ‘Start Download’
3. Press Edison’s play (triangle) button to start the program
Chapter 1.6 - Barcode programming
Another way to program Edison is by using barcodes. In that way Edison can follow a black line, follow the light, react on claps and do many other things that are pre-programmed into its memory.
Reading the barcode
- Place Edison facing the barcode on the right side
- Press the record (round) button 3 times
- Edison will drive forward and scan the barcode
