Module 5 - Section 2 - Mouse control
| Site: | ΕΛ/ΛΑΚ Moodle |
| Course: | Python Lab |
| Book: | Module 5 - Section 2 - Mouse control |
| Printed by: | Guest user |
| Date: | Friday, 31 July 2026, 1:49 PM |
5.2.1 - Tuples
Tuples are very similar to lists, except that they are immutable (they cannot be changed). Also, they are created using parentheses, rather than square brackets.
>>> breakfast = ("spam", "eggs", "milk")
As with lists we can access the values in the tuple with their index:
>>> print (breakfast[0])
But we cannot reassign a value in a tuple. If we try python causes an error:
>>> breakfast[1] = "yougurt"
Tuples can be created without parentesis, by just separating the values with commas:
>>> my_tuple = "biscuits", "soda", "ice cream"
>>> print (my_tuple[0])
An empty tuple is created using an empty parentesis pair :
>>> tpl = () # But ..... what is the use of an empty tuple
If we can do the same things with lists why python has tuples? Tuples are faster than lists and use less memory, but they cannot be changed.
5.2.2 - Move as my mouse commands
In the previous module we learned how to move a rectangle, changing the coordinates of the starting point.
Pygame offers a method for moving objects using the mouse. First of all we must know where the mouse position is.
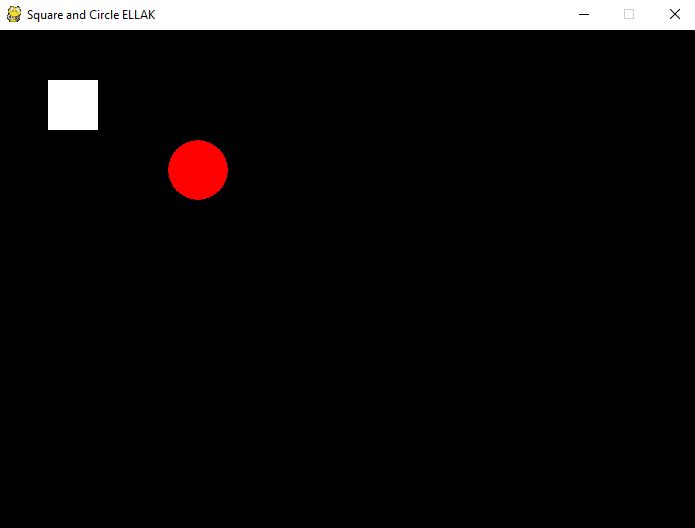
To do so open the file we previously created to draw a square and a circle from here
Copy the following line to line 36 taking care of indentation.
    # Get Mouse Position
     pos = pygame.mouse.get_pos()
    x = pos[0]
    y = pos[1]
    print(x,y)
The first command creates a tuple of two numbers that are the coordinates of the mouse. The following commands assign the x and y coordinates to variables x and y. The print command can be commented out. It exists to view the coordinates as you move the mouse.
Now we will use these coordinates to move the red circle.
Change the line that draws the circle (around line 54) to
pygame.draw.circle(screen, RED, [ x, y], 30, 0)
and run the code
Wow!! Move as i command you.
You can comment the line that prints the position of the mouse (around line 50)
You can download the code from here and test it.
Move the circle near the white square.
Is it on top or the square is on top?
Exercises
- Can you modify the code to have the square on top?
- Can you modify the code to move the square?
5.2.3 The Stick Figure
How about creating more complex shapes than a square and a circle? What other command can we use to draw?
Look at the image below. Starting from the basic Pygame Template (you can download it from here, open it and rename it to stick_figure) write the drawing commands to create a stick figure.
Some colors are missing, so you have to create them (at the same position as the other colors). You can view an RGB calculator here or you can use this code to create ORANGE and BLUE
ORANGE = ( 232, 163, 24)
BLUE = ( 0, 0, 255)
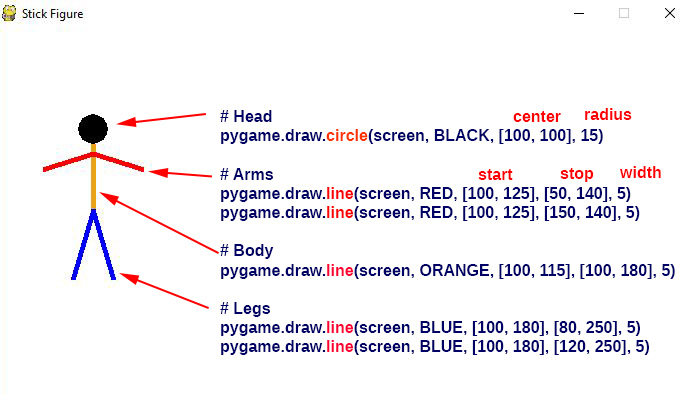
You can download the code from here.
5.2.4 - Moving the Stick Figure
Download the code for the Stick Figure from here and open it to Thonny.
We will use the mouse to move the Stick Figure.
Uncomment lines 52 to 55, taking care of indentation, to read the position of the mouse.
Run the code and you should see the position of the mouse printed in CLI area.
Change lines 65 to 79 to add movement to the drawings.
    # Draw stick figure
     # Head
     pygame.draw.circle(screen, BLACK, [100 + x, 100 + y], 15)

    # Body
     pygame.draw.line(screen, ORANGE, [100 + x, 115 + y], [100 + x , 180 + y], 5)


    # Legs
     pygame.draw.line(screen, BLUE, [100 + x , 180 + y ], [80 + x, 250 + y], 5)
    pygame.draw.line(screen, BLUE, [100 + x, 180 + y], [120 + x, 250 + y], 5)

    # Arms
     pygame.draw.line(screen, RED, [100 + x, 125 + y], [50 + x, 140 + y], 5)
    pygame.draw.line(screen, RED, [100 + x, 125 + y], [150 + x, 140 + y], 5)
Don't forget to check the indentation.
You can download the code from here to test it