Submodule 11.1: Gimp file- Selection tools
| Site: | ΕΛ/ΛΑΚ Moodle |
| Course: | Web Design and Digital Content Production |
| Book: | Submodule 11.1: Gimp file- Selection tools |
| Printed by: | Guest user |
| Date: | Saturday, 23 May 2026, 2:59 AM |
Description
- The Gimp .xcf file
- Selection tools
- Crop tool
- Path tool
To start...
We have to settings before start working.
Open your Gimp and ...
- Open the Windows tab and select Single- window mode.
- Click on the "Move tool" in the left tools bar and in the panel select "Move the active layer".
Create and Save a Gimp file
You can recognize a GIMP Image file by its extension, .xcf . The extension abbreviation stands for eXperimental Computing Facility. GIMP uses these files to store layers, transparency settings, paths, and other information associated with one or more photos.
See the Gimp documentation: https://docs.gimp.org/en/
Rectangle and ellipse select tools
The role of the Rectangle Selection tool is to select rectangular regions of the active layer.
The role of the Ellipse Selection tool is to select both circular and elliptical regions from an image/ active layer.
The Shift key
Pressing the Shift key after starting your selection, activates the Fixed option. If you keep holding the Shift until you finished the selection, the resulting selection shape will be a square or a circle ( depending on the selection tool used).
When you have already done a selection and you start a new one, if you press the Shift key before starting the new selection, the resulting selection will be added to the existing one.
A "+" appears on the cursor.
The Ctrl key
If you press the Ctrl key after starting your selection and you hold it down until you finished, you will change the centre of your selection. More specifically, instead of using the corner as your center, it will use your starting point.
When you have already done a selection and you start a new one, if you press the Ctrl key before starting the new selection, the resulting selection will be subtracted from the existing selection.
A "-" appears on the cursor.
The Shift + Ctrl keys
Pressing these keys before starting your selection intersects the resulting selection with the existing one.
Create a transparent image. The Lasso tool
Firstly, we open the image in our Gimp and save it as Gimp file.
The Crop tool
We want to select a smaller area of our image. To achieve that, we will use the Crop tool. We press Enter after completing our selection and we save the file.
The Free selection tool (Lasso)
Here we want to select only the girl. To do this we will use the Free selection tool.
To zoom in or out we press + or -.
Note: The video doesn't show the whole process of the selection.
In this video the selection has been completed, we have selected the girl.
The next step is to close our selection. To achieve this we press Ctrl + click back to the first point of our selection.
To view the resulting selection we should add the tab "Selection editor". Then we can use the button "Inverse the selection" to see if the girl or the background is selected. Here, I select the background.
Make the image transparent
The steps to achieve this are:
- right click to add the alpha channel to the layer
- select the background and
- delete it.
The checkerboard pattern is a visual way to show empty space it's like a transparent sheet where there was no paint.
When you make an image transparent is common that you notice that you may have forgotten some white spaces.
To improve the selection, we can add selection areas by clicking shift before add points.
You can find the file of the video at: courseGimp>xcfFiles>image2.xcf
The Paths tool
We will use the Paths tool to isolate an object with curves.
Be careful:
To add a new point you have to first click on the last point to make it active.
To add a new point between two other points in order to create a curve, press Ctrl + click.
To release the arms hold down the mouse and drag it.
After creating a path, we are still able to both edit it and create a selection from this path:
You can find the file of the video at: courseGimp>xcfFiles>image3.xcf
Exersice
Exercise
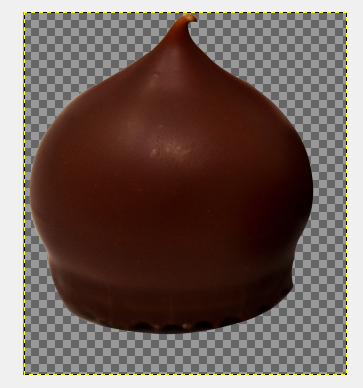
We have selected various images which are related to chocolate in the folder courseGimp> freeImages. You can also find other free images.
Chose an image of your choice and isolate one of its elements by using any method/methods from those we learned in this submodule.
If you want to start by doing something more simple, you can open the Gimp and use the file courseGimp>xcfFiles>image3.xcf
The goal of this exercise is to create a transparent image. Save the file as exersice11.1.xcf in the folder "courseGimp>exercises"
The below is an example of a transparent image: