Transforming sketches in Inkscape
| Ιστότοπος: | ΕΛ/ΛΑΚ Moodle |
| Μάθημα: | 3D printing with circuits and Arduino |
| Βιβλίο: | Transforming sketches in Inkscape |
| Εκτυπώθηκε από: | Guest user |
| Ημερομηνία: | Τρίτη, 14 Ιουλίου 2026, 5:53 AM |
Περιγραφή
Creative 3D printing without 3D modelling.
1. Pixels or vectors?
The image files found online usually have a raster image file format, such as JPEG or PNG. This means that the image is saved as a matrix of coloured dots called pixels, where every pixel has its own RGB value determining its colour (Red-Green-Blue).
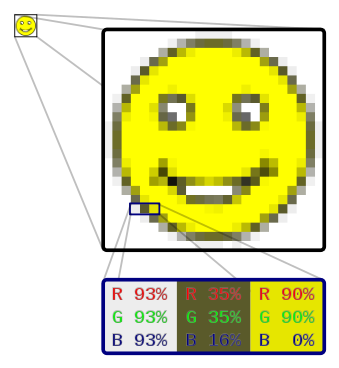
This also means that when the image is enlarged, the pixels appear as squares.
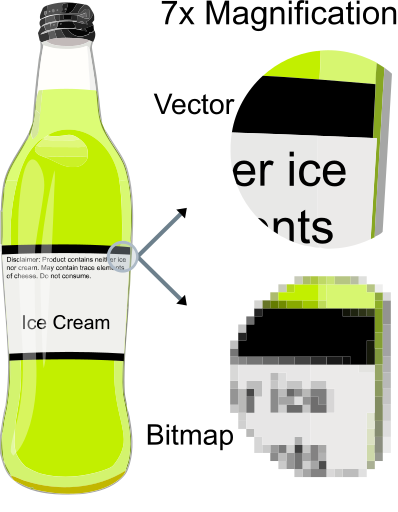
Vector graphics on the other hand, use a more complex way to represent images, which are composed of mathematical paths instead of pixels, and allow designers to make modifications more easily. One key difference is that zooming in/enlarging a vector image will not affect the smoothness of the lines.
For the transformation to 3D, we need a 2D vector .svg image.
2. Importing to Inkscape and vectorising
For this, we will need to trace the outlines of our sketch and export them as an .svg file using Inkscape.Inkscape is professional quality vector graphics software which is used by design professionals and hobbyists for creating a wide variety of graphics such as illustrations, icons, logos, diagrams, maps and web graphics. Inkscape uses the .SVG (Scalable Vector Graphics) as its native format, and is free and open-source software.

For this tutorial, we use an image from a colouring book found here and we open it with Inkscape.
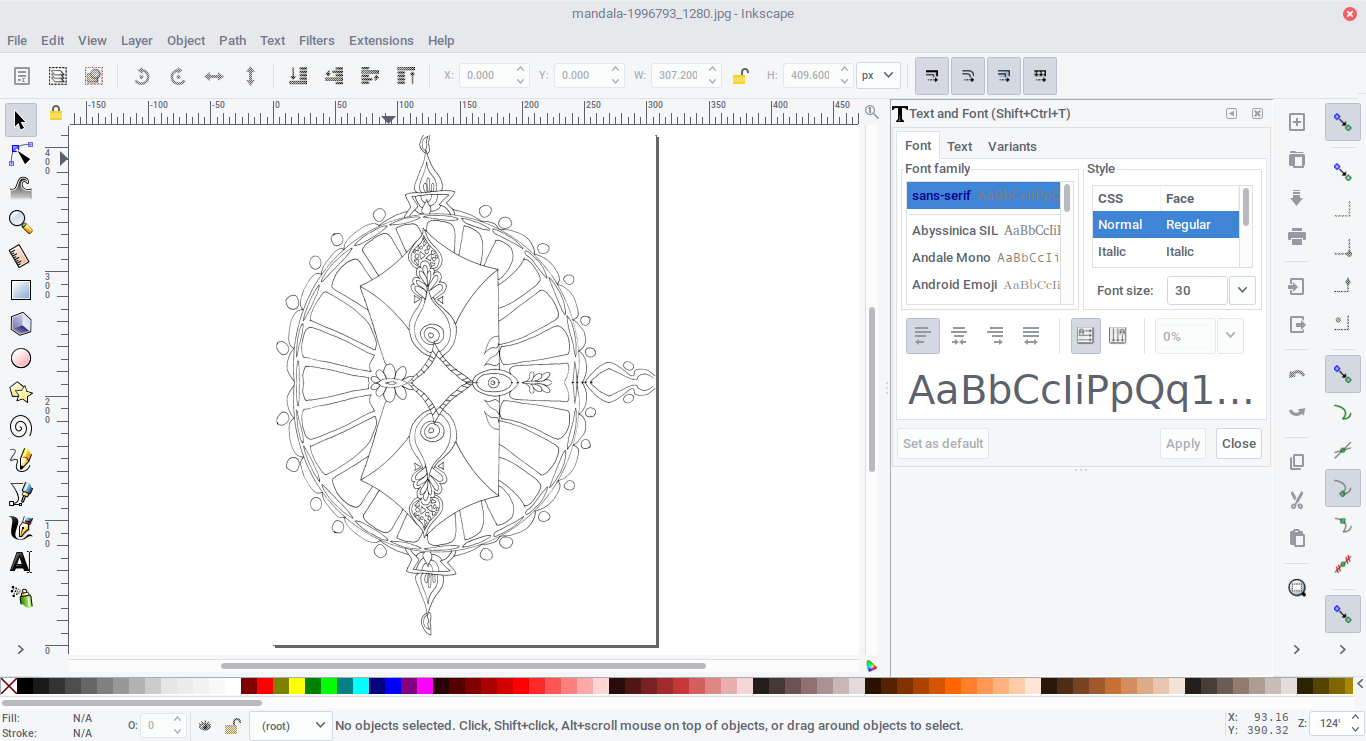
In order to vectorise it, first, we select the image by clicking on it and then, from the menu, click on Path and choose Trace Bitmap....
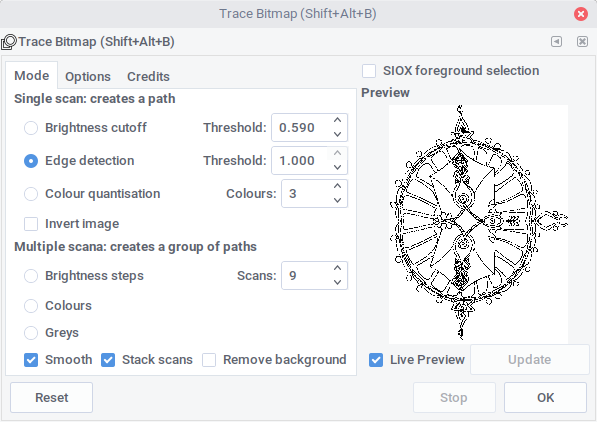
Next, we select Edge detection and, with the Live Preview checked, we can see how tweaking the Threshold level changes the result. In general we are looking for a good level of detail, with nice closed lines. Depending on the type of your sketch, you might want to use a mode other than Edge detection and experiment.
3. Exporting the .svg and going 3D
Afterwards, we are ready to save our file as an .svg.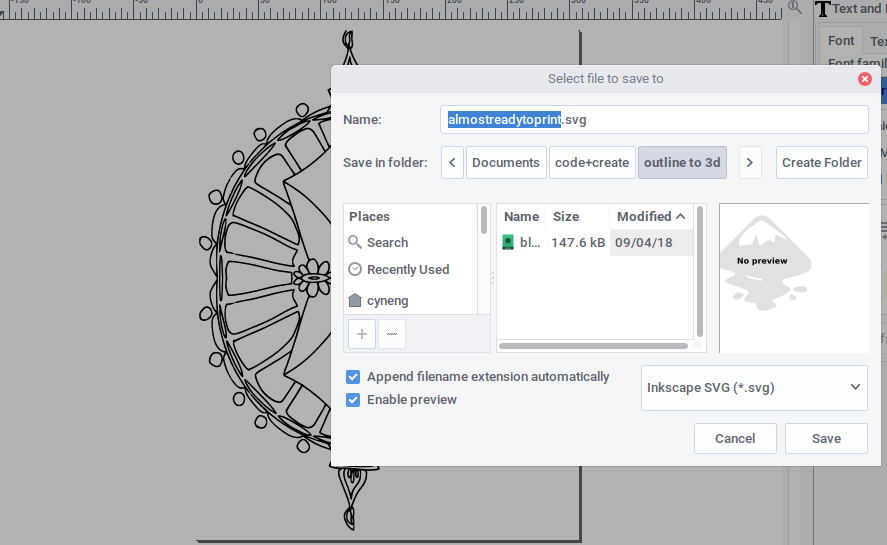
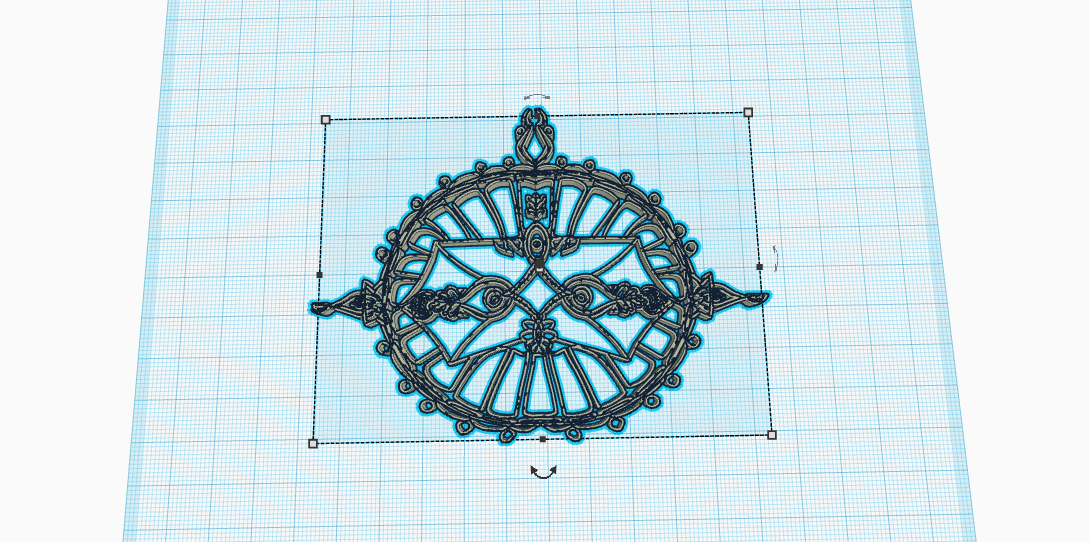
With Tinkercad, we can import the file directly.

Tinkercad will automatically turn it to a 3D object as you see below.
4. Modifying the 3D model
From here, we might want to make a few modifications. For example the design we chose might look good as a necklace, so we are going to lower its height and add a small ring.
When we are happy with the design, we select all the objects and click Group.
Afterwards, we export our 3D model as an .stl and import it to Cura for slicing!