Submodule 10.4: Carousel
| Site: | ΕΛ/ΛΑΚ Moodle |
| Course: | Study / Web Design and Web Development |
| Book: | Submodule 10.4: Carousel |
| Printed by: | Guest user |
| Date: | Friday, 26 June 2026, 1:49 AM |
Description
- Adding carousel
- Adding CSS Classes
- Adding Carousel Controls
Introduction
In this lesson we will examine the use of the Carousel component in our web page. We will:
- Use a carousel component in your web page
- Configure various aspects of the carousel
- Add controls to the carousel to manually control it
See more for carousel
Adding a Carousel
The carousel will be added to the index.html page. In this page, go to the top of the container div that contains the content of the page and add a new content row and an inner div spanning all the 12 columns as follows:
<div class="row row-content">
  <div class="col">
  </div>
</div>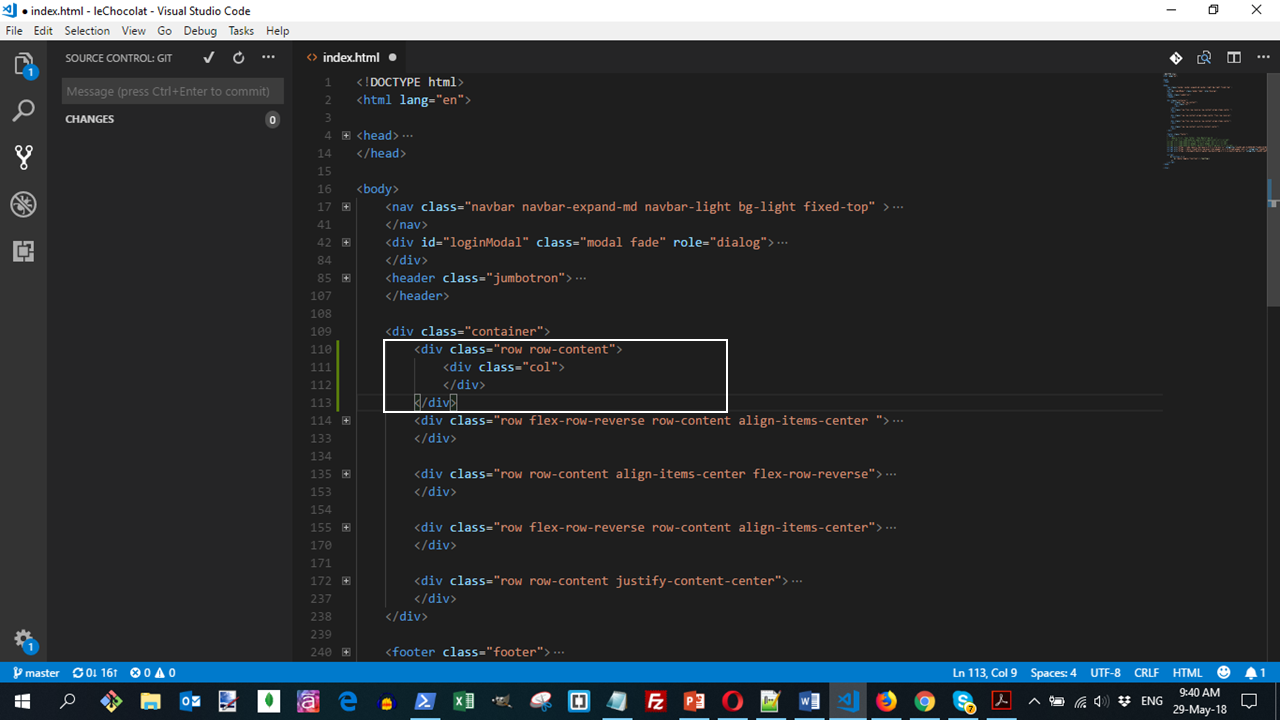
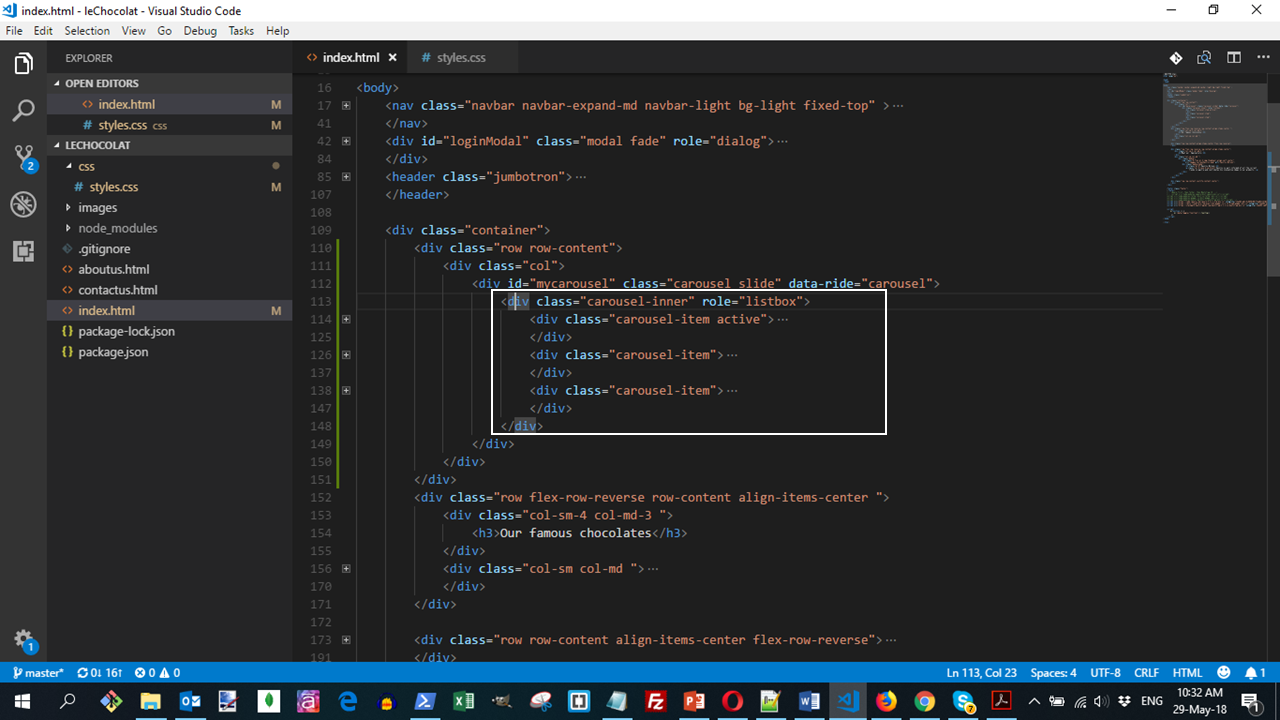
Next, add the basic carousel div inside the content row col that you just added as follows:
<div id="mycarousel" class="carousel slide" data-ride="carousel">
</div>
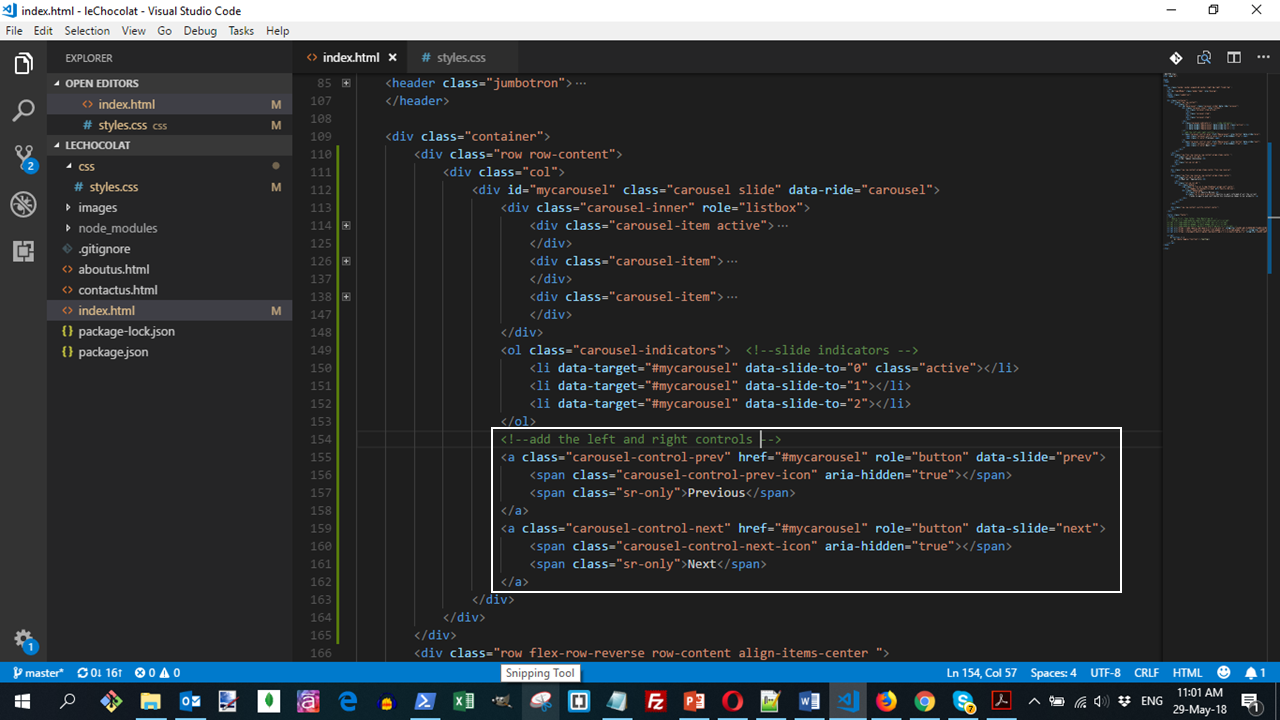
Adding Carousel Controls
Next, we will add manual controls to the carousel so that we can manually move among the slides. Add the following code to the bottom after the carousel items in the div of the carousel to add slide indicators that enable us to select a specific slide:
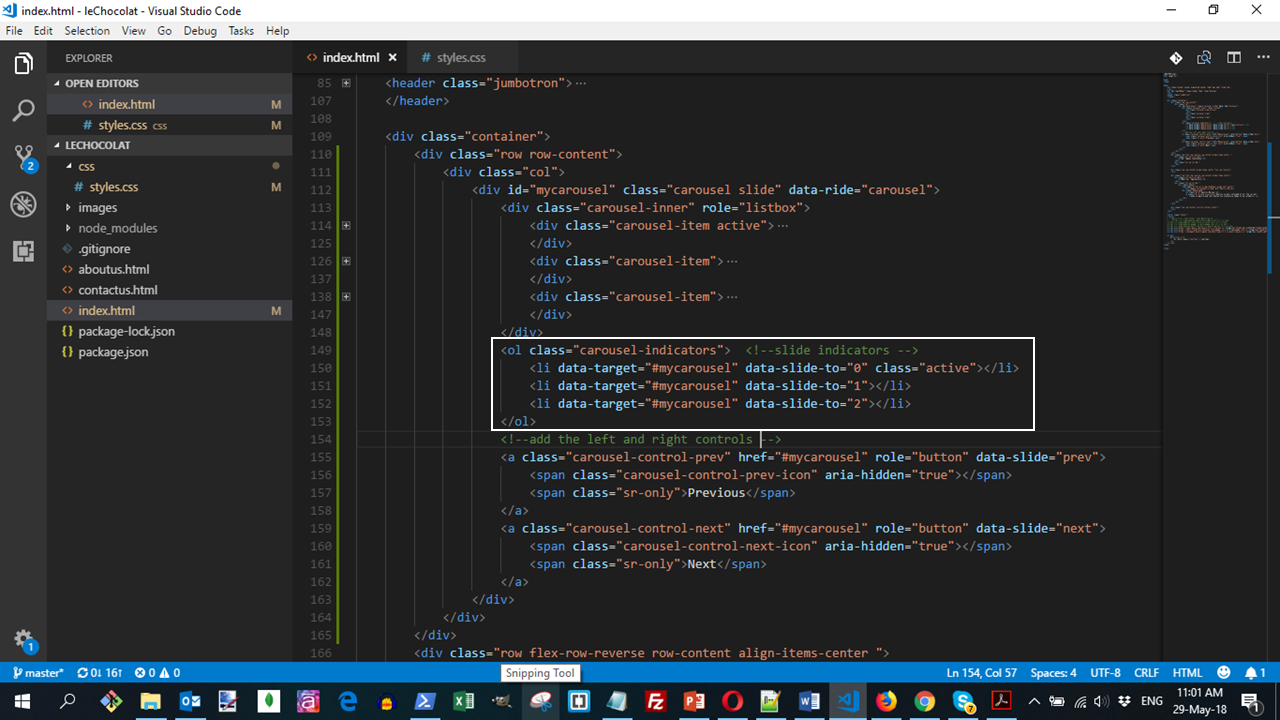
• Then, add the left and right controls to the carousel that enable us to move to the previous and next slide manually. Add this to the bottom of the carousel div:
left and right controls source:
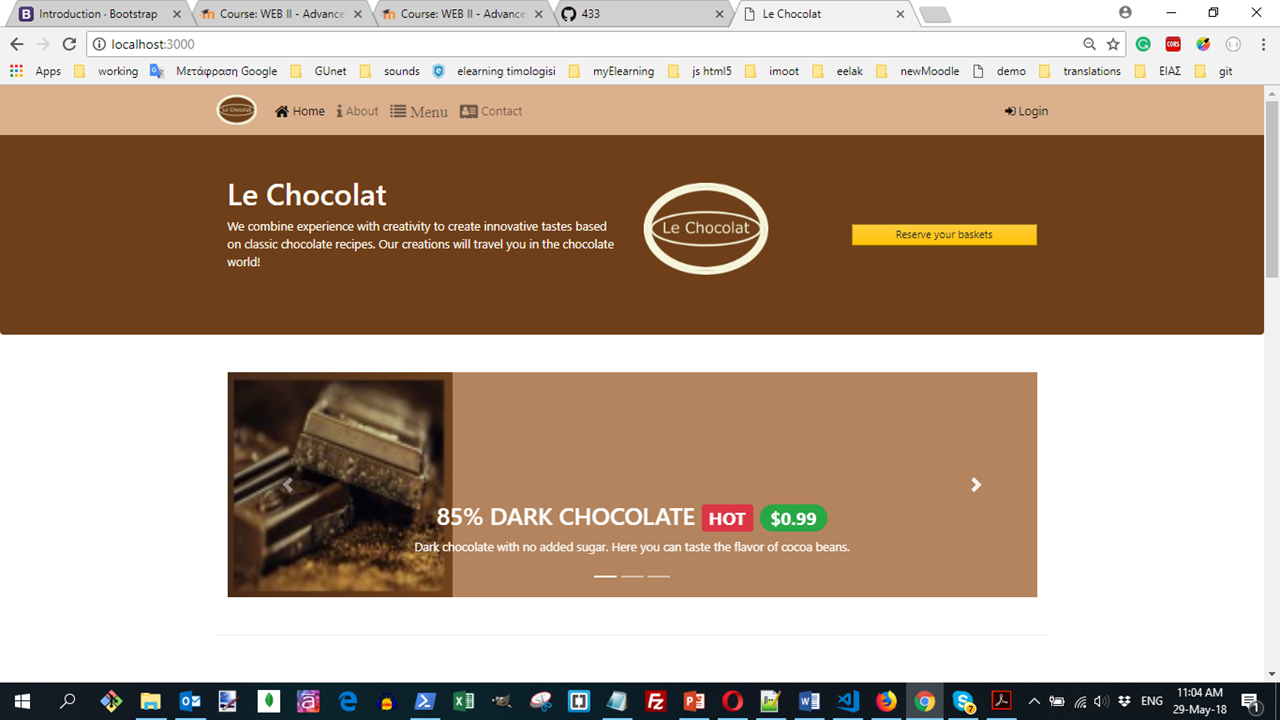
The code will create a page displayed as:
Do a Git commit
Do a Git commit with the message "Carousel".
In this submodule, we learnt about the carousel component and how to add it to a web page. We also learnt about introducing manual controls to the carousel.