Submodule 16.2: Basics of p5.js
| Site: | ΕΛ/ΛΑΚ Moodle |
| Course: | Study / Web Design and Web Development |
| Book: | Submodule 16.2: Basics of p5.js |
| Printed by: | Guest user |
| Date: | Tuesday, 30 June 2026, 9:56 AM |
Description
- setup() and draw() functions
- createCanvas
- Primitives Shapes
Our working space
Let's create our p5 site on our computer.
We will create and preview the previous canvas as an example.
Follow the next steps
Open your Visual Studio editor and the p5yourName folder
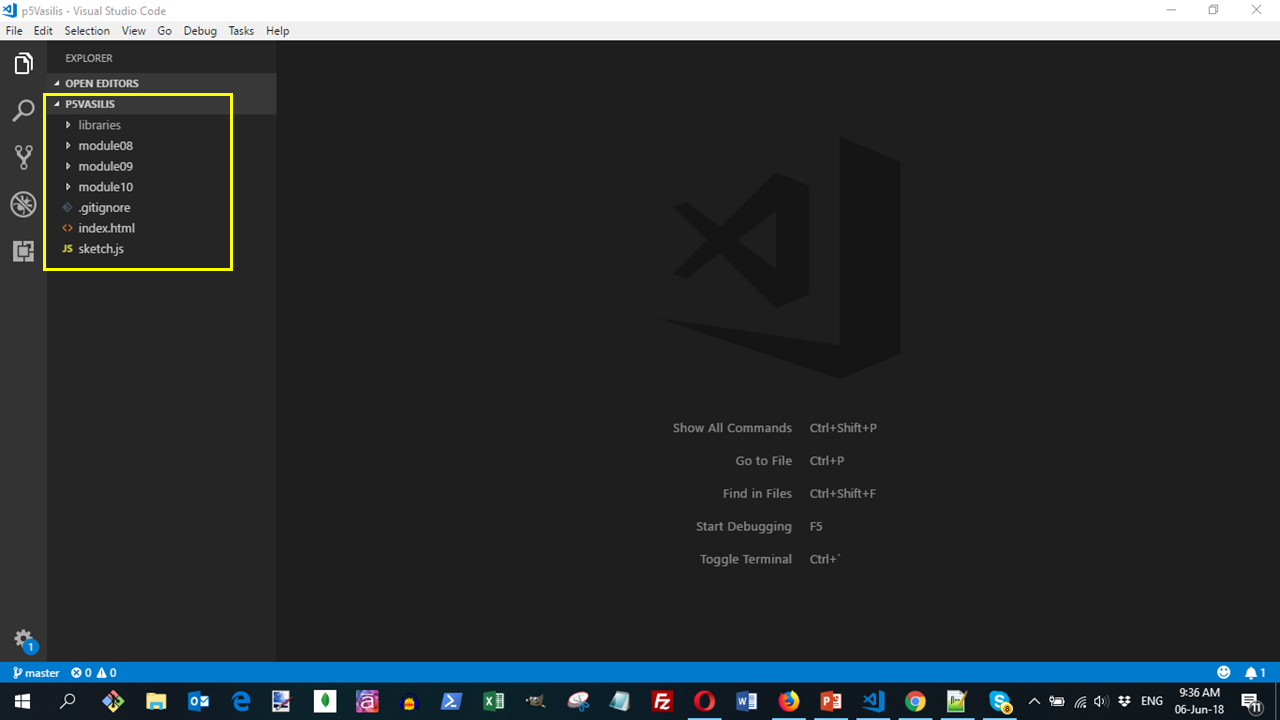
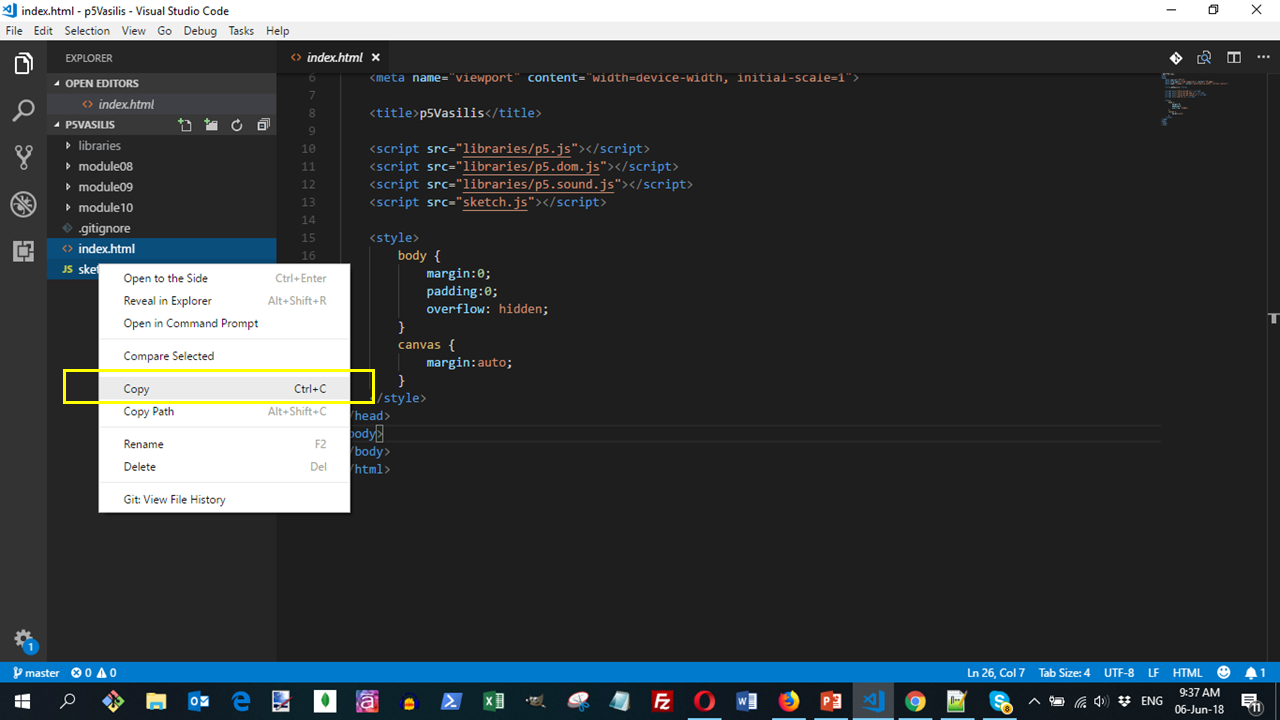
Press Shift and select the index.html and sketch.js files. Do right click and click copy the files.
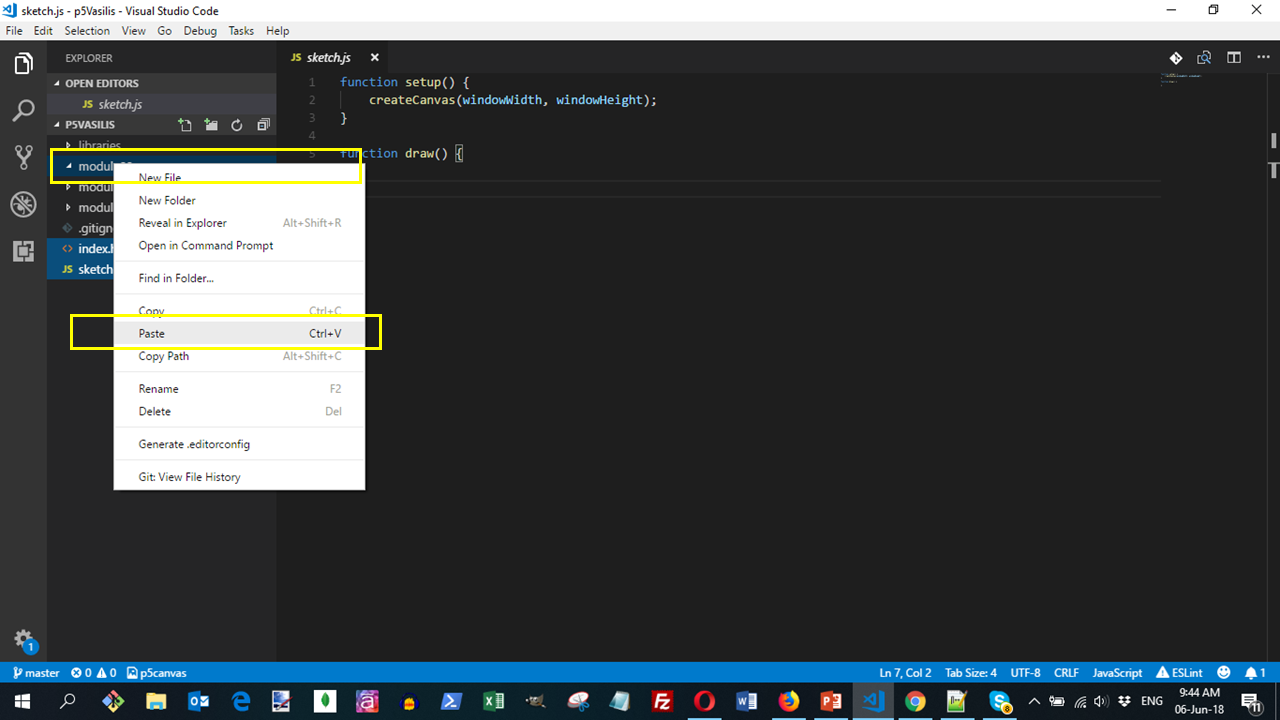
Right-click on the module08 folder and select paste.
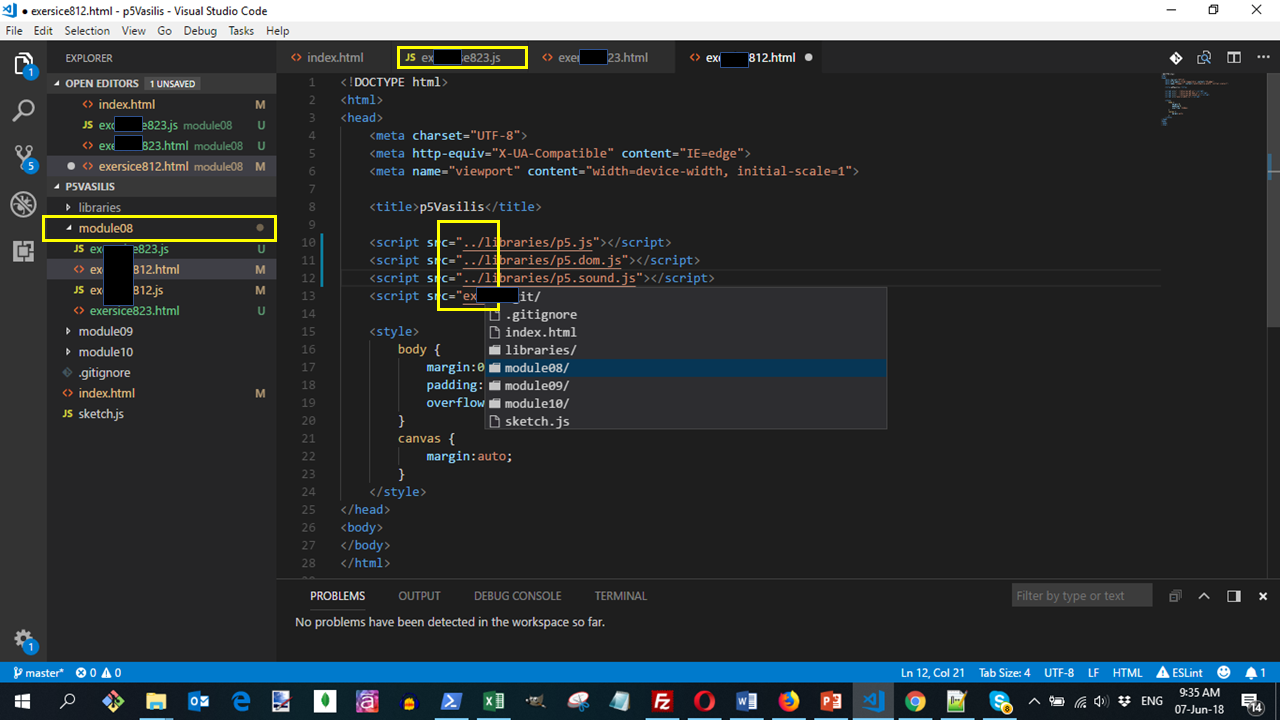
Rename the files in the module08 folder. The index.html file to ex812.html and the sketch.js to ex812.js
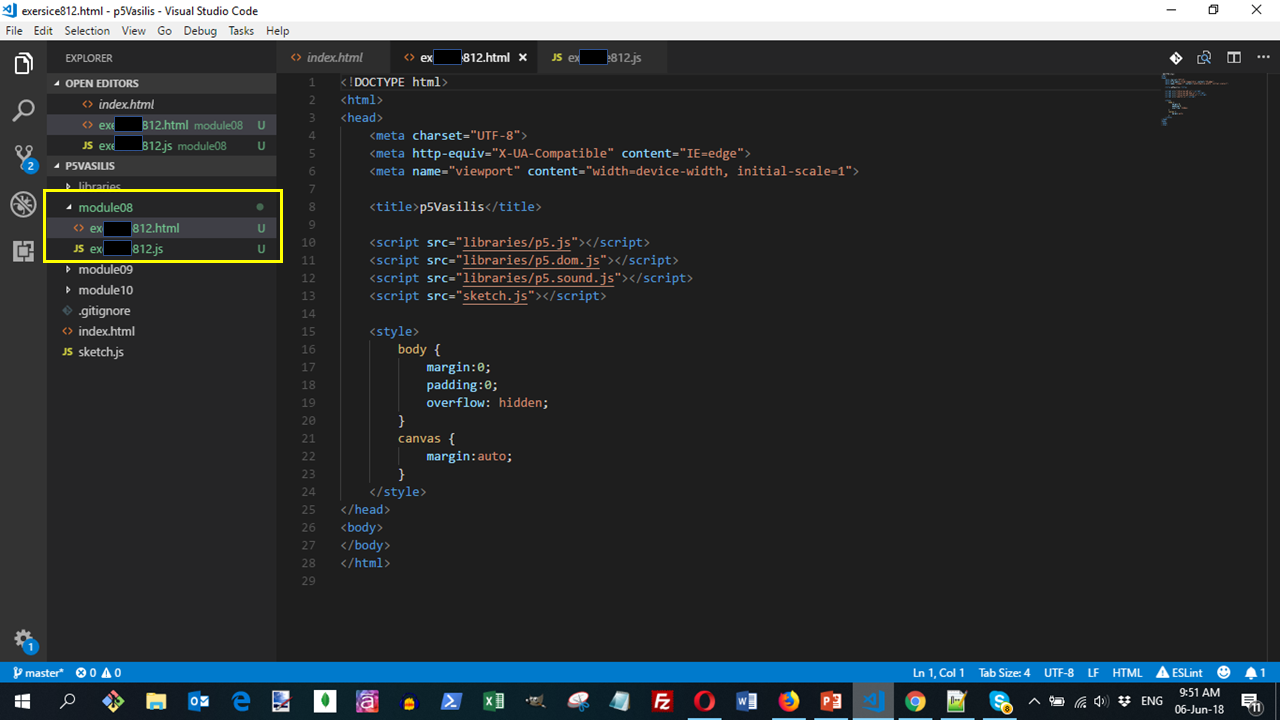
In the ex812.html file, update the link to ex812.js from sketch.js

Update also the links for the p5 libraries
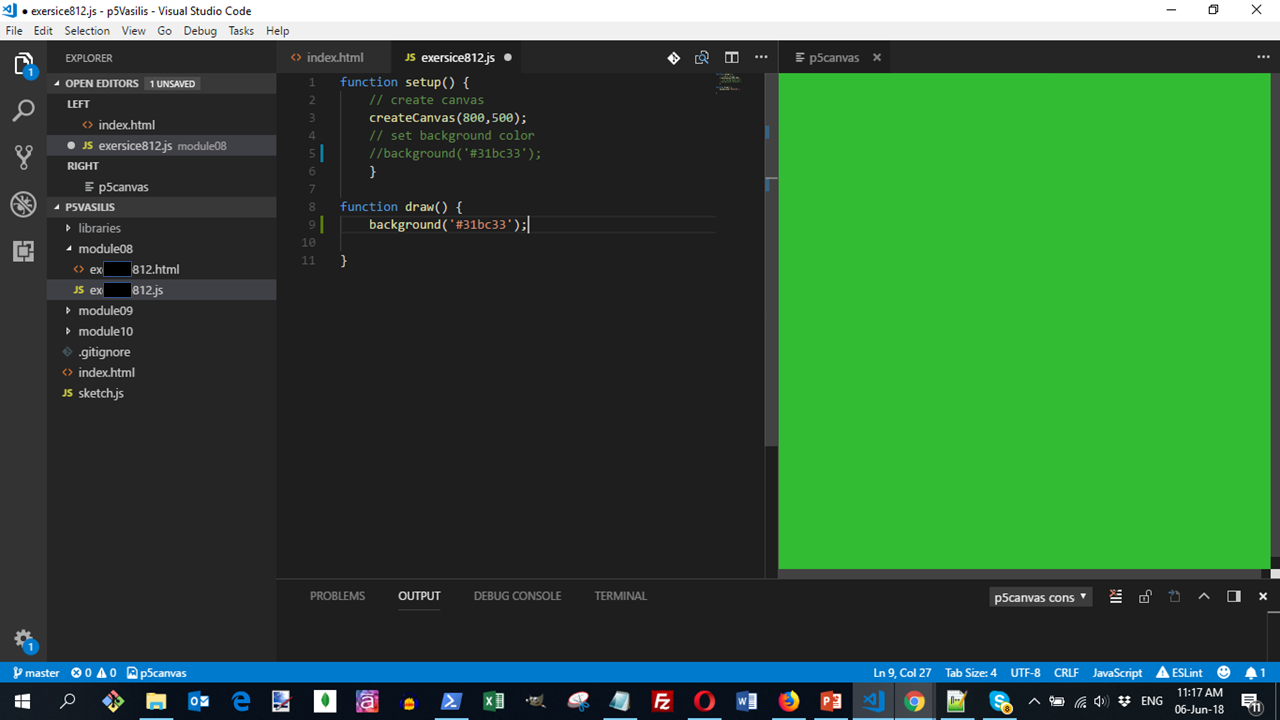
Update the code in the ex812.js
function setup() {
// create canvas
createCanvas(800,500);
// set background color
background('#31bc33');
}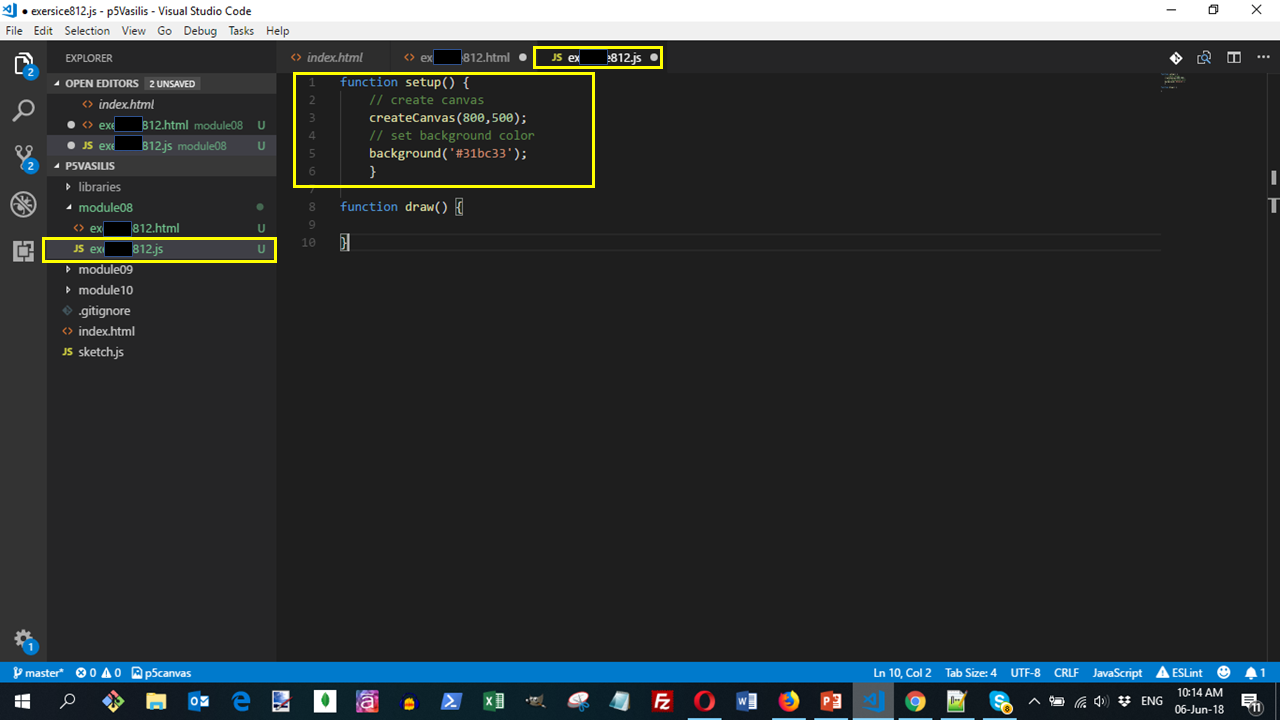
Save every file
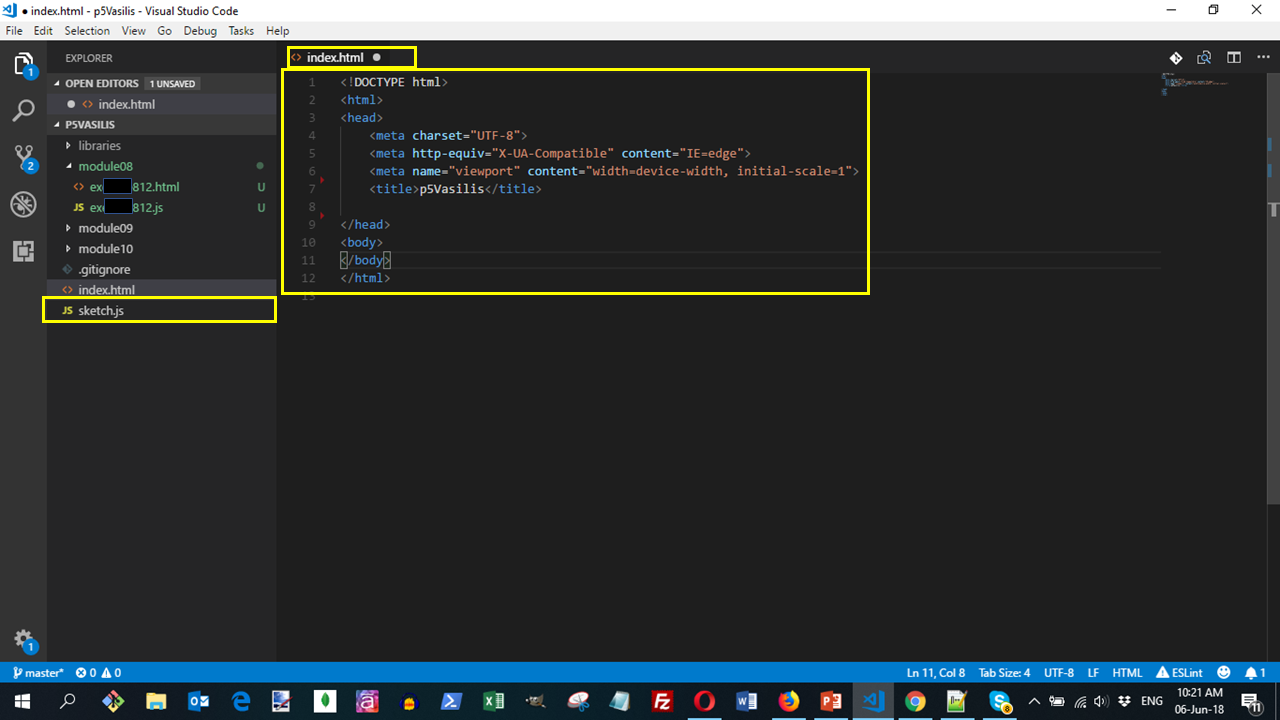
Modifications of the index.html file
Go to the index.html file and delete all <script> and <style> tags
Create <h2> tags for the p5 modules
<h2>Module 8</h2>
<h2>Module 9</h2>
<h2>Module 10</h2>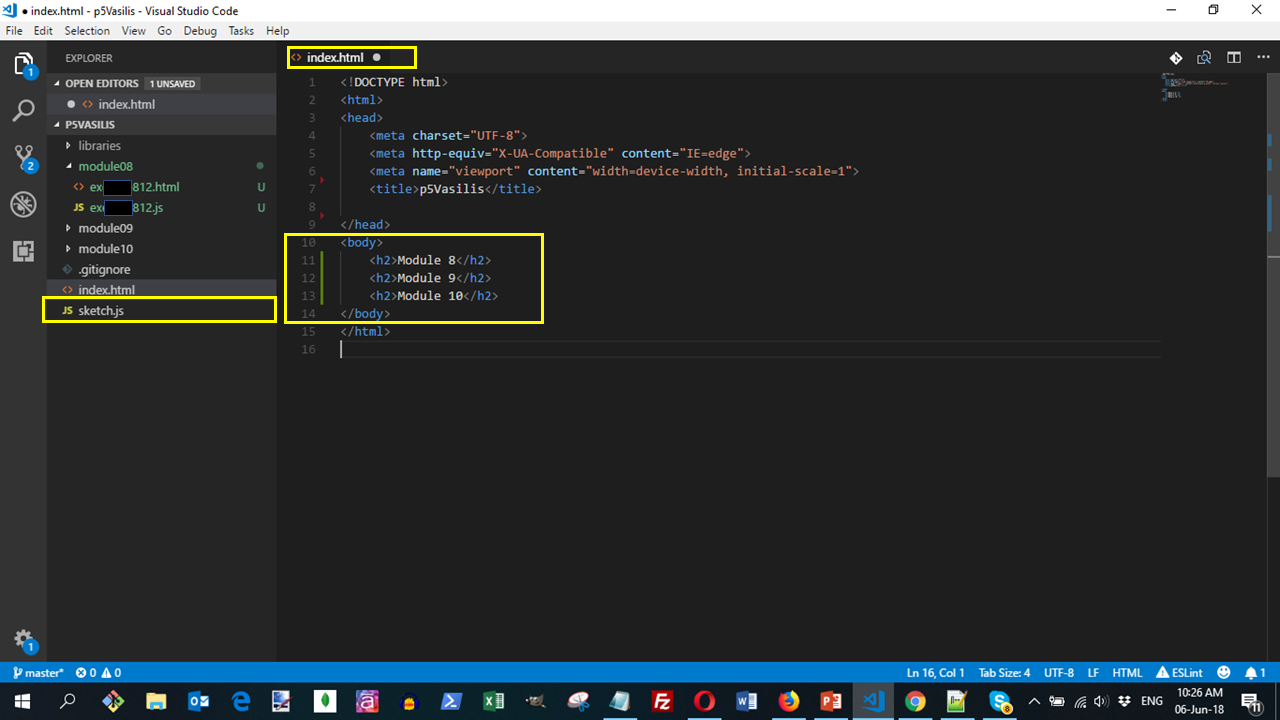
Create, under Module 8, a link to the ex812.html with an appropriate title
<ul>
  <li>
     <a href="module08/ex812.html" target="_blank">Ex812 - A canvas example</a>
   </li>
 </ul>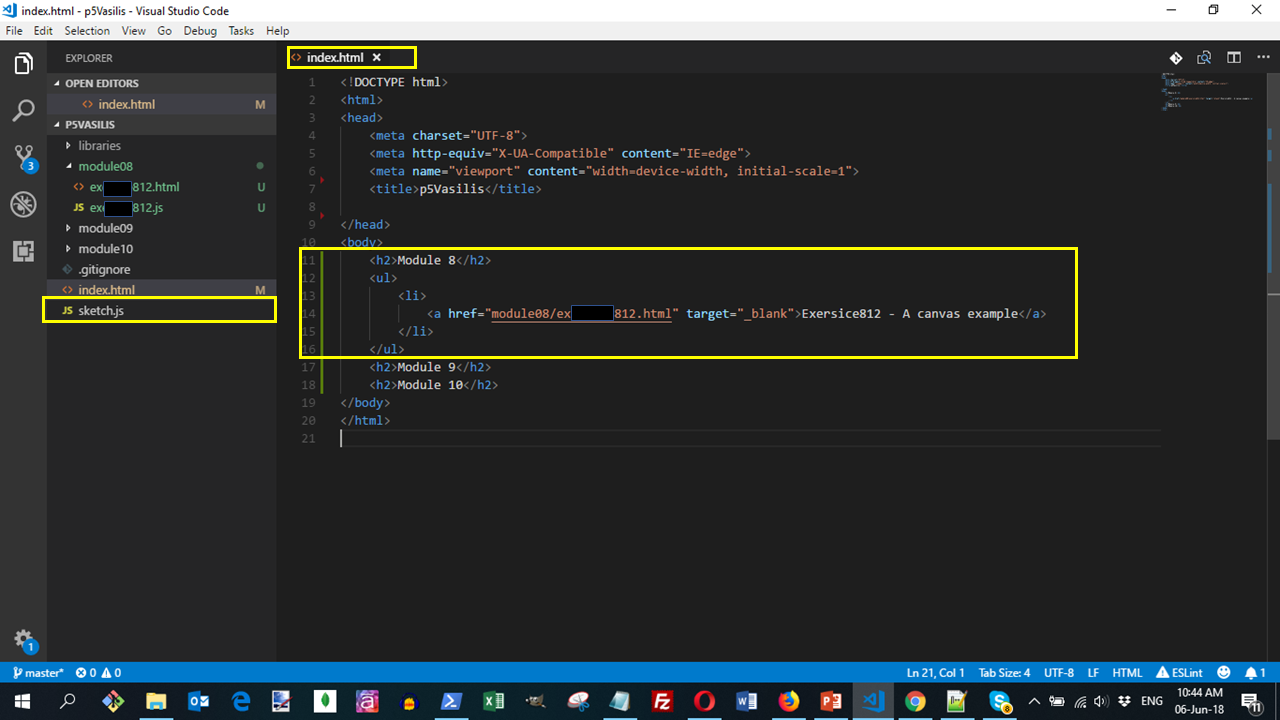
Save the index.html file
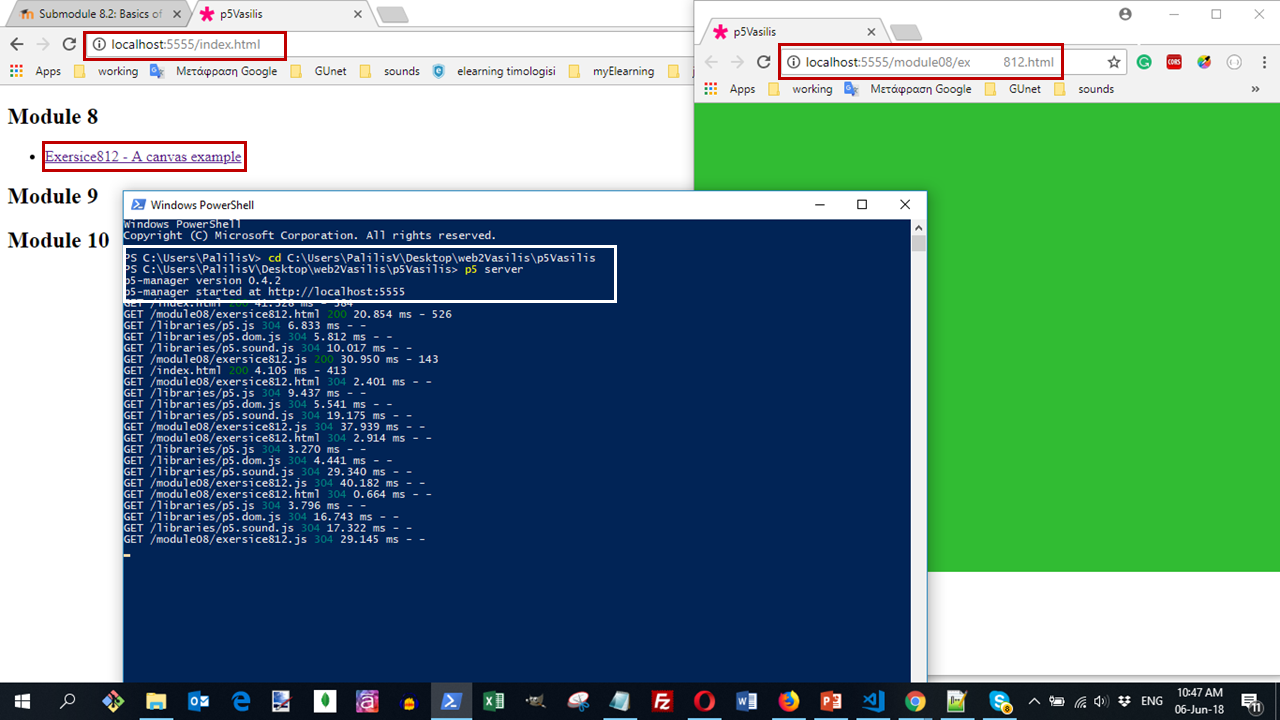
p5 Server
Open the p5 server (remember about this) and click on the link. You can see a working ex812.html !!
Commit
Do a Git commit with the message Initial Site Setup.
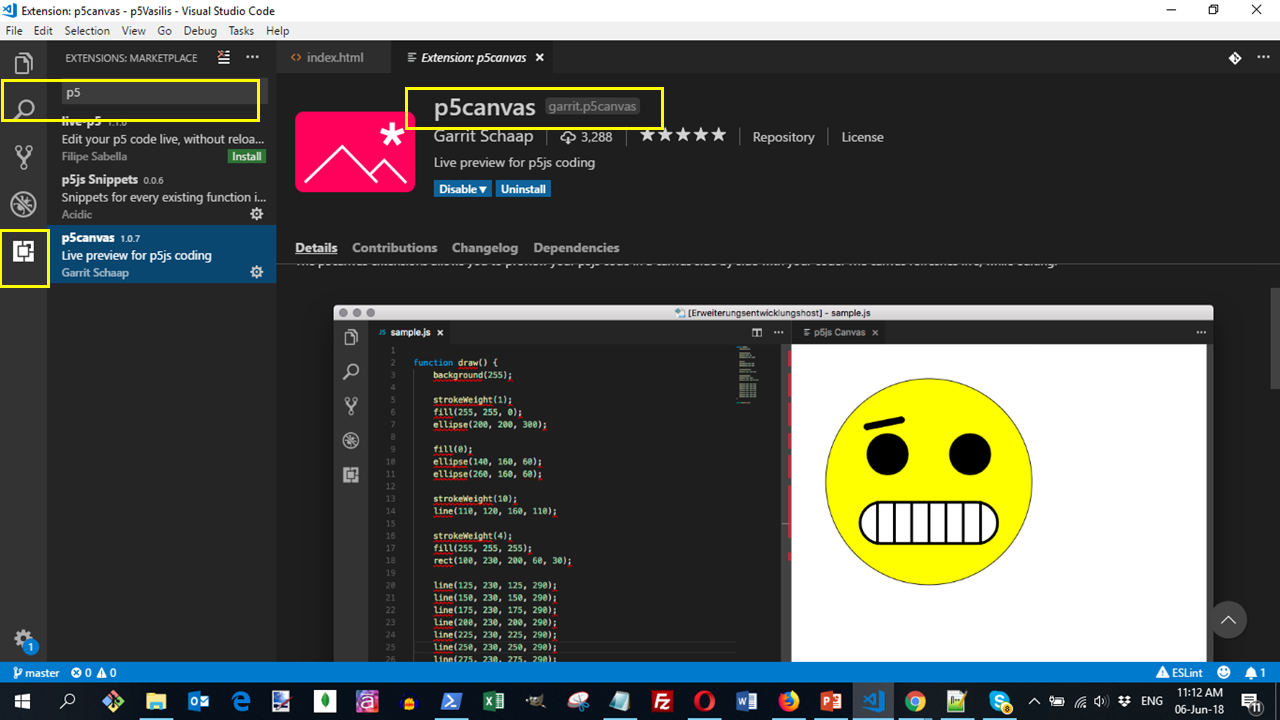
Visual Studio Editor
Open in your editor the Extensions and search for p5. install the p5Canvas extension that allows you to preview your p5js code on a canvas side by side with your code. The canvas refreshes live while editing.
Open the exersice812.js and enable the p5Canvas live preview. Nothing happens!!
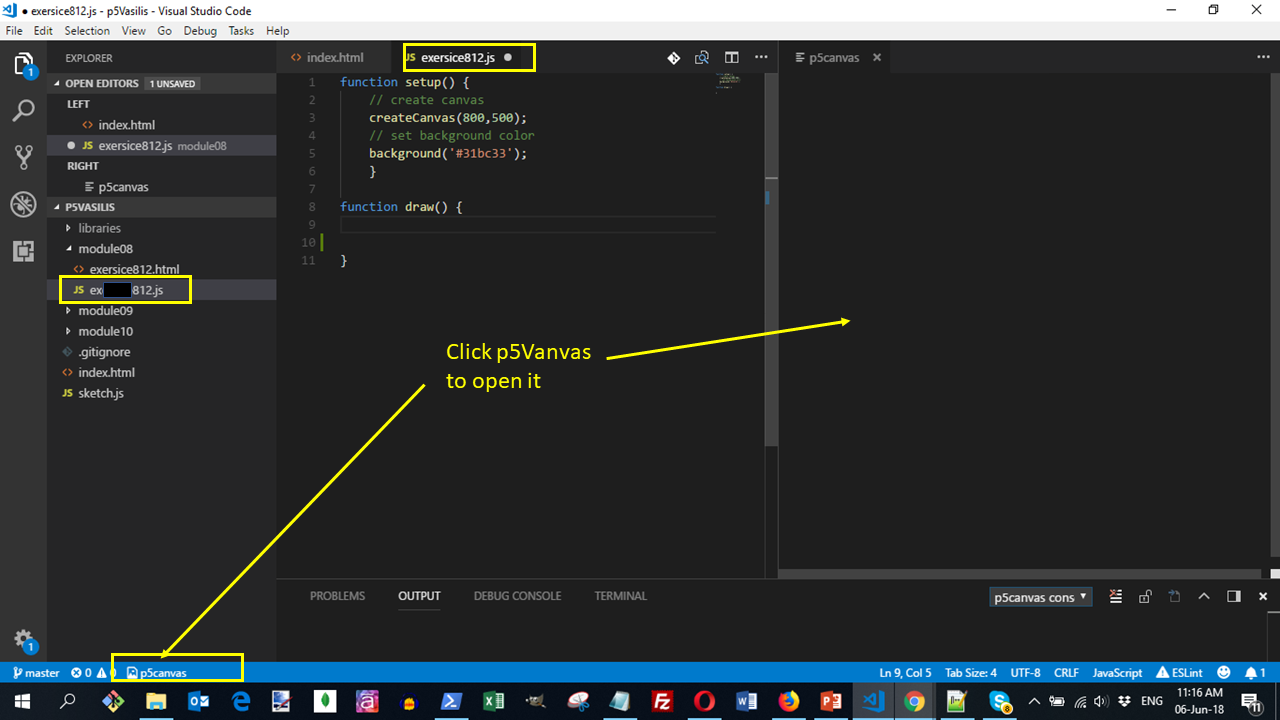
Copy the background('#31bc33') function from setup() to draw() to see live your code. The extension p5Canvas watches the changes in draw() function, not in the setup()!
setup() and draw() functions
The first thing that you will need in order to start coding in p5.js, is to understand the setup() and draw() functions.
The setup() function should be placed at the beginning of our code. We can only have one setup() function and it is the place where we initialize our environment. That setup() function runs only once in the beginning of the program.
Inside that function, we initialize the dimensions of our canvas. We will see more about that later but essentially our canvas is the place where our code will take place.
Also, in the setup() we can choose to define the background color of our canvas.
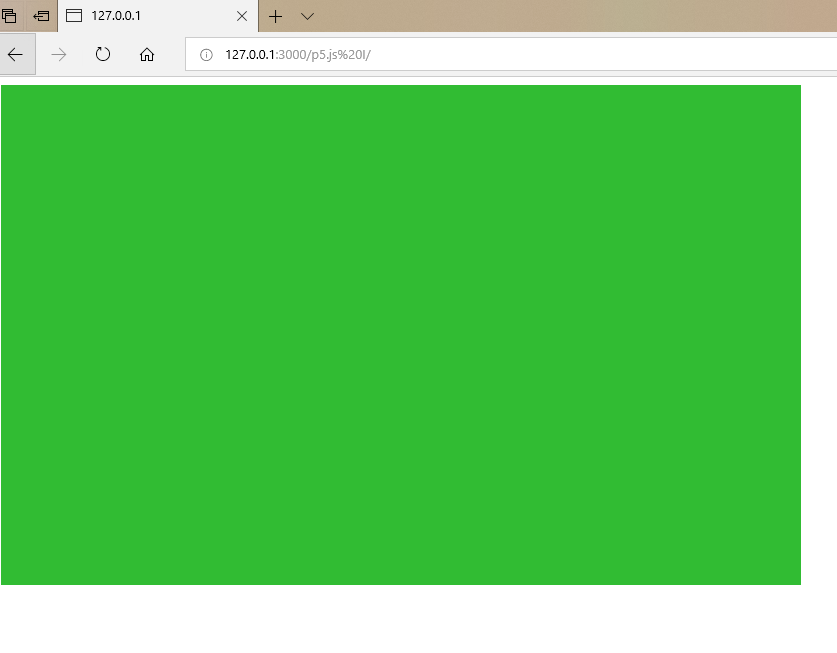
Example of a code with an empty canvas of green background:
function setup() {
// create canvas
createCanvas(800,500);
// set background color
background('#31bc33');
}
The draw() function should always be placed after the setup() function and we can only have one such function in our code. It is called automatically up to 60 times per second and it works similar to loops. It continuously executes everything that is inside its block.
All our main code is placed inside this block.
- See more about setup() and draw() functions
- See more about the background() function
createCanvas
In order to start coding with p5.js we should first create our canvas.
To do this, we use the pre-build p5.js function createCanvas();
This function is defined only one time in our setup.
This function accepts two arguments: width and height, thus we have createCanvas(width, height);
When we call this function with specific values, the canvas element is created in the document with width and height dimensions equal to the values we have passed. The values we pass are automatically assigned pixels units.
When we define these values, we can directly use width and height inside our canvas to refer to their values.
If we do not use createCanvas(); in our code, the system automatically creates one with 100 x 100 pixels.
A nice feature of p5.js is that it enables us to create a canvas that equals the window width and height of our page even if we don't know its size. This is achieved with the system variables windowWidth and windowHeight.
These variables, automatically store the width and height size of our page. Thus writing createCanvas(windowWidth,windowHeight); will result in creating a canvas equal to our browser window size.
- See more about createCanvas() function
Primitives Shapes - ellipse
Let's start drawing!
p5.js has pre-build primitives shapes functions which makes it easy to draw shapes in the canvas.
One of these is the ellipse();
This function has 4 basic parameters and thus accepts 4 arguments.
These arguments are: x position, y position, width and height which are expressed in the ellipse as : ellipse(x,y,w,h);
Thus, the first two values of an ellipse are its x and y coordinates. The canvas (0,0) coordinates are on the upper left corner. Thus x position increases in the right direction and y position as we go down the canvas. When we are at the upper right corner, x position is equal to the width of our canvas whereas when we are in the lowest point of the canvas, the y position equals with canvas height.
The two other values determine not only its width and height but also whether we will display an ellipse or a cycle. If the w,h have equal values, we create a cycle. The same result will happen if we only define the width since p5.js automatically assigns the same value for height.
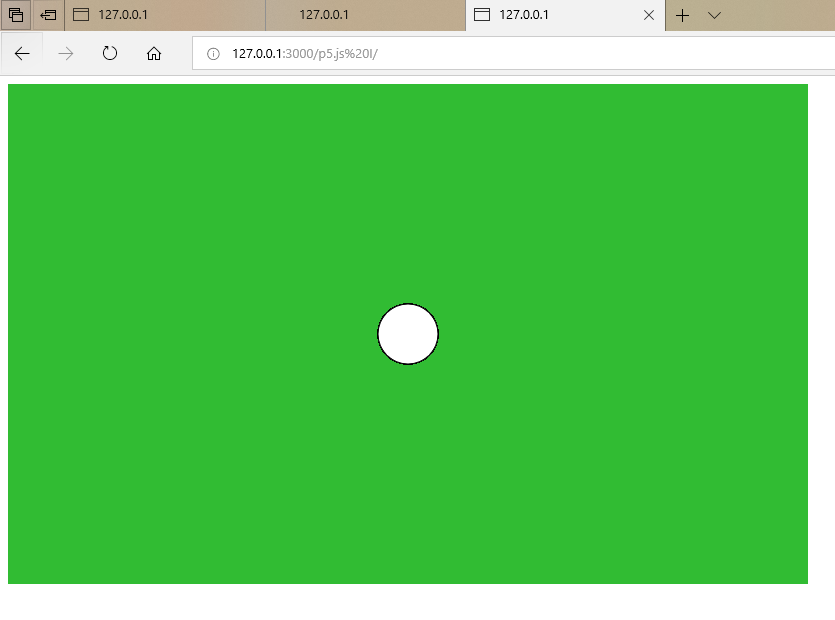
Example 1
Here is an example code for an ellipse ( cycle) displayed in the center of the canvas:
function setup() {
  // create canvas
  createCanvas(800,500);
  // set background color
  background('#31bc33');
}
function draw () {
  ellipse(width/2,height/2,60);
}
Exercise
- Open your Visual Studio editor and the
p5yourNamefolder. - Open the file
ex812.jsin your editor and save it asex823.js - Open the file
ex812.htmlin your editor and save it asex823.html - In the
ex823.htmlfile, update the link toex823.jsfrom exersice812.js - Go to the
index.htmlfile and create, underModule 8, alinkto theex823.htmlfile with the title "Primitives Shapes - ellipse".
Modify the ex823.jsfile to create a face. You can see here an example.
function setup() {
  createCanvas(800, 600);
  // set background color
  background('#D66761');
}
function draw() {
  noFill();
  // create the face ellipse
  ellipse(width/2,height/2,200,300)
  // for the left eye
  // draw the base ellipse for the eye, the sclera/“white of the eye”
  ellipse(350,275,50,25);
  // draw the Iris for the eye
  ellipse(350,275,25);
  // draw the center of the eye
  fill('black');
  ellipse(350,275,12.5);
  // for the right eye
  // draw the base ellipse for the eye, the sclera/“white of the eye”
  noFill();
  ellipse(450,275,50,25);
  // draw the Iris for the eye
  ellipse(450,275,25);
  // draw the center of the eye
  fill('black');
  ellipse(450,275,12.5);
}
Do a Git commit with the message "Primitives Shapes - ellipse".
Primitives Shapes - line
line()
The line() function takes 4 arguments.
These are: x1, y1, x2, y2. Thus we have line ( x1,y1,x2,y2).
The x1 parameter is the x-coordinate of the first point whereas the x2 is the one of the last point.
The y1 parameter is the y-coordinate of the first point whereas the y2 is the one of the last point.
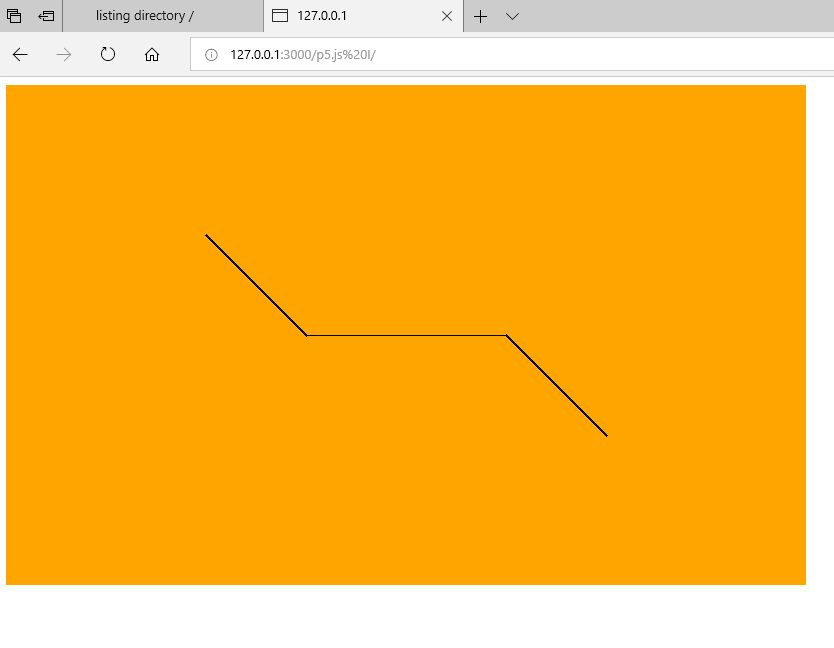
Let's see an example of a code that uses the line() function to create an abstract shape:
function setup() {
  // create canvas
  createCanvas(800,500);
  // set background color
  background('orange');
}
function draw () {
  line ((width/2-100),height/2, (width/2+100),height/2);
  line ((width/2-100),height/2,(width/2-200),150);
  line ((width/2+100),height/2,(width/2+200),350);
}
Can you imagine what would be the outcome of the above code?
Exercise
- Open your Visual Studio editor and the
p5yourNamefolder. - Open the file
ex812.jsin your editor and save it asex824.js - Open the file
ex812.htmlin your editor and save it asex824.html - In the
ex824.htmlfile, update the link toex824.jsfrom ex812.js - Go to the
index.htmlfile and create, underModule 8, alinkto theex824.htmlfile with the title "Primitives Shapes - line".
Modify the ex824.jsfile in order to create a staircase using lines. You can see here an example.
let i = 20;
function setup() {
  // create canvas
  createCanvas(800,500);
  // set background color
  background('orange');
}
function draw () {
  // left line
  line (350,100, 350,300);
  // right line
  line (450,100, 450,300);
  // draw horizontal lines across the height of the two vertical lines
  for (i; i<200; i= i+20){
    line (350,100+i, 450,100+i);
  }
}
Do a Git commit with the message "Primitives Shapes - line".
- See more about the line() function
Primitives Shapes - point()
point()
The point function takes 2 arguments which determine its x and y position. Thus we have point(x,y).
The function draws a point with dimensions of 1 pixel.
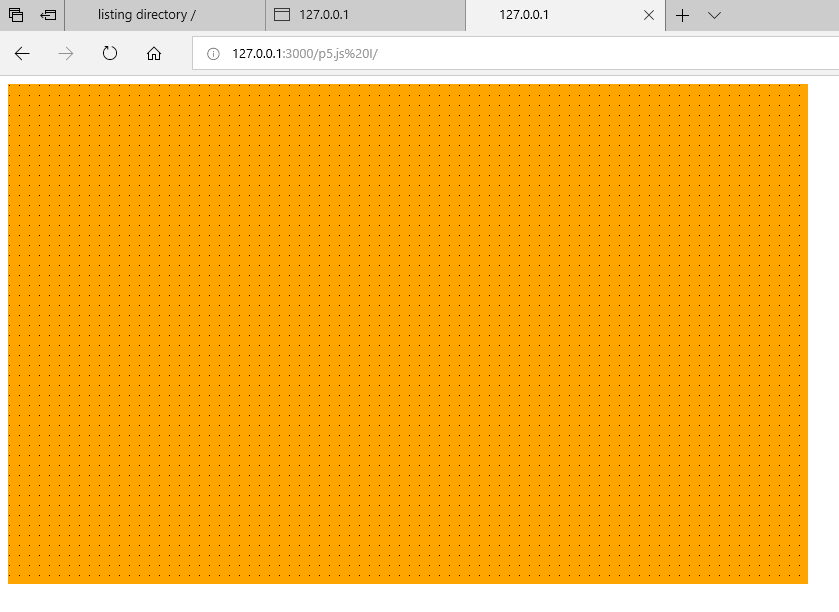
Let's see an example of a code that uses the point() function to create points across the canvas:
let xPos;
let yPos;
function setup() {
  // create canvas
  createCanvas(800,500);
  // set background color
  background('orange');
}
function draw () {
  for (xPos = 1; xPos<width; xPos = xPos +10) {
    for (yPos = 1; yPos<height; yPos = yPos+10) {
      point (xPos,yPos);
    }
  }
}
Exercise
- Open your Visual Studio editor and the
p5yourNamefolder. - Open the file
ex812.jsin your editor and save it asex825.js - Open the file
ex812.htmlin your editor and save it asex825.html - In the
ex825.htmlfile, update the link toex825.jsfrom ex812.js - Go to the
index.htmlfile and create, underModule 8, alinkto theex825.htmlfile with the title "Primitives Shapes - point".
Modify the ex825.jsfile in order to create a diagonal line of points, going from the up left edge to the right down. You can see here an example.
let xPos;
function setup() {
  // create canvas
  createCanvas(800,500);
  // set background color
  background('orange');
}
function draw () {
  // use a for loop and create points with a distance of 30px
  for (xPos = 1; xPos<width; xPos = xPos +30) {
    // in order to create a diagonal line of points going from up left to down right
    // you will have to use the appropiate geometry to define the y coordinate
    point (xPos,5/8*xPos);
  }
}
Do a Git commit with the message "Primitives Shapes - point".
- See more about the point() function
Primitives Shapes - rect()
rect()
The rect() function takes the same 4 arguments with the ellipse. Thus we have rect (x,y,w,h).
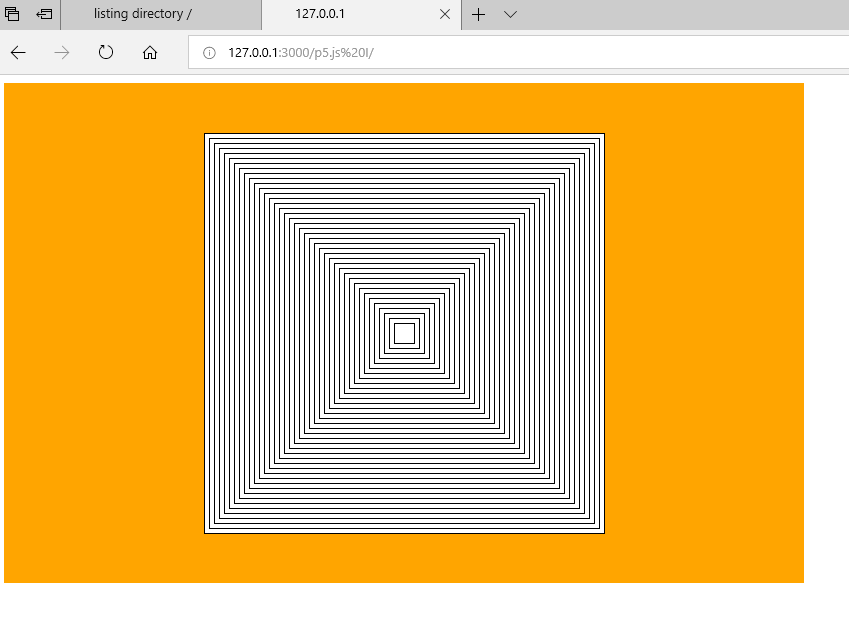
Let's see an example of a code that uses the rect() function to create a simulation of a 3d shape:
function setup() {
  // create canvas
  createCanvas(800,500);
  }
function draw () {
  // set background color
  background('orange');
   for (dim = 400; dim>10; dim = dim-10 ) {
    rectMode(CENTER);
    rect(width/2,height/2,dim,dim);
  }

}
Exercise
- Open your Visual Studio editor and the
p5yourNamefolder. - Open the file
ex812.jsin your editor and save it asex826.js - Open the file
ex812.htmlin your editor and save it asex826.html - In the
ex826.htmlfile, update the link toex826.jsfrom ex816.js - Go to the
index.htmlfile and create, underModule 8, alinkto theex826.htmlfile with the title "Primitives Shapes - rect".
Modify the ex826.jsfile in order to create a cube using rects and lines.. You can see here an example.
function setup() {
  // create canvas
  createCanvas(800,500);
}
function draw () {
  // set background color
  background('orange');
  noFill();
  // create the cube
  rect(300,200,100,100);
  rect(350,250,100,100);
  line (400,200,450,250);
  line (300,200,350,250);
  line (400,300,450,350);
  line (300,300,350,350);
}
Do a Git commit with the message "Primitives Shapes - rect".
- See more about the rect() function
Primitives Shapes - triangle()
triangle ()
The triangle() takes 6 arguments.
These are: x1,y1,x2,y2,x3,y3. Thus we have triangle(x1,y1,x2,y2,x3,y3).
The x1,x2 and x3 are respectively the x coordinates for the first, second and third point.
The y1,y2 and y3 are respectively the y coordinates for the first, second and third point.
The triangle is created by connecting these points.
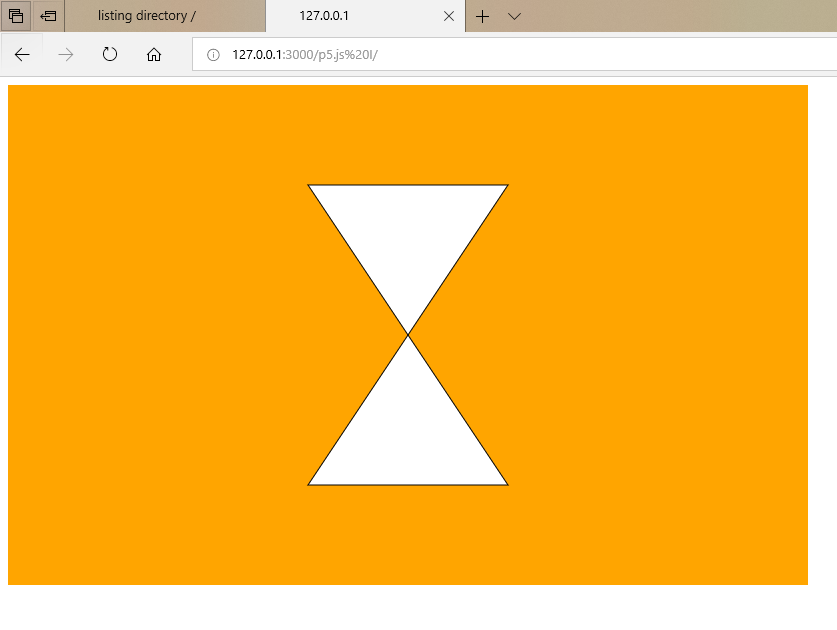
Let's see an example of a code that uses the triangle() function:
function setup() {
  // create canvas
  createCanvas(800,500);
  }
function draw () {
  // set background color
  background('orange');
  triangle(width/2,height/2,500,400,300,400);
  triangle(width/2,height/2,500,100,300,100);
}
Exercise
- Open your Visual Studio editor and the
p5yourNamefolder. - Open the file
ex812.jsin your editor and save it asex827.js - Open the file
ex812.htmlin your editor and save it asex827.html - In the
ex827.htmlfile, update the link toex827.jsfrom ex812.js - Go to the
index.htmlfile and create, underModule 8, alinkto theex827.htmlfile with the title "Primitives Shapes - triangle".
Modify the ex827.jsfile in order to create the abstract shape using triangles. You can see here an example.
function setup() {
  // create canvas
  createCanvas(800,500);
  }
function draw () {
  // set background color
  background('orange');
  // create the shape using triangles
  triangle(400,250,500,400,300,400);
  triangle(300,100,400,250,200,250);
  triangle(500,100,600,250,400,250);
  triangle(400,250,200,250,300,400);
}
Do a Git commit with the message "Primitives Shapes - triangle".
- See more about the triangle() function
Motion
P5.js enables us to easily create movement/animation of objects.
Although this concept is new, the base is the good understanding of our canvas coordinates.
Now that you have created some shapes and you have become familiar with our canvas coordinates, its time to use your new knowledge together with JavaScript to create a simple animation. How would you create an ellipse moving horizontally from the left to the right end of your canvas and vice versa?
// create a variable to control the direction of the ellipse
let control = false;
// make ellipse starting from the left end of the canvas
let i=30;
function setup() {
  // create canvas
  createCanvas(800,500);
  // set background color
  background('#31bc33');
}
function draw () {
  // when ellipse is in the left edge, control would be/become false
  if (i==30) {
    control = false;
  }
  // if ellipse is inside the canvas width (we substract 30 which is the radius
  // of our ellipse) and control is false
  if (i<(width-30) && control==false){
    i++
    // increase its x position (ellipse moves in the right direction)
    ellipse(i,height/2,60);
  }
  else {
    // else control will change to true
    control = true;
    // decrease its x position (ellipse moves in the left direction)
    i--;
    ellipse(i,height/2,60);
  }
}
You can see here an example.
You may have noticed that your ellipse is leaving traces as it is moving through the canvas. Why do you think this happens? What would you do if you wanted to change it?
Exercise
- Open your Visual Studio editor and the
p5yourNamefolder. - Open the file
ex812.jsin your editor and save it asex828.js - Open the file
ex812.htmlin your editor and save it asex828.html - In the
ex828.htmlfile, update the link toex828.jsfrom ex812.js - Go to the
index.htmlfile and create, underModule 8, alinkto theex828.htmlfile with the title "Motion".
Modify the ex828.jsfile in order to create a two-dimensional motion with collisions You can see here an example.
Do a Git commit with the message "Motion".