Submodule 19.2: Getting Started with Angular
| Site: | ΕΛ/ΛΑΚ Moodle |
| Course: | Study / Web Design and Web Development |
| Book: | Submodule 19.2: Getting Started with Angular |
| Printed by: | Guest user |
| Date: | Sunday, 28 June 2026, 1:42 PM |
Description
- Installing Angular
- Installing Bootstrap
- Adding Font Awsome
- Testing Project
Introduction
In this submodule, we will learn some basics of Angular and how to configure an Angular application using the Angular-CLI, the command line tool.
- We will create an angular-sub-folder using angular-cli.
- We will install the Bootstrap CSS framework.
- We will add the Font Awesome icons
- We will test the setup of the Project
Installing Angular
We have already installed the Angular-cli on your computer. This cli will enable us to create Angular applications in any place on our computer. Check if the Angular is installed on your computer. Type the following in a terminal window:
ng -vTo learn more about the various commands that this CLI provides, type at the prompt:
ng help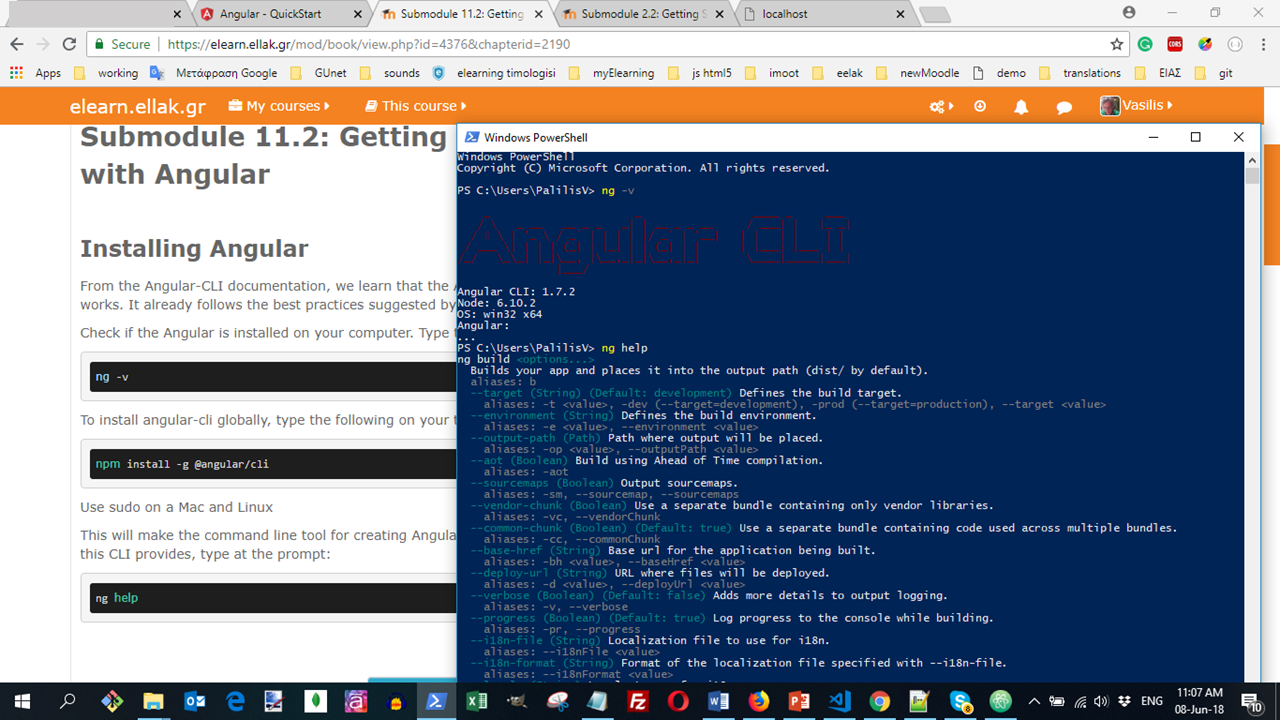
Setting up the Angular sub-folder
Go to your folder location on your desktop and ...
- create a sub-folder with the name
angularYourName - Open your terminal and move to this folder
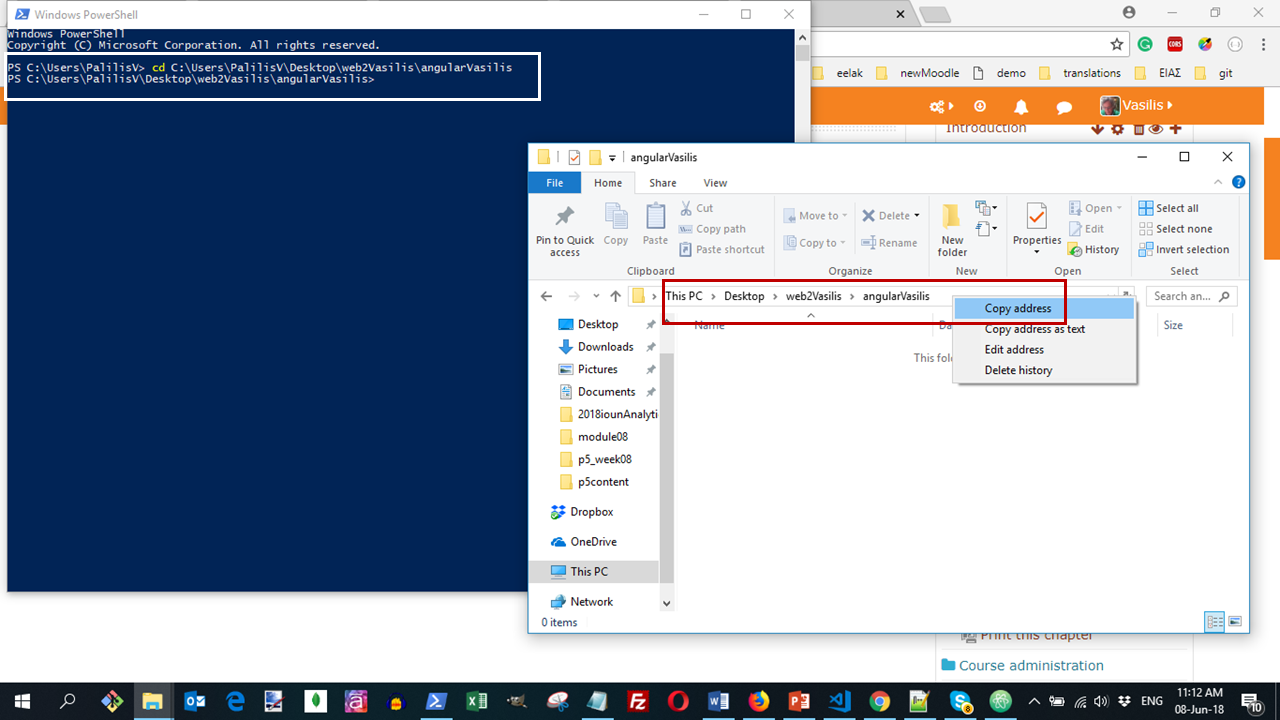
- To create the
angularChocoYournameangular-sub-folder, run in the terminal:
ng new angularChocoYourname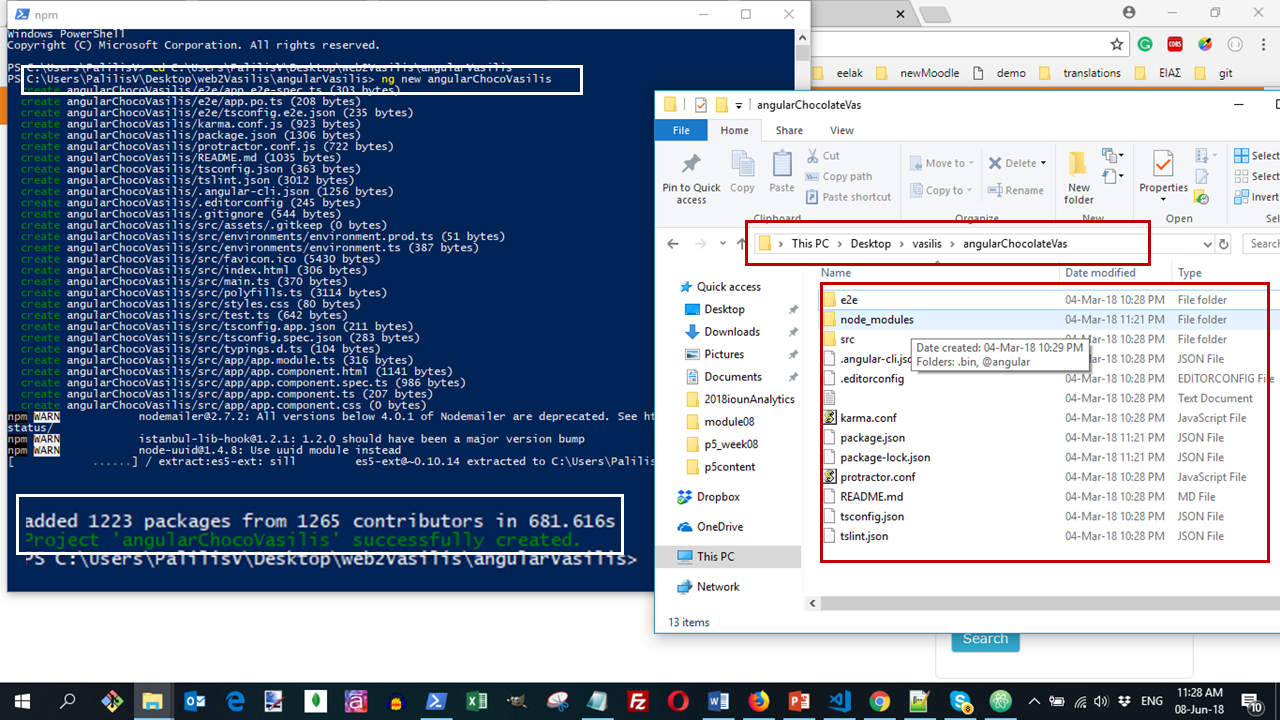
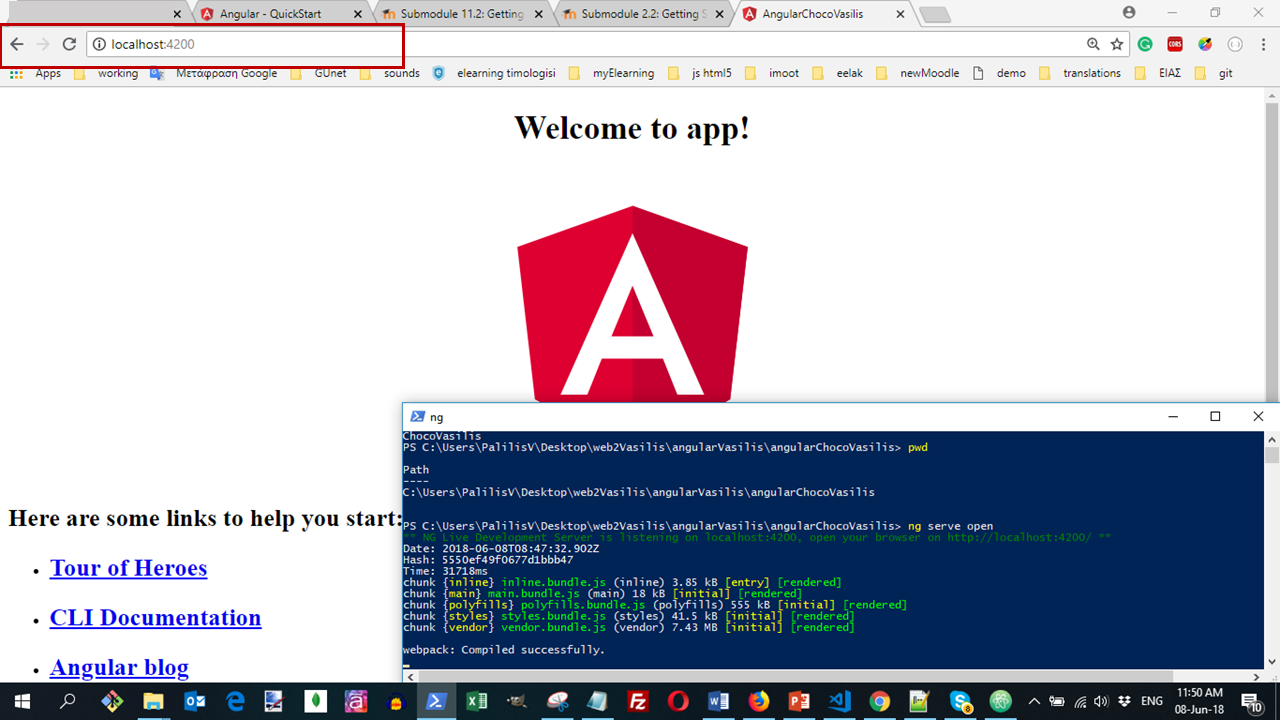
Move to the angularChocoYourname folder and type the following at the prompt:
ng serve –openThis will compile the project and then open a tab in your default browser at the address http://localhost:4200.
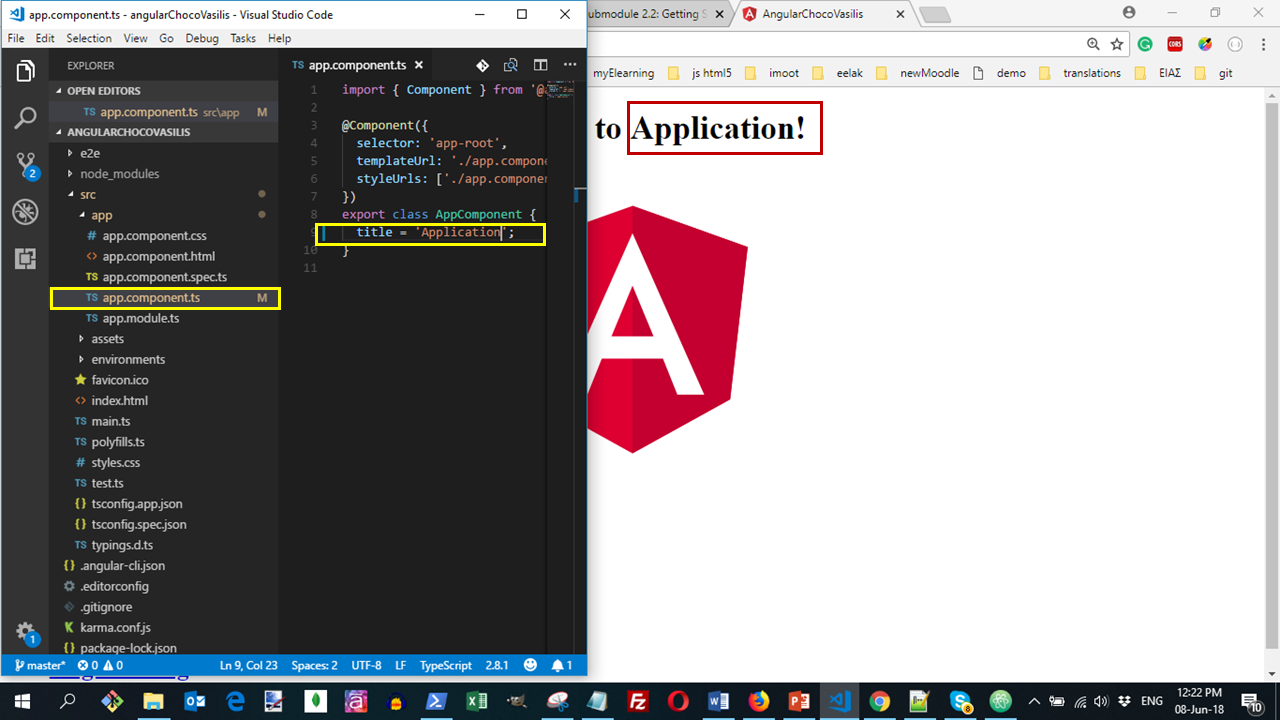
Open the angularChocoYourname angular-sub-folder in your Visual Studio editor, find the file …\src\app\app.component.ts and change the title from app to Application (line 9). Save and see the change in your browser.
- See more about
AppModule.
Do a Git command with the message "Angular initial Setup"
Installing Bootstrap
To install Bootstrap in our Angular application, open your Terminal, move to the angularChocoYourname angular-sub-folder, and run the command:
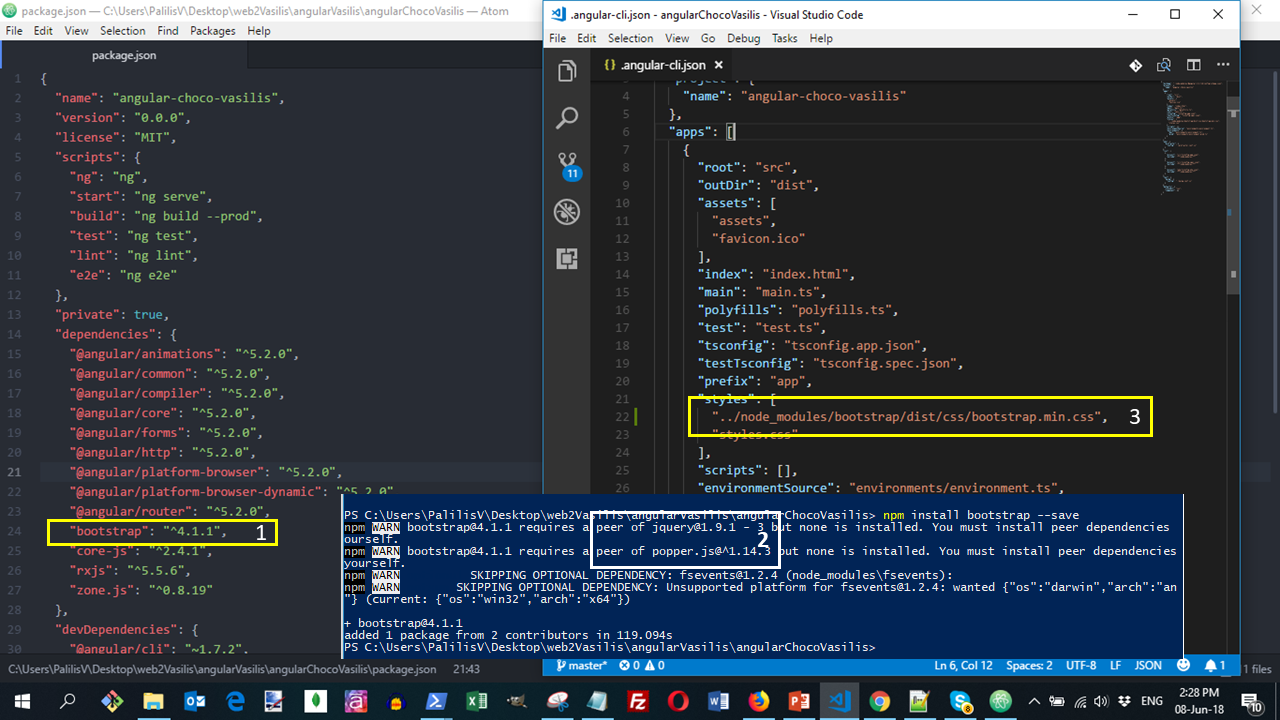
npm install bootstrap@4.1.1 --saveNote that:
- Using the
--saveoption the dependency will be saved inpackage.json(Image 1) - As npm informs us, we are not able to use the JavaScript-based Bootstrap classes because these need the jquery and popper libraries. We will solve this problem later. (Image 2)
Now that the project is set up it must be configured to include the bootstrap CSS.
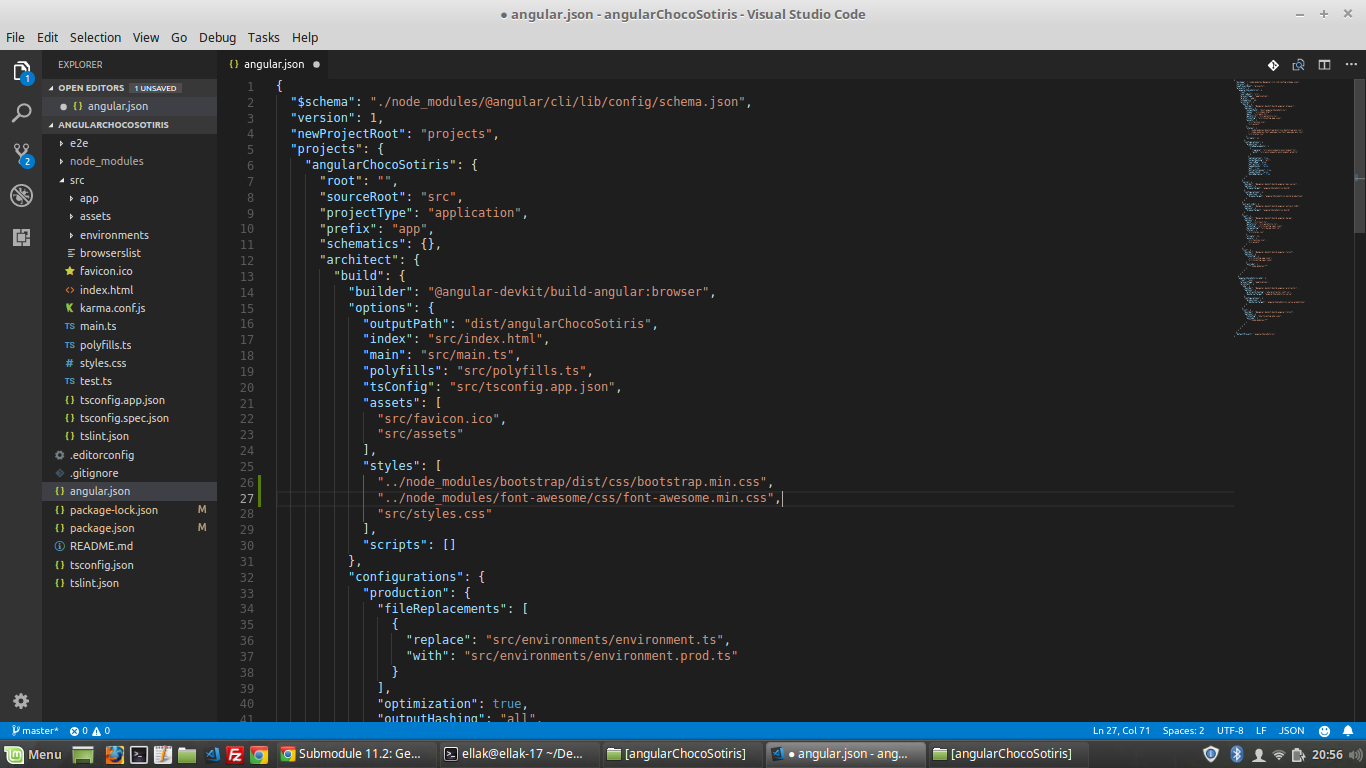
- Open the file
angular-cli.jsonfrom the root of your project. - Inside
appslocate thestylesproperty. - This property allows external global styles to be applied to your application.
- Specify the path to bootstrap.min.css adding the code:
"../node_modules/bootstrap/dist/css/bootstrap.min.css",- It should look like the (Image 3) when you are done.
Adding Font Awesome
You can include Font Awesome to the angularChocoYourname angular-sub-folder by using npm and typing the following at the prompt:
npm install font-awesome@4.7.0 --saveThe project must be configured to include the Font Awesome adding the following line of code to the file angular-cli.json
"../node_modules/font-awesome/css/font-awesome.min.css"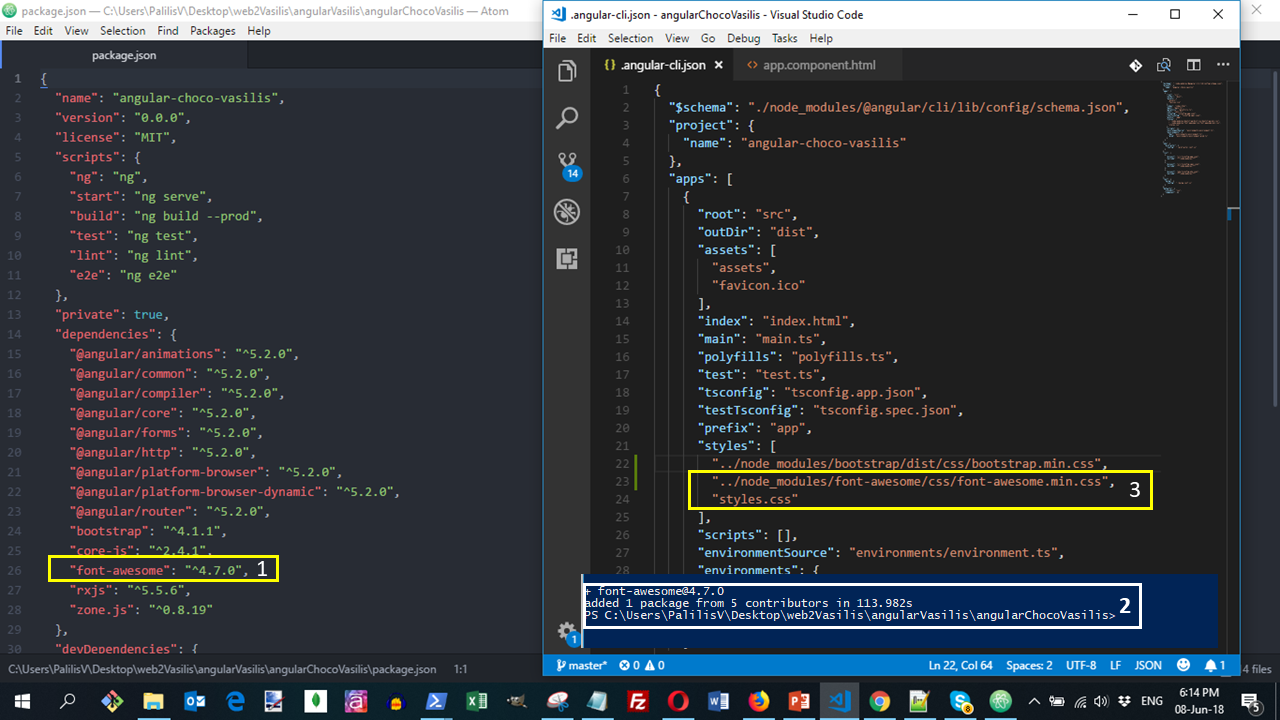
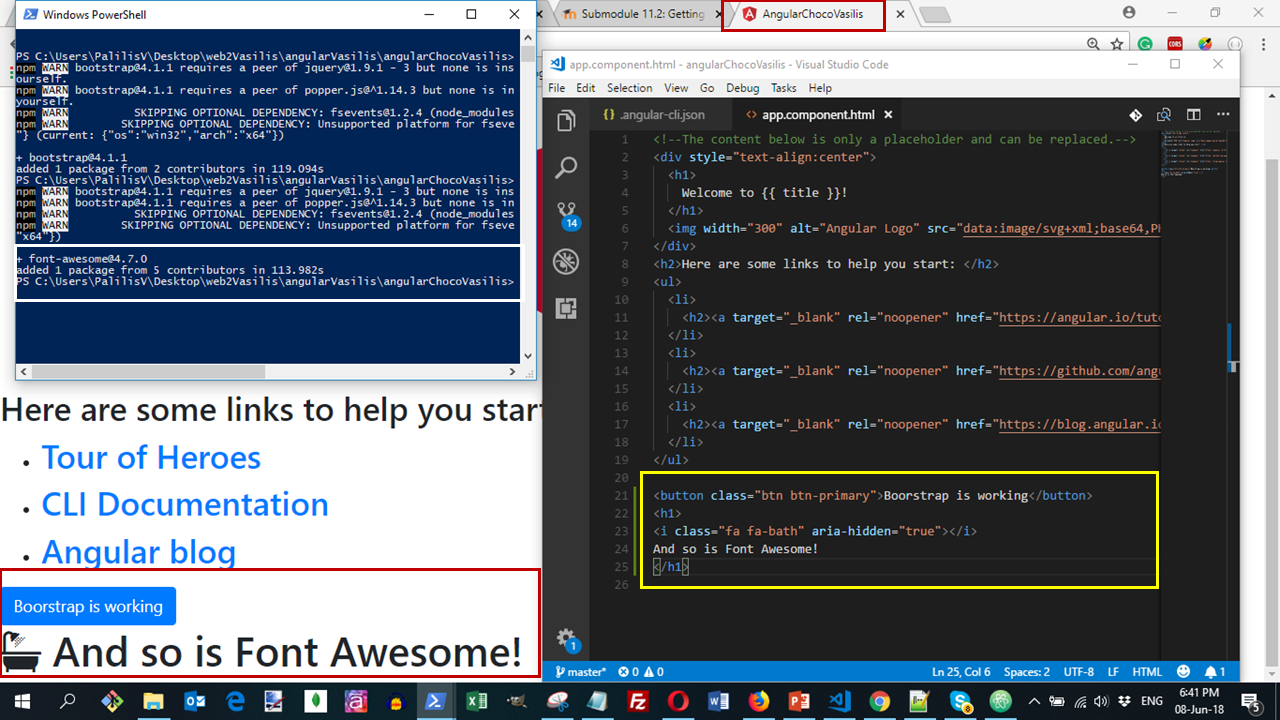
Testing Project
Open app.component.html and add the following markup:
<button class="btn btn-primary">Boorstrap is working</button>
<h1>
  <i class="fa fa-bath" aria-hidden="true"></i>
   And so is Font Awesome!
</h1>
With the application configured, run ng serve to run your application in development mode. In your browser navigate to the URL localhost:4200. Verify that the bootstrap styled button and the icon appear.
Do commit the changes to the Git repository with the message "Styling Angular".
Do a Git commit
Commit the changes to the Git repository with the message "Styling Angular".
Conclusions
In this submodule, you installed the Angular CLI tool, created and styled a basic Angular project and served up the compiled project to your browser.