Submodule 19.3: Angular Components
| Site: | ΕΛ/ΛΑΚ Moodle |
| Course: | Study / Web Design and Web Development |
| Book: | Submodule 19.3: Angular Components |
| Printed by: | Guest user |
| Date: | Friday, 19 June 2026, 6:59 AM |
Description
- Component
- Interpolation
- Structural directives
- Pipes
Introduction
In this submodule, you will learn about Angular components and how we construct an Angular component and design its template to view. We will :
- Use Angular-CLI to scaffold out the barebones of an Angular component
- Construct the Angular component code and the template for the component
We will also learn about Angular Interpolation, Structural directives and Pipes
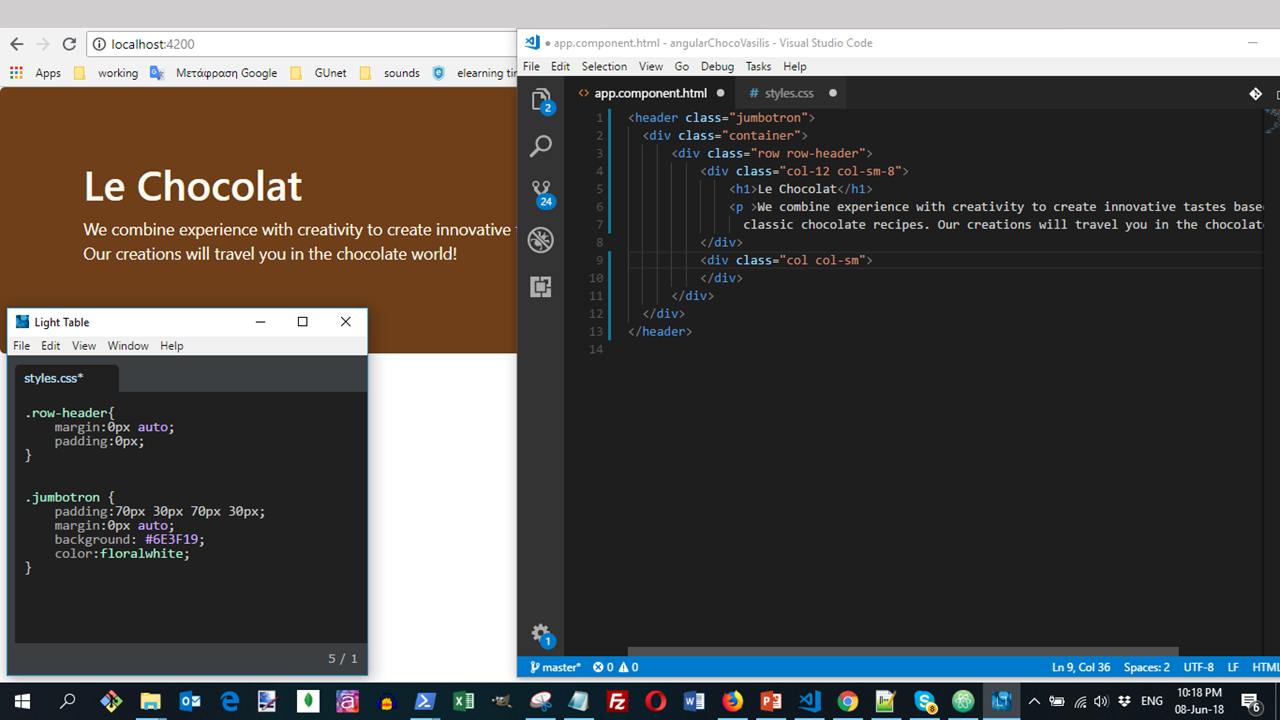
Adding a Bootstrap Jumbotron
Open app.component.html and replace its contents with the appropriate code for the Jumbotron.
Add also the appropriate code to the styles.css file.
Components Part 1 ...
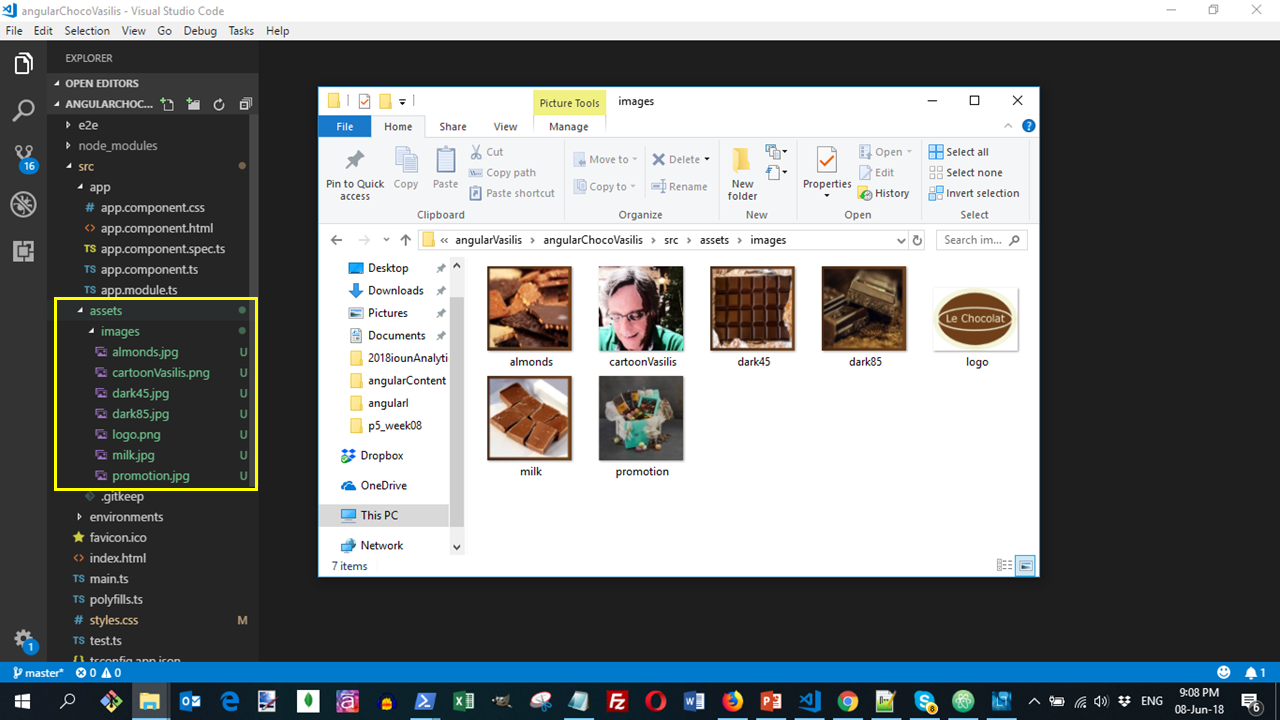
Image folder
Download the images.zip file and unzip it in the to the Angular project's src/assets folder. This should create a folder named images there.
... Components Part 1...
Adding a Menu Component
Next, open the CLI and use the command shown below to generate a new component named menu:
ng generate component menuThis will create the necessary files for the menu component in a folder named menu, and also import this component into app.module.ts.
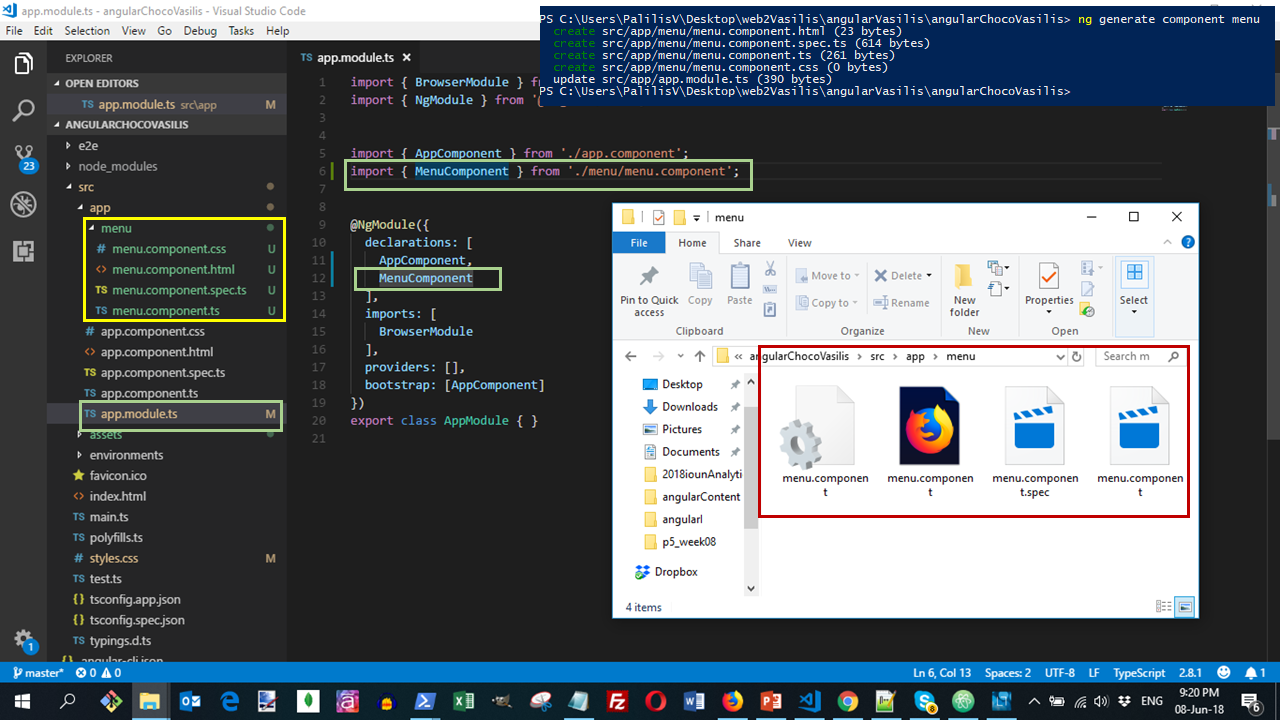
So with that, Angular-cli has set up the Menu Component to be available to our application.
- See more about Angular Components
... Components Part 1...
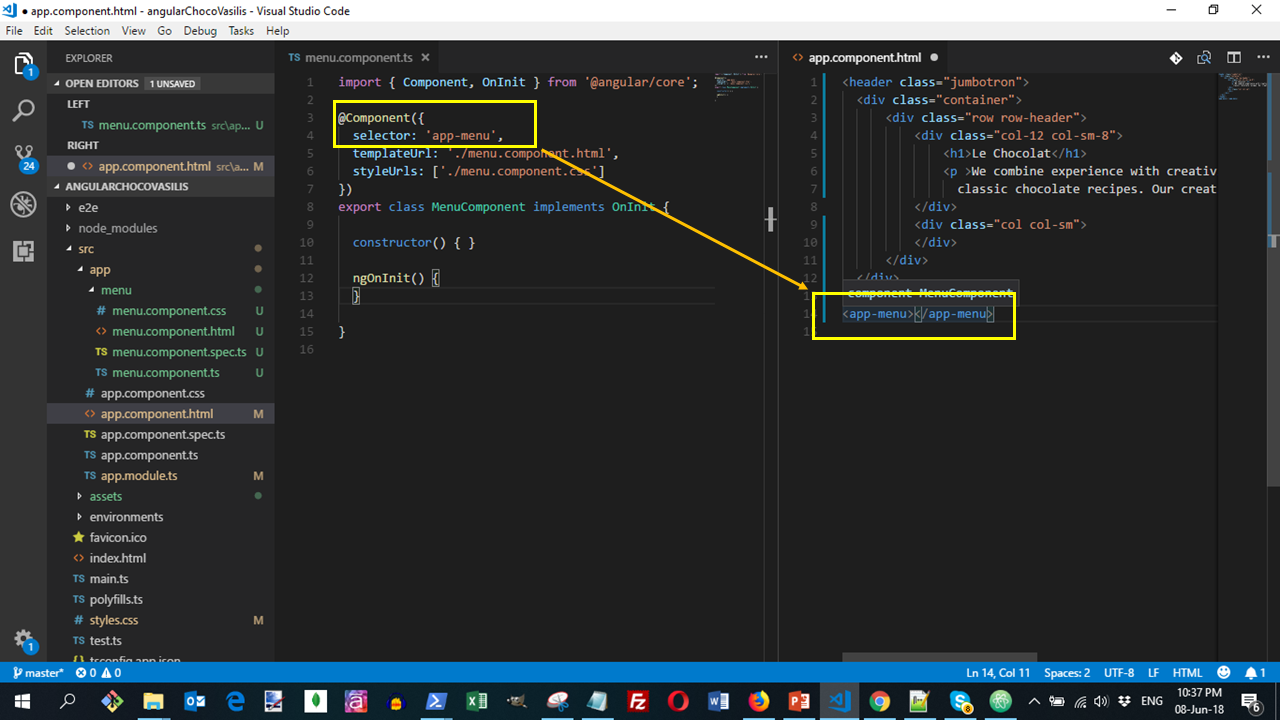
Menu component dispaly
Next, open app.component.html file and add the following after the Jumbotron:
<app-menu></app-menu>This way, the menu.component takes a part of what is included inside the app.component's template.
We can see that the selector for the menu.component has been defined as app-menu. If we want to include that menu file in app.component.html, we just write <app-menu></app-menu>.
So whatever is defined in the menu.component template will be placed into app.component.
... Components Part 1...
Creating the Menu
Next, create a folder named shared under the src/app folder. We will put here files that we're going to share across various components.
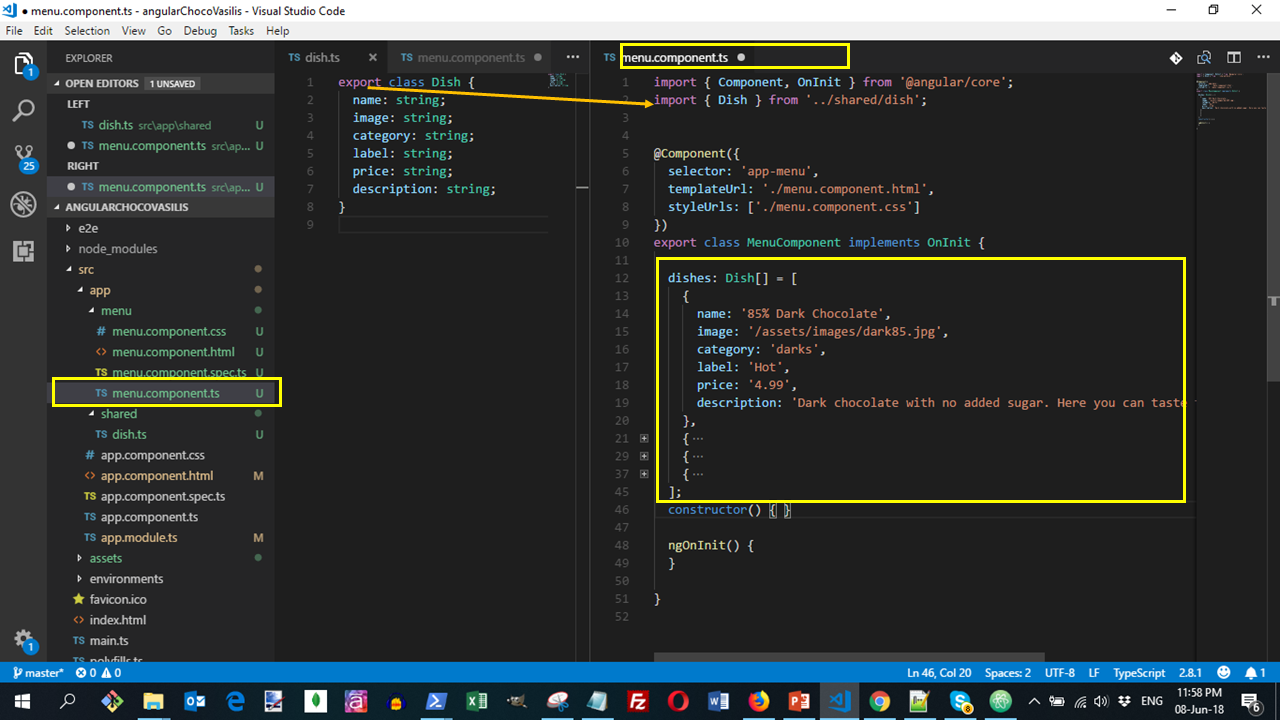
To this folder, add a file named dish.ts with the following code, to create and export a class that defines the Choco-dish object. This class will act as a blueprint for the objects that we will create next :

Update menu.component.ts as follows to add in the data for four kinds of chocolate.
By importing the class "dish", we can use it as a type for the array of objects "dishes", that we will define and export for the next step. With the phrase "as a type" we mean that the data inserted in "dishes" objects, should be of the same type with those that are declared on "dish" class. For example, in this case we cannot have a number as a value.
Next, update the menu.component.html template as follows:
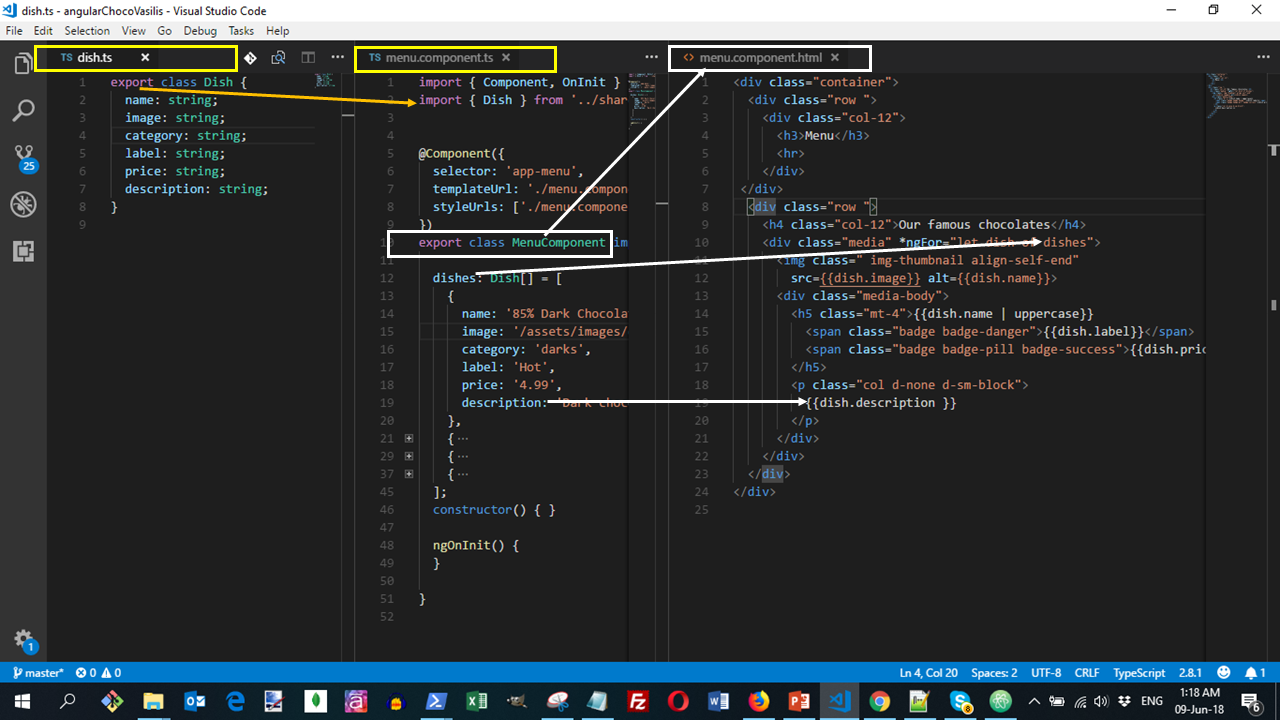
Note the syntax, *ngfor, which is the structural directive in Angular.
It allows us to iterate over an array of items.
Remember that we have defined and exported dishes as an array of dish objects in our code.
In the template, we iterate over it, using the code *ngFor="let dish of dishes" which allows us to access each element of the array.( dish is just a name, it could be anything eg i,x,w..)
This is like a for loop.
Now from this, we can also get access to the properties of each individual object inside the dishes array.
Note the double curly brackets, for example, in {{dish.image}}. This is the one-way interpolation. Using double curly brackets we can display the value of the dish.image in our page.
This means that the source of the image will get the value of dish.image that is defined in my javaScript object.
The same applies for all of {{dish.name}} etc.
Note the | (the vertical bar on your keyboard). This is an Angular pipe.
We use the uppercase pipe which will transform the dish.name from whatever it is into an entire word with uppercase letters.
we're going to use more angular pipes in the next submodules.
... Components Part 1
The results
With the previous code configured, open your Terminal go to the angularChocoYourname angular-sub-folder and run ng serve to run your application in development mode. In your browser navigate to the URL localhost:4200
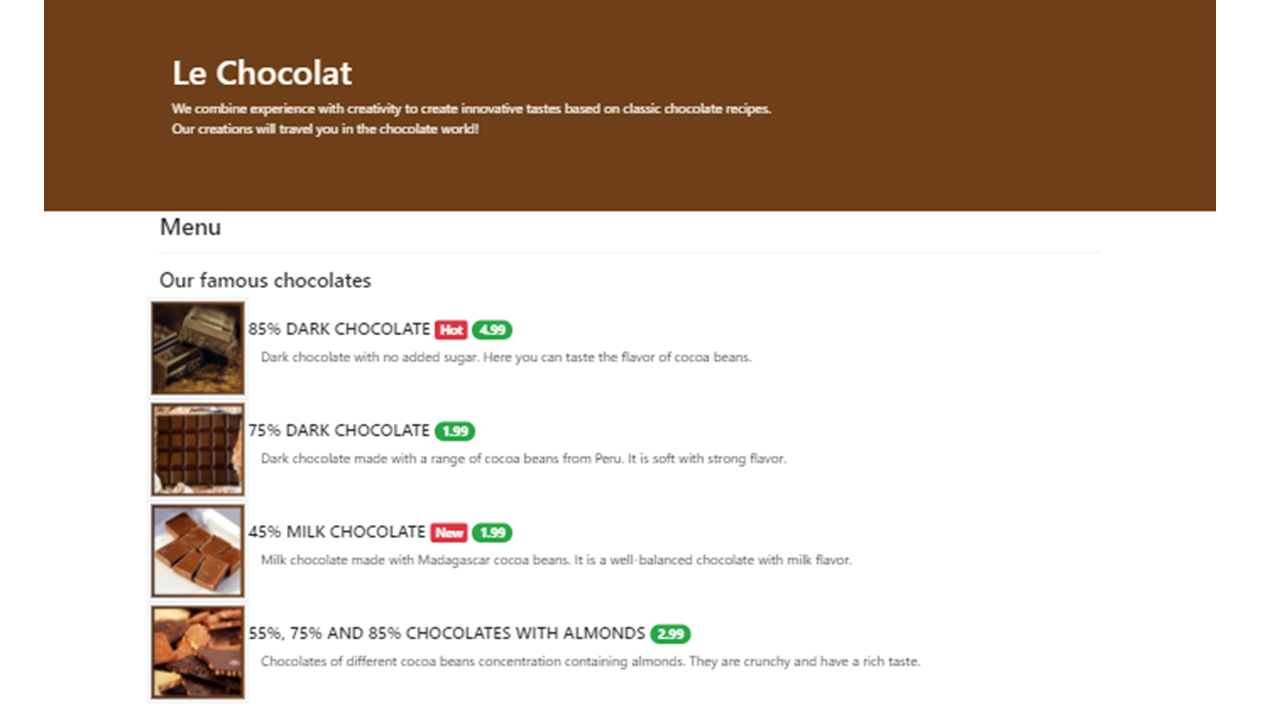
Remember the JavaScript array of object we have exported.
Look how each of the properties for the JavaScript object array has been used and mapped to the four items in the Bootstrap "media".
Look how the corresponding images have been included here using the image thumbnail class.
And note how the name and the description of each dish are displayed here.
Do a Git commit with the message "Components Part 1".
Components Part 2 ...
Update the menu.component.ts
Update the menu.component.ts file as follows to move the details of the dishes into a constant, in preparation for introducing services in a future submodule, where we will move these data to a service instead of using these inside our application:

Note that we have assigned to the exported variable dishes the constant Dishes dishes = DISHES.
You possibly wonder why we have removed the type for the dishes.
TypeScript is intelligent enough to realize that when we do this it'll automatically assign BOTH the type and values to dishes to match what you have in DISHES.
But if we want to be completely clear, we can also write dishes : Dish[] = DISHES.
Note also the variable called selectedDish.
We are going to use this variable in this submodule, and in later submodules also.
We make this equal to the first dish in my array selectedDish = DISHES[0].
You could also write selectedDish : Dish = DISHES[0])
... Components Part 2...
Add a Card Component
Update the menu.component.html template to display the details of a selected dish using the Bootstrap Card component as follows:

Note the syntax, *ngif, which is the structural directive in Angular.
We add in a *ngIf with the dish here in the row.
By applying an *ngIf="dish" to the div, we specify that if the selected dish is currently null, we don't add this div to the page.
If it is not, then this div will be added to the page and we'll display the columns elements with the content.
... Components Part 2
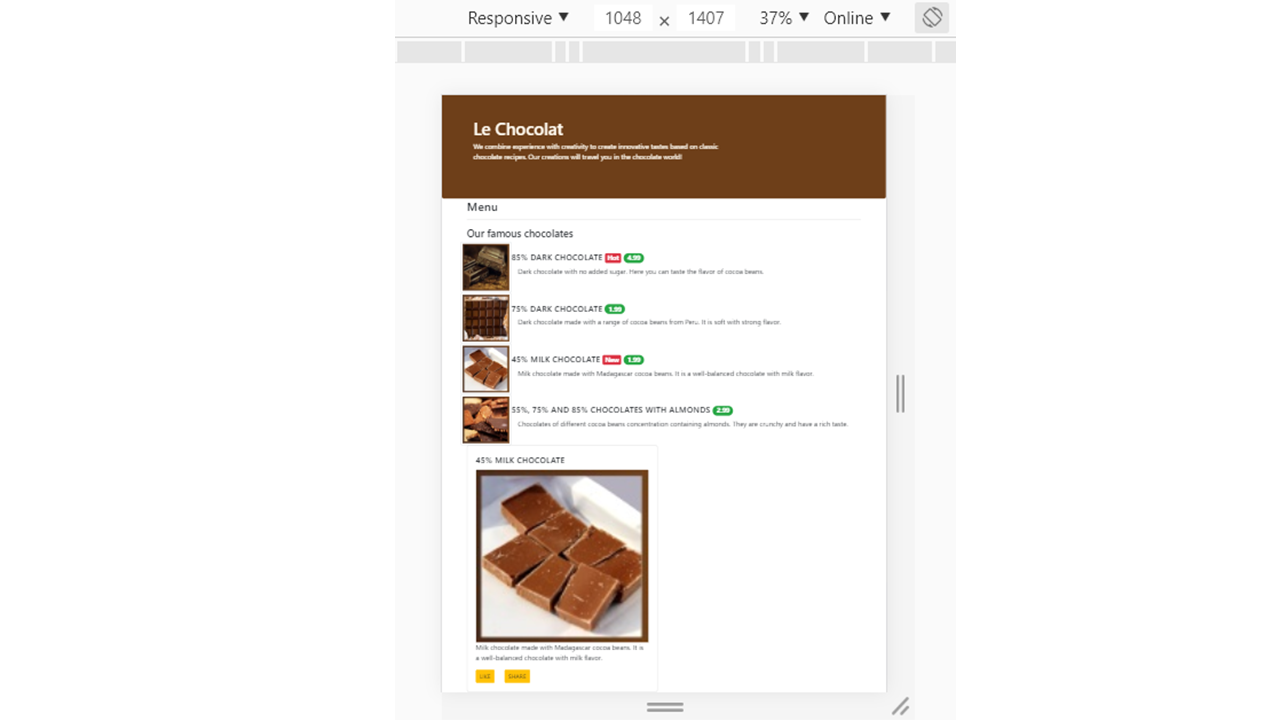
The results
With the previous code configured, open your Terminal, go to the angularChocoYourname angular-sub-folder and run ng serve to run your application in development mode. In your browser navigate to the URL localhost:4200
Do a Git commit with the message "Components Part 2".
Further reading
Directives
- Angular templates are dynamic
- Directives give instructions to Angular on how to render the templates to the page
- A directive can be defined in Angular as a class with the @Directive decorator
- A component is a special kind of directive with a template associated with it
- Two other kinds of directives in Angular: Structural and Attribute
Structural Directives
- Allows you to alter the layout by adding, removing and replacing elements in a page
- Apply a structural directive to a host element in the DOM and its descendants
- Common Structural Directives
- NgIf <div *ngIf=“selectedDish”> . . . </div>
- NgFor <md-list-item *ngFor="let dish of dishes">
- NgSwitch