Submodule 20.2: Data Binding - Practice
| Site: | ΕΛ/ΛΑΚ Moodle |
| Course: | Study / Web Design and Web Development |
| Book: | Submodule 20.2: Data Binding - Practice |
| Printed by: | Guest user |
| Date: | Saturday, 27 June 2026, 6:49 AM |
Introduction
So far we have created this static webpage:
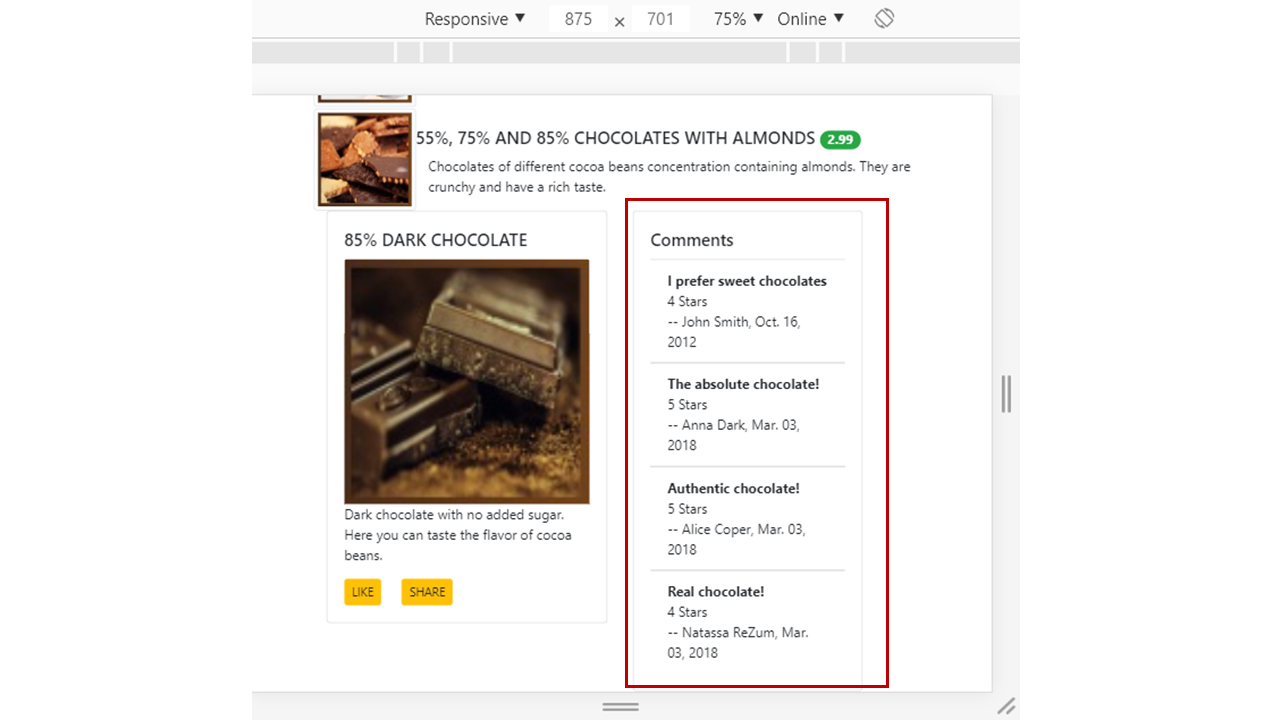
This is a static webpage without Interactivity and we could have created it without Angular .
Let's go one step further:
- We want to add comments to each Choco-dish (comment.ts)
- Update the existing dish.ts to receive comments
- Centralize the data so each component will take them from one source (dishes.ts)
- Update the two components so that when the user clicks on a Choco-dish will see details and comments about this one. What we will actually do will be to create an interactive and dynamic page.
So, in this submodule, you will use your knowledge of data binding to update the Angular application to enable you to select any Choco-dish from the menu and show its details. You will:
- Leverage data binding for communication among components
- Design a component to receive input from another component.
Refactoring the code ...
First, create a new class named Comment in a file named comment.ts in the shared folder and include the following in it:
export class Comment {
  rating: number;
  comment: string;
  author: string;
  date: string;
}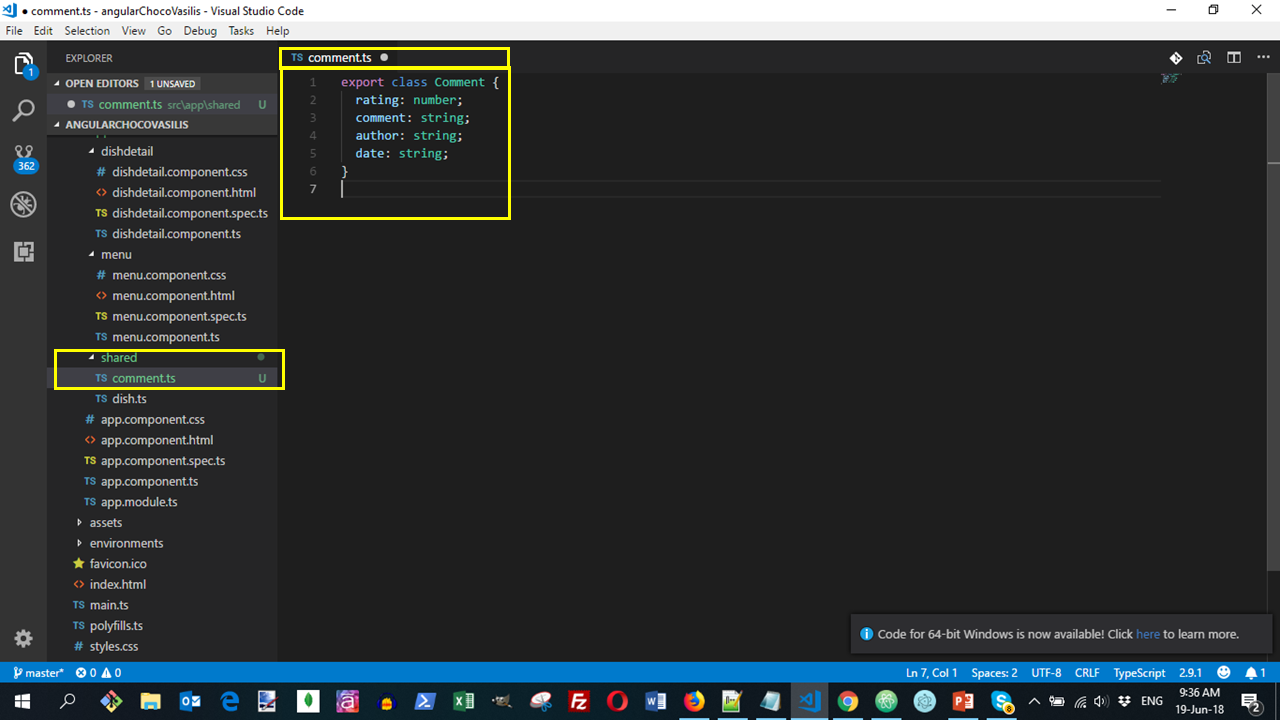
Here, we define the properties of this Comment class.
The first property is rating which is a number.
The second property is comment which is a string.
The third property is author which is a string.
The last property is date which is also a string.
...Refactoring the code ...
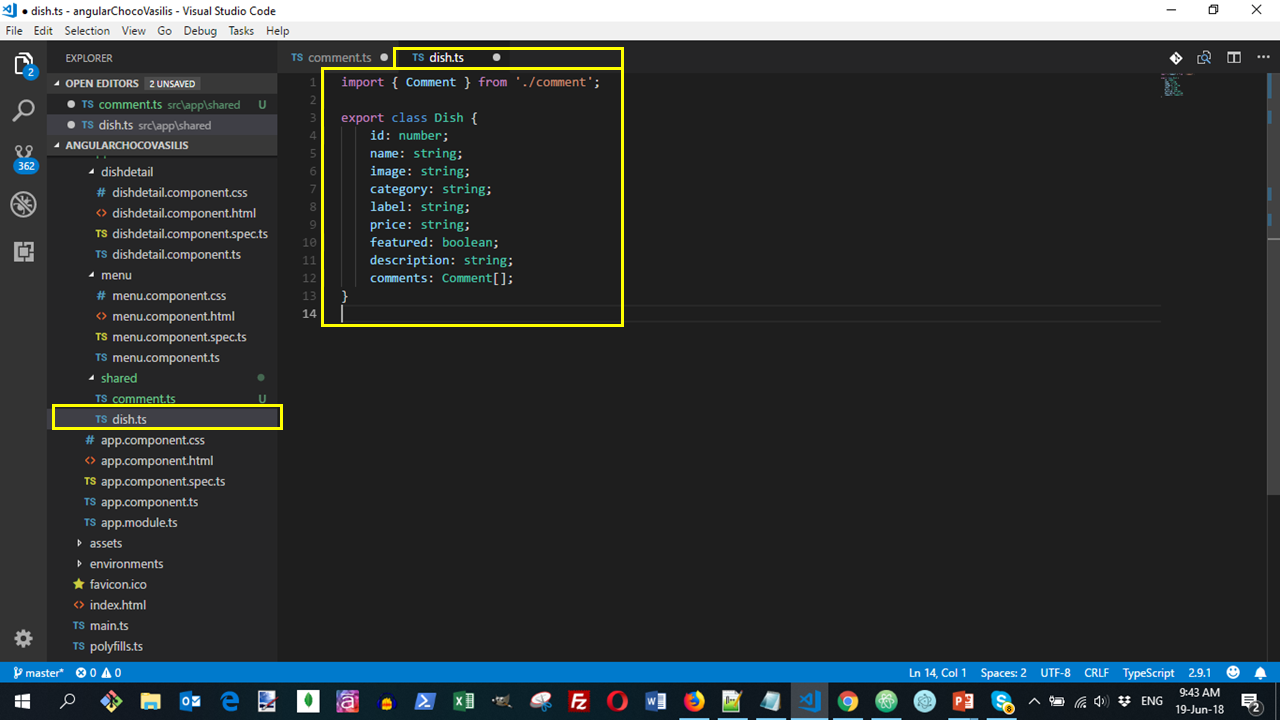
Then update the dish class, in dish.ts file, to allow a Choco-dish to have an array of comments as follows:
import { Comment } from './comment';

export class Dish {
  id: number;
  name: string;
  image: string;
  category: string;
  label: string;
  price: string;
  featured: boolean;
  description: string;
  comments: Comment[];
}
...Refactoring the code ...
Then create a new file named dishes.ts in the shared folder to export the JavaScript object array of DISHES:
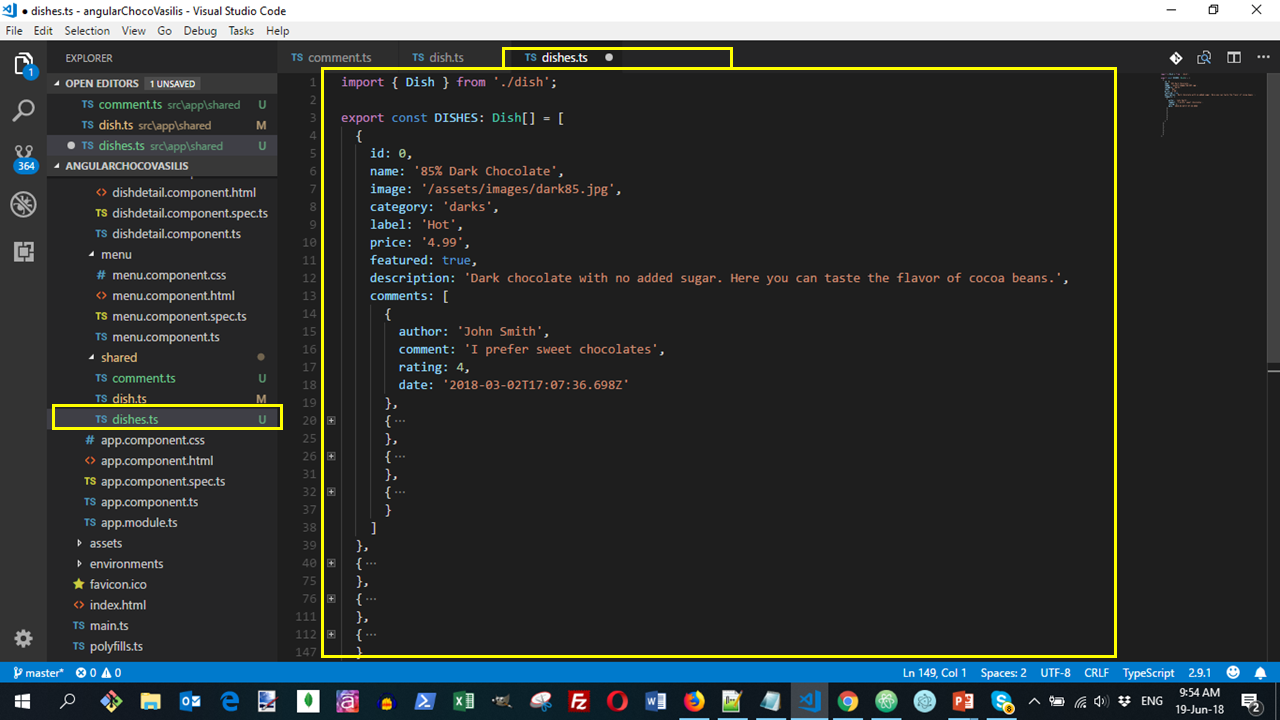
Note the date format. This is a standardized format that is used also in many programming languages which allow us to store the date as a string. We use the Angular pipe to display the date in a more convenient format.
Updating the .ts files
Open menu.component.ts file and update its content. First, delete the dishes constant and then make the following changes:
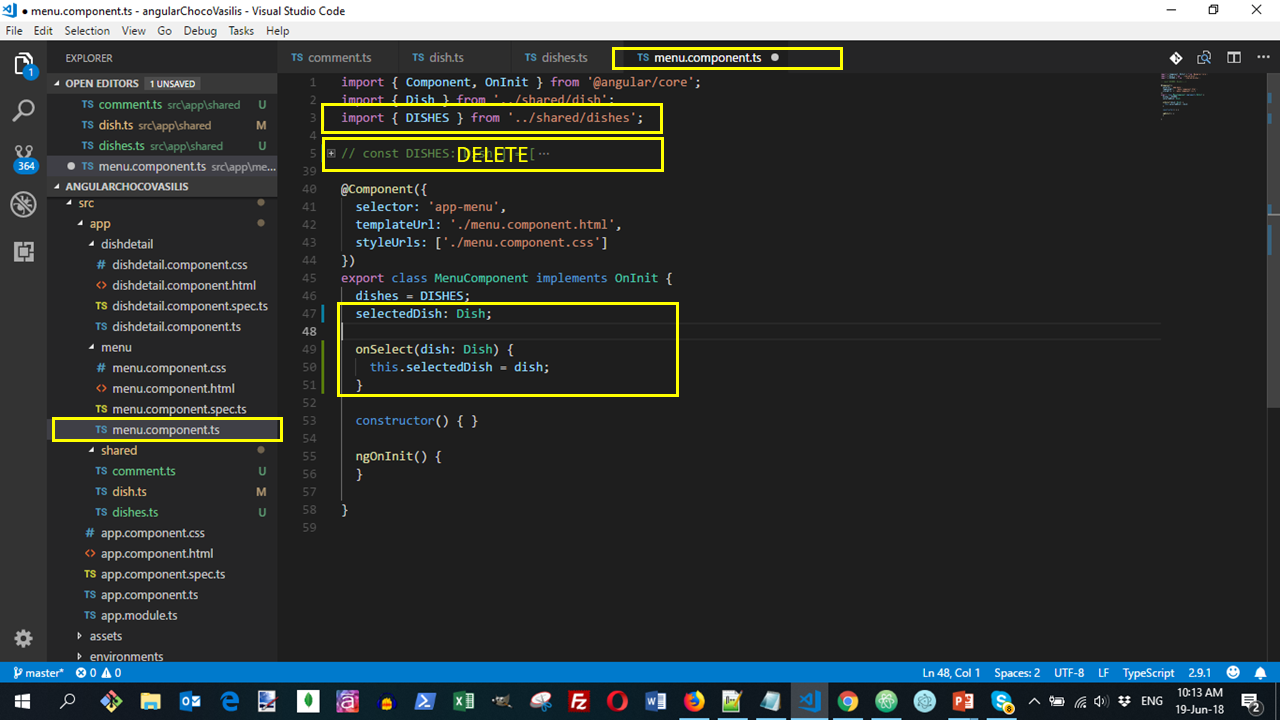
Note that we have separated the Choco-dish data from our code and we now import these from the DISHES/dishes.ts
Open dishdetail.component.ts and update its contents as follows:
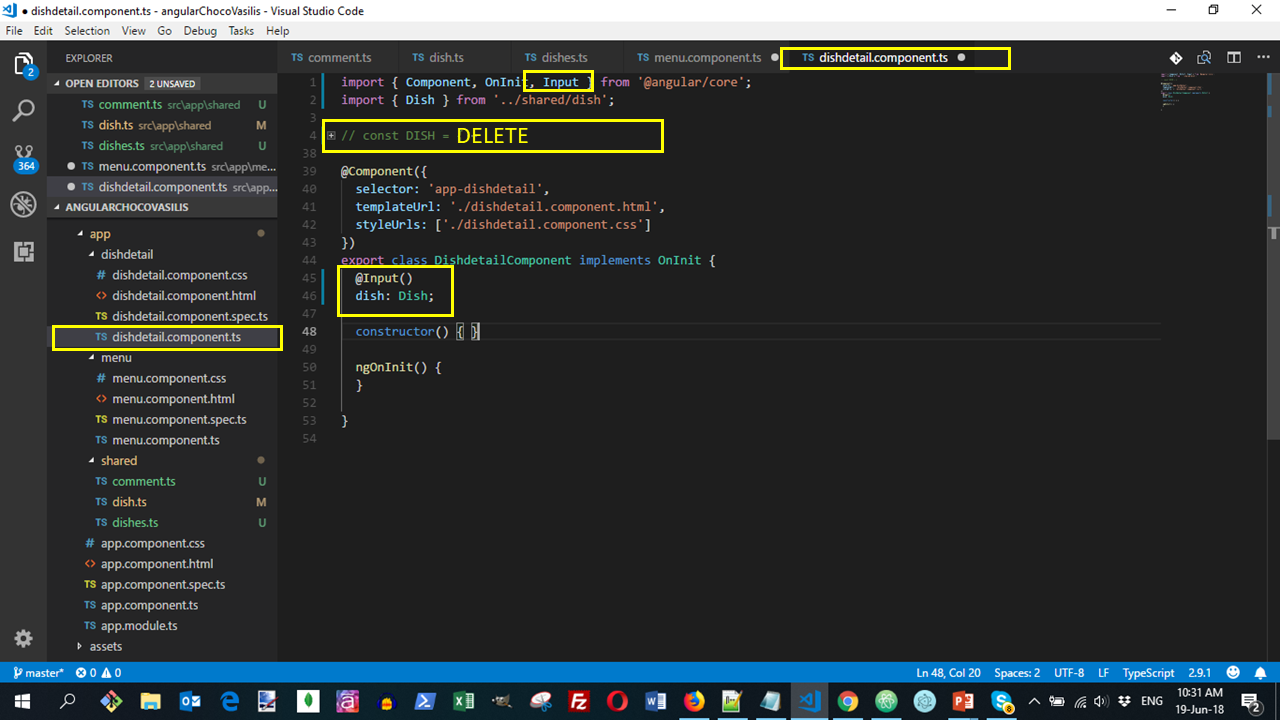
Note the use of the Input module.
This module allows us to declare a decorator - @Input() - inside which we define the dish variable.
We also need to import { Dish } from '../shared/dish';
This is a way to transfer information from one component (dishdetail) from another component (menu).
Updating the .html files
Open menu.component.html and update the class media with the Event binding (click) = "onSelect(dish)". So, when Choco-dish is clicked, the onSelect(dish: Dish) method is called and passes the value of the Choco-dish that has been clicked in the menu.component.ts.
<div class="media" *ngFor="let dish of dishes" (click) = "onSelect(dish)">Modify the dishdetail link using the Property binding [dish] = "selectedDish". With this property binding, the value- dish is passed from the component to the specified property- selectDish. Recall that the selectedDish is a variable in the menu.component.ts file.
<app-dishdetail [dish] = "selectedDish"></app-dishdetail>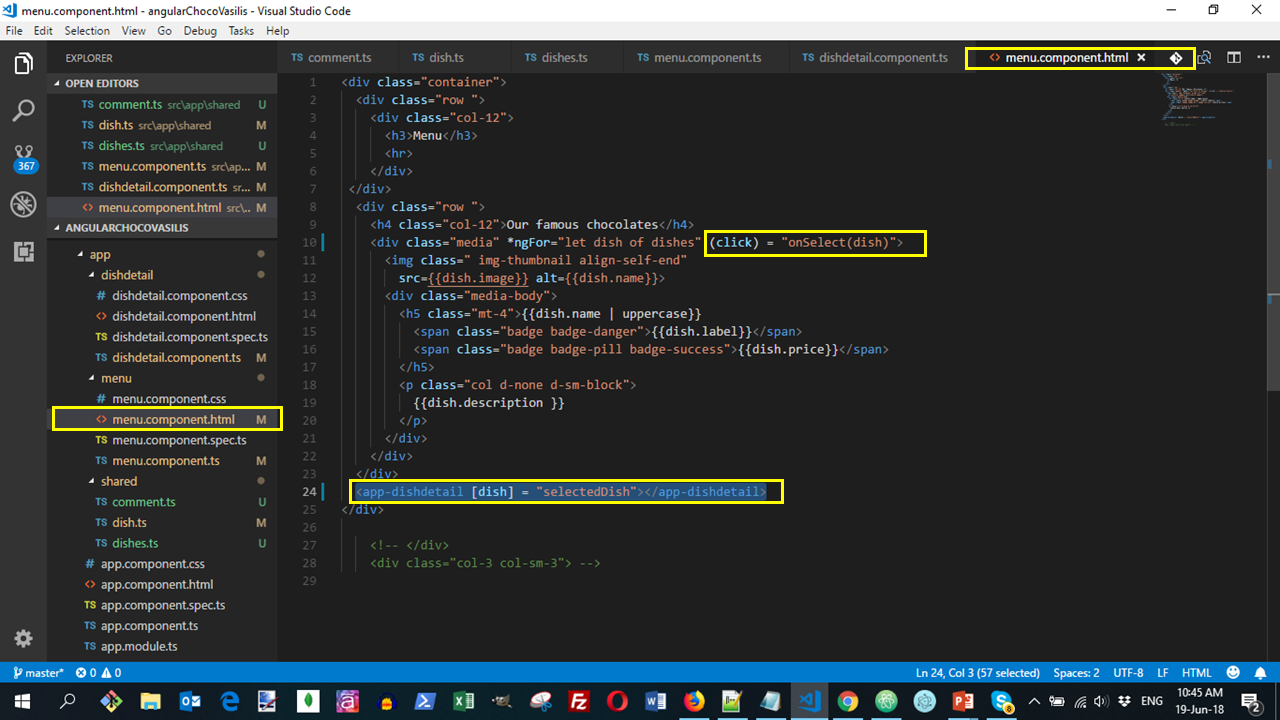
The results
With the previous code configured, open your Terminal, go to the angularChocoYourname angular-sub-folder and run ng serve to run your application in development mode. In your browser navigate to the URL localhost:4200
Do a Git commit with the message "Angular Data Binding".
- See more about Angular template- syntax