Submodule 21.1: Routing - Practice
| Site: | ΕΛ/ΛΑΚ Moodle |
| Course: | Study / Web Design and Web Development |
| Book: | Submodule 21.1: Routing - Practice |
| Printed by: | Guest user |
| Date: | Wednesday, 15 July 2026, 2:20 PM |
Introduction
In this submodule, we cover the basics of Angular routing. We examine how the router module in Angular enables the navigation among views of various components that form part of an Angular application. You will:
- Configure your application with multiple components whose views can be shown one at a time and navigate among them
- Configure a basic router using the Angular routing module to enable the navigation among the views.
Adding Footer
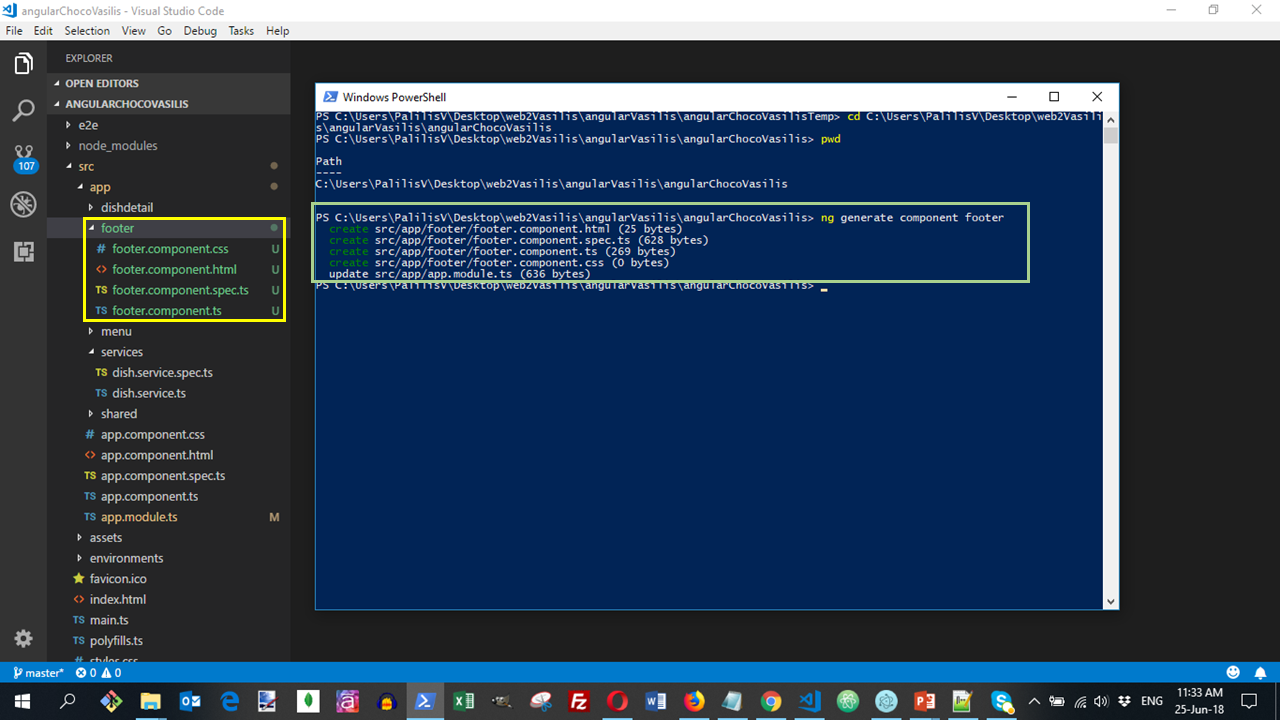
Open your Terminal and move to the angularChocoYourname angular-sub-folder.
To add a new component, the footer, to your application using Angular CLI, type the following at the prompt:
ng generate component footerOpen the angularChocoYourname angular-sub-folder in your Visual Editor code and check the creation:
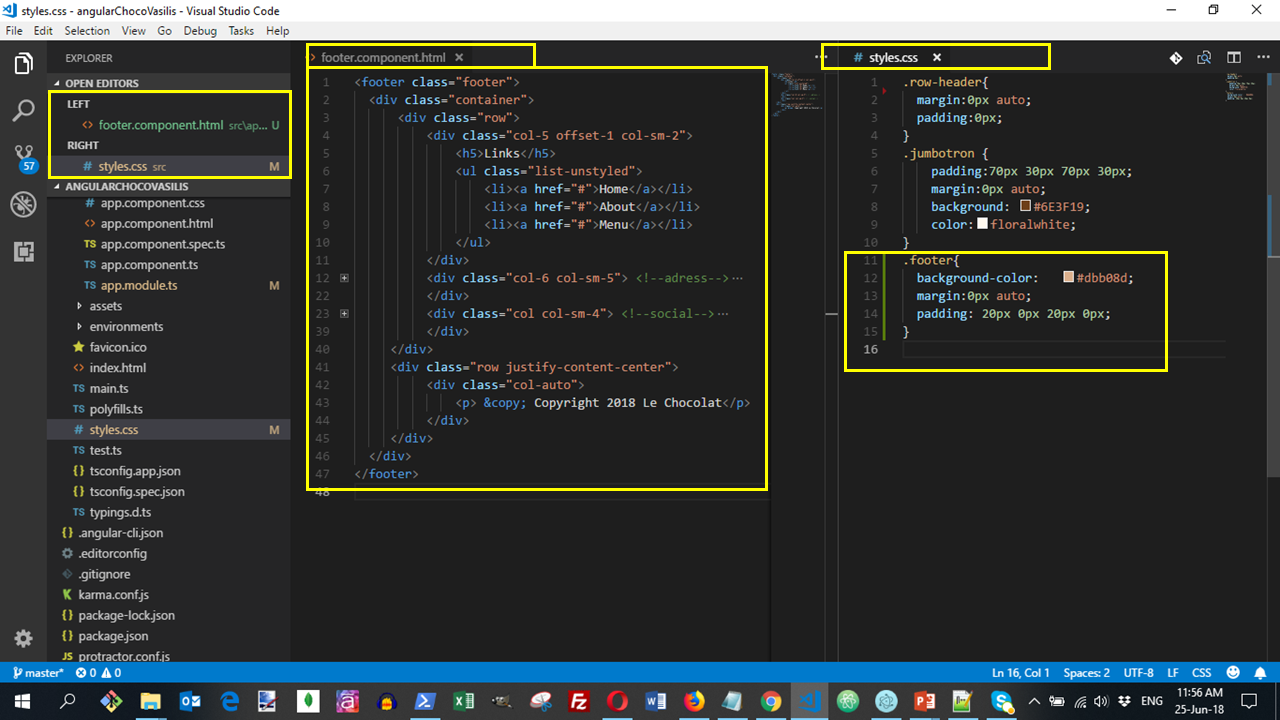
Update the footer's template, footer.component.html, and the styles.css as follows:
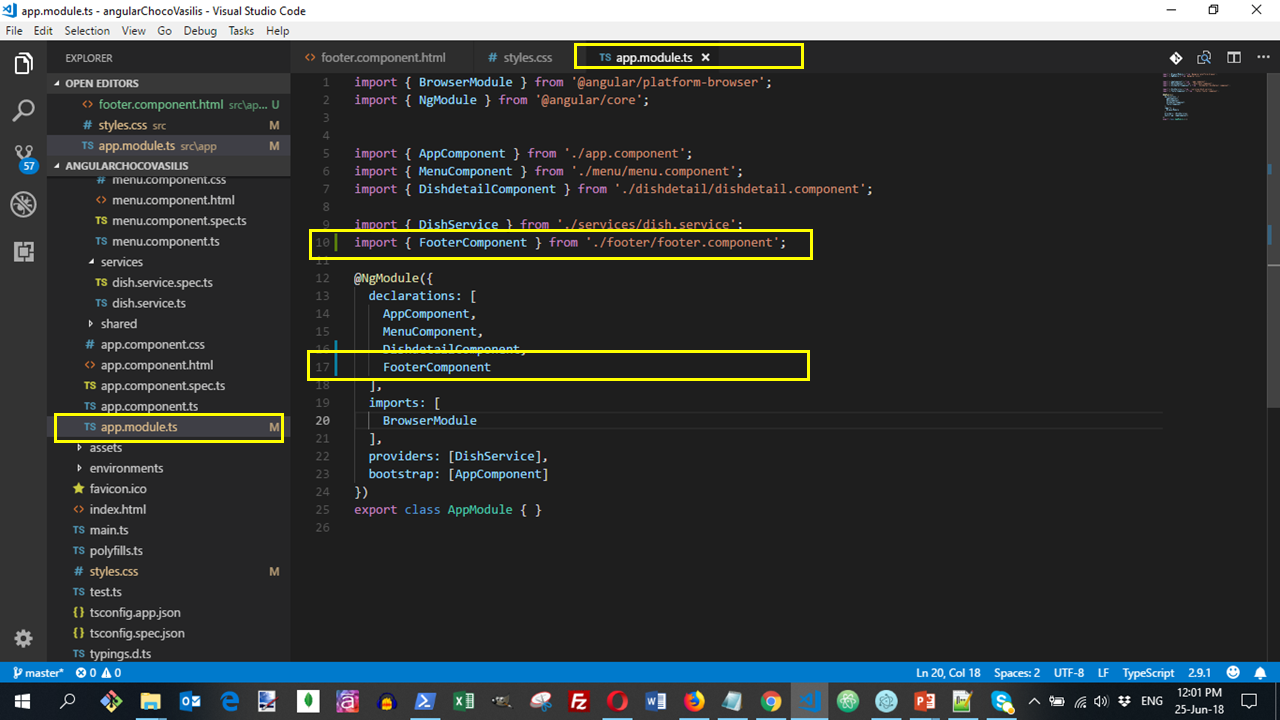
Note that Angular has automatically updated the app.module.ts
Now update the app.component.html file to include the footer as follows:
<app-footer></app-footer>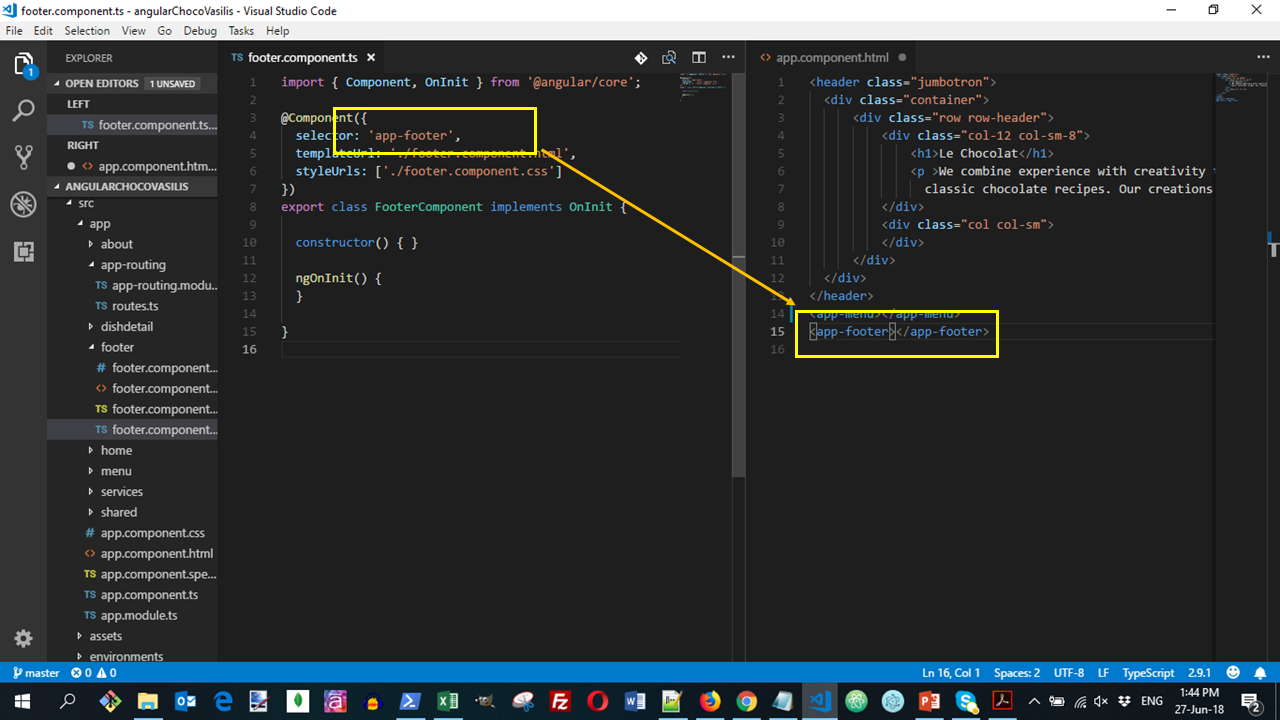
With the previous code configured, open a new Terminal, go to the angularChocoYourname angular-sub-folder and run ng serve to run your application in development mode. In your browser navigate to the URL localhost:4200
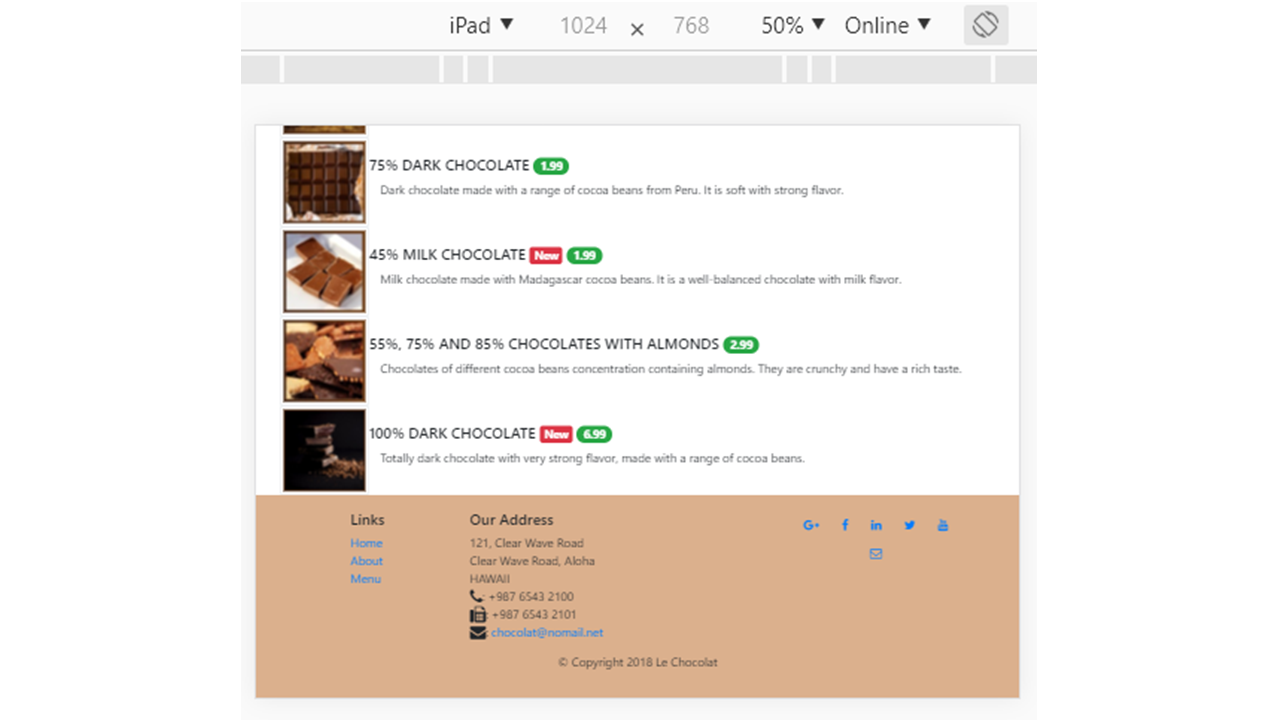
This code will create a page displayed as:
Do a Git commit with the message "Angular Footer".
Adding Components
Add two new components to your Angular application as follows:
ng generate component aboutng generate component home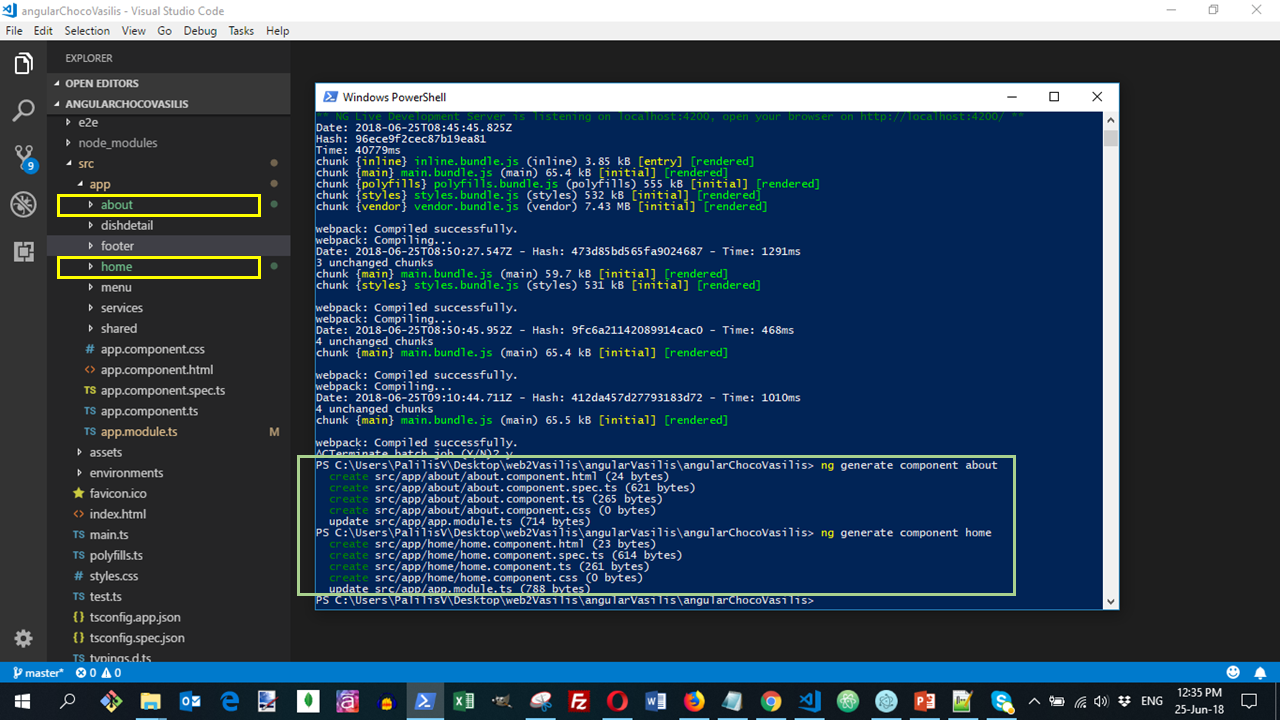
We will use these components in the setup of the router, which will give us the ability to navigate through them.
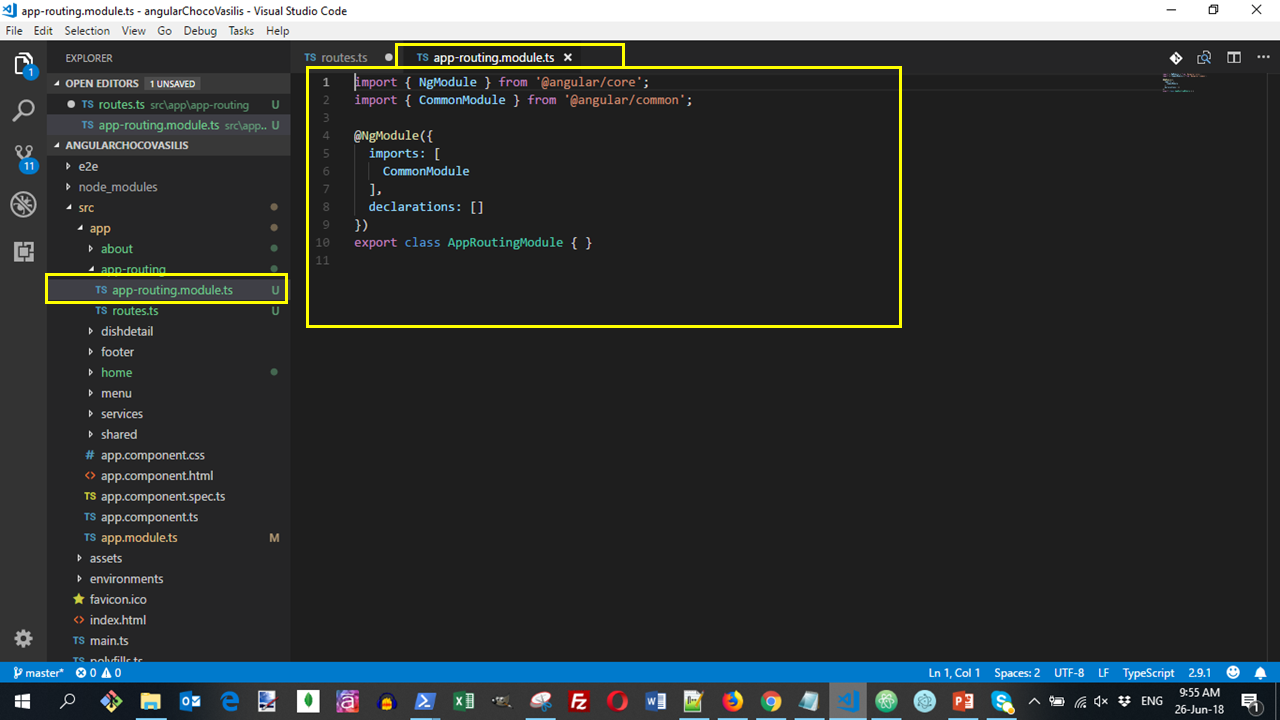
Adding a Router Module
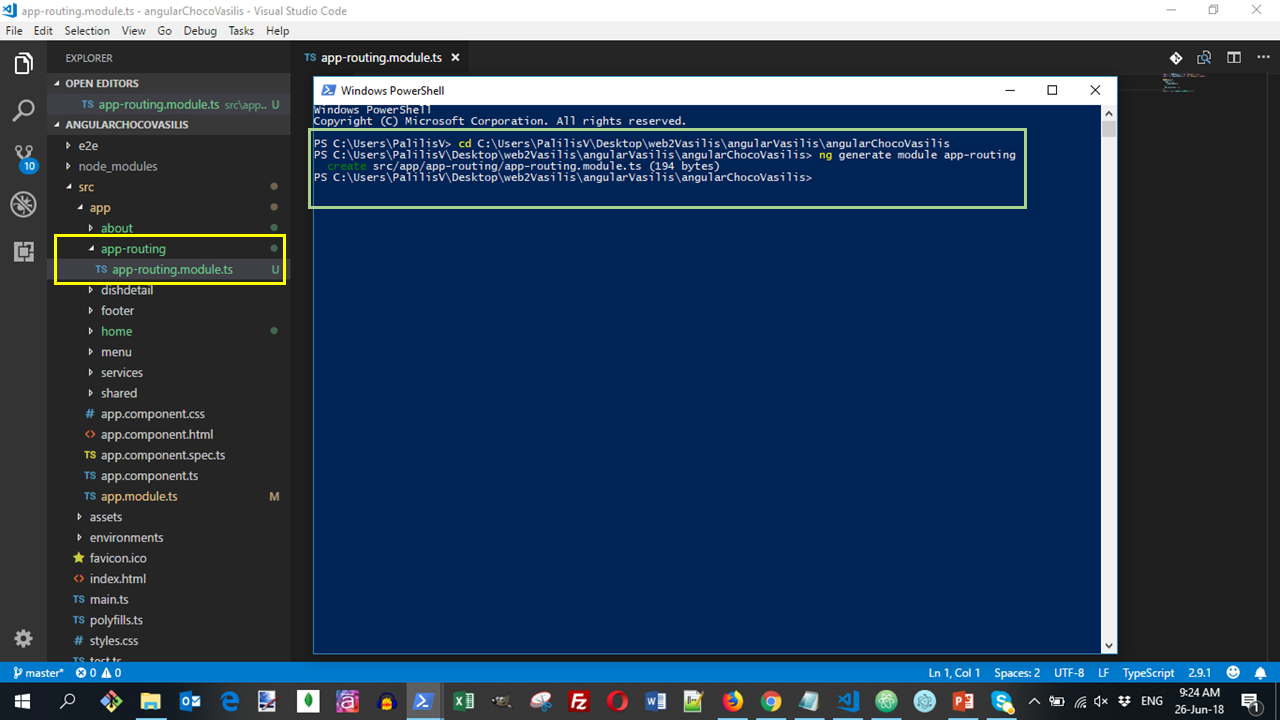
Add a new module named app-routing to your application as follows.
ng generate module app-routingThis will create a new module file named app-routing.module.ts in the app-routing folder.
This module will provide routing features for our application. In the next page, we will use this in our app module to enable routing.
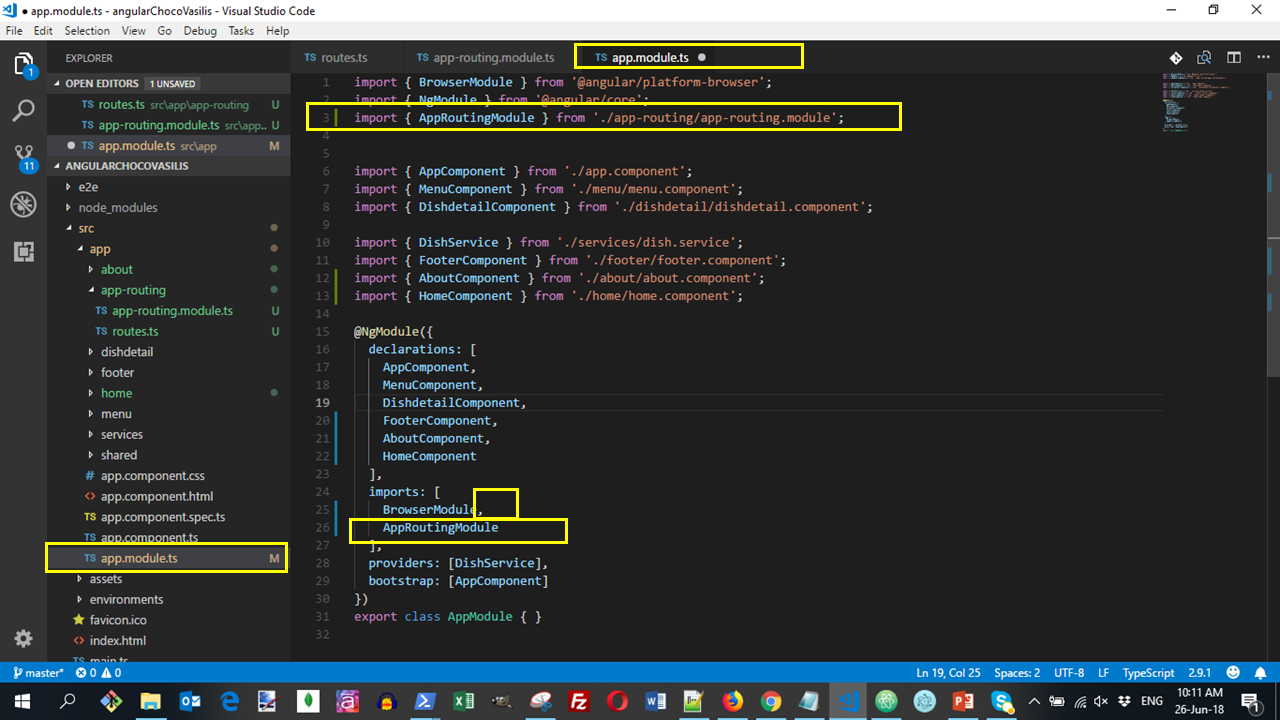
Update the app.module.ts
Update the app.module.ts file to use the Routing Module as follows:
. . .
import { AppRoutingModule } from './app-routing/app-routing.module';
@NgModule({
  . . .
  imports: [
    BrowserModule,
    AppRoutingModule
  ],
  . . .
})
. . .
Notice
- the import of the
{ AppRoutingModule } from './app-routing/app-routing.module';here. - the import of this
AppRoutingModulein theimportsarray of the decorator@NgModule.
Adding routes
Next, create a new file named routes.ts in the app-routing folder

and update it as follows:
import { Routes } from '@angular/router';
import { MenuComponent } from '../menu/menu.component';
import { DishdetailComponent } from '../dishdetail/dishdetail.component';
import { HomeComponent } from '../home/home.component';
import { AboutComponent } from '../about/about.component';
export const routes: Routes = [
  { path: 'home', component: HomeComponent },
  { path: 'menu', component: MenuComponent },
  { path: '', redirectTo: '/home', pathMatch: 'full' }
];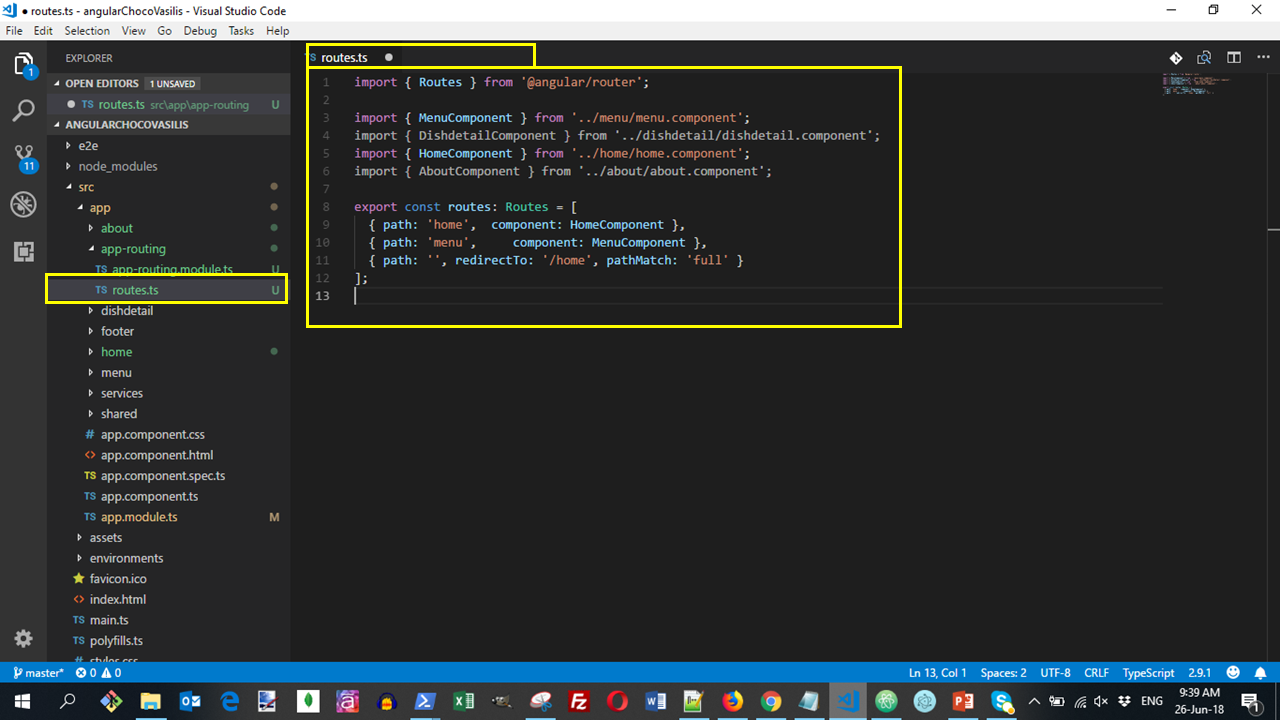
Notice
- the import of the
{ Routes } from '@angular/router';. The Routes type is optional and lets an IDE with TypeScript support or the TypeScript compiler conveniently validate your route configuration during development. - the import of our components
- The definition of the
constant routes, of type Routes. The router configuration represents all possible router states of our application.
It is a tree of routes, defined as a JavaScript array, where each route can have the following properties:
- path: string, path to match the URL
- patchMatch: string, how to match the URL. Angular Router has two matching strategies:
- prefix: default, matches when the URL starts with the value of path
- full: matches when the URL equals the value of path.
- component: class reference, component to activate when this route is activated
- redirectTo: string, URL to redirect to when this route is activated
- data: static data to assign to route
- resolve: dynamic data to resolve and merge with data when resolved
- children: child routes.
Update the Router
The existing app-routing.module.ts file includes:
Update the app-routing.module.ts file to make use of the routes defined above as follows:
import { NgModule } from '@angular/core';
import { CommonModule } from '@angular/common';
import { RouterModule, Routes } from '@angular/router';
import { routes } from './routes';
@NgModule({
 imports: [
 CommonModule,
 RouterModule.forRoot(routes)
 ],
 exports: [ RouterModule ],
 declarations: []
})
export class AppRoutingModule { }
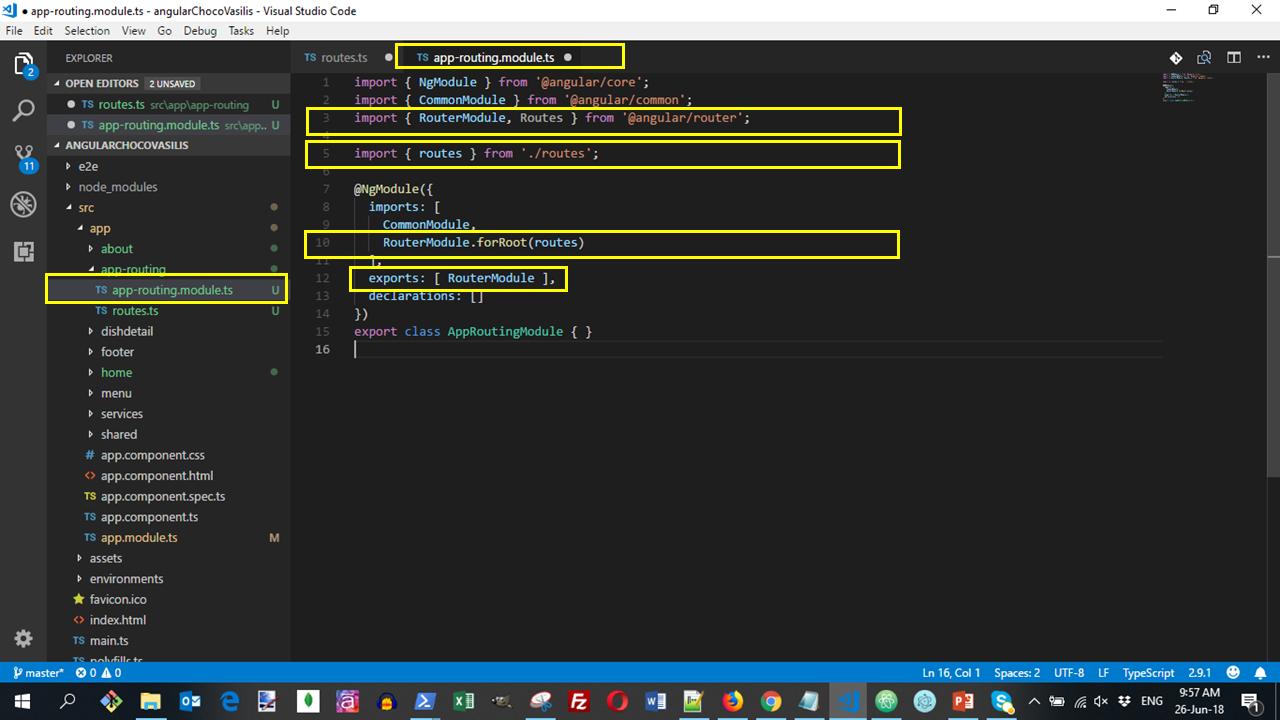
Notice
- the import of the
{ RouterModule, Routes } from '@angular/router'. The Angular Router is an optional service that presents a particular component view for a given URL. It is not part of the Angular core. It is in its own library package,@angular/router. - the import of OUR
{ routes } from './routes'; - The creation of the Router Module AppRoutingModule in the imports array in the decorator @NgModule:
RouterModule.forRoot(routes).
This way a routing module is created that includes the router directives, the router configuration and the instantiation of the router service. - In addition, we also specify RouterModule in the exports property:
exports: [RouterModule].
Update the app.component.html
Next update the app.component.html file as follows:
<router-outlet></router-outlet>
<app-footer></app-footer>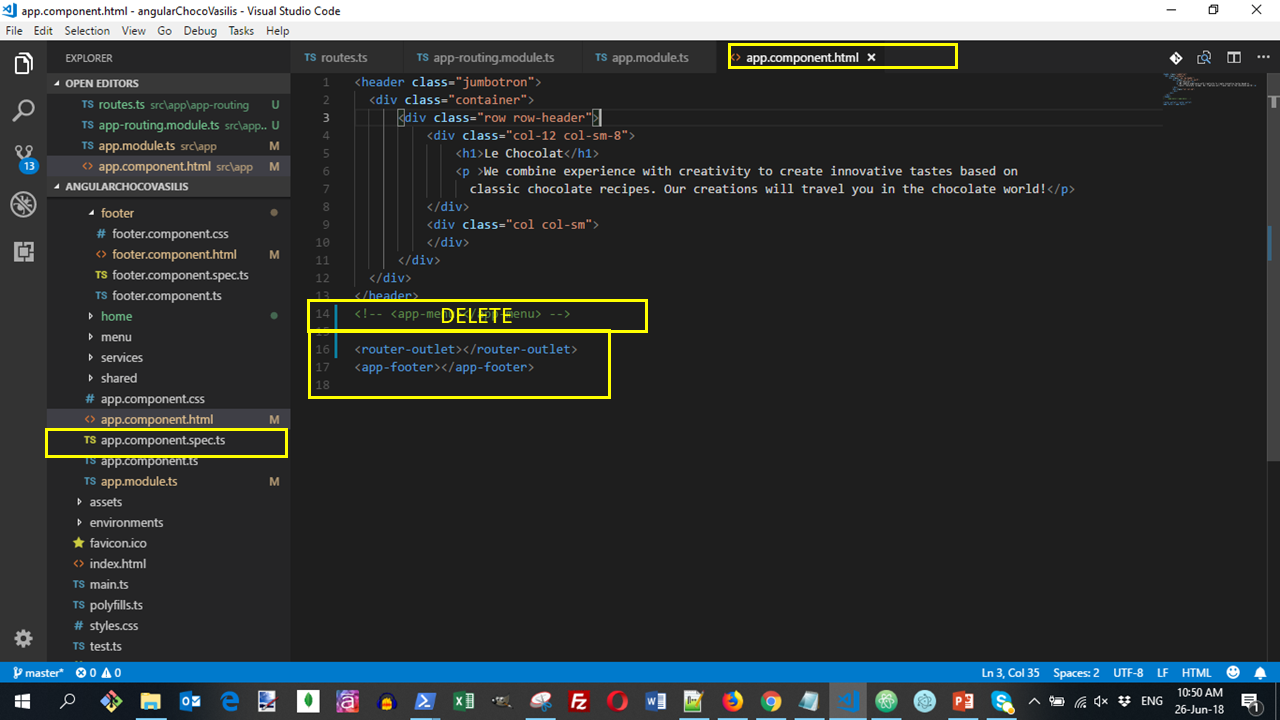
Here we don't need any more the "link" to the app-menu since the "linking" will take place using the router.
Although our application now has a routing configuration, we still need to tell Angular Router where it can place the instantiated components in the DOM.
When our application is bootstrapped, Angular instantiates AppComponent because AppComponent is listed in the bootstrap property of AppModule.
To tell Angular Router where it can place components, we must add the <router-outlet></router-outlet> element to AppComponent’s HTML template.
Update the footer.component.html
Finally, update the Links in the footer.component.html file as follows:
<ul class="list-unstyled">
  <li><a routerLink="/home" >Home</a></li>
  <li><a routerLink="/menu" >Menu</a></li>
 </ul>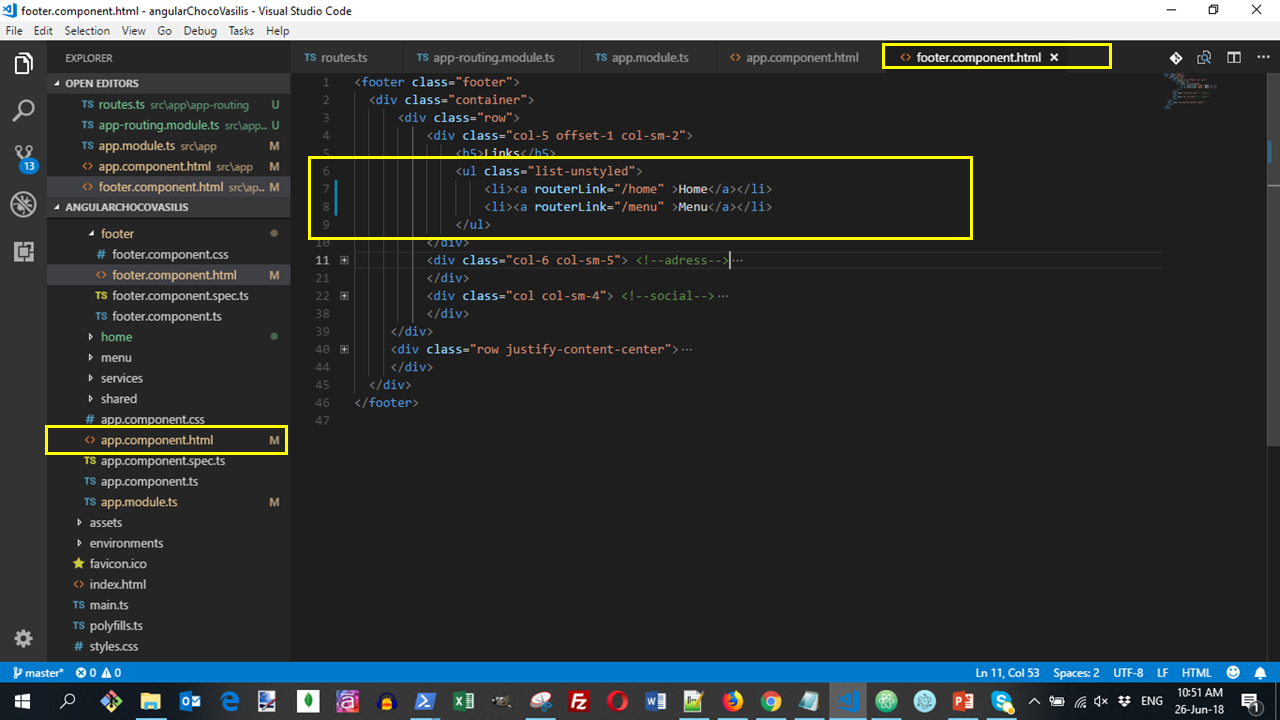
Anchor tags use the routerLink directive to bind instead of the href attribute to point to specific routes.
The Results
With the previous code configured, open your Terminal, go to the angularChocoYourname angular-sub-folder and run ng serve to run your application in development mode. In your browser navigate to the URL localhost:4200
Do a Git commit with the message "Angular Data Binding".
- See more about Angular Routing