Submodule 14.1: Introduction to DOM
| Site: | ΕΛ/ΛΑΚ Moodle |
| Course: | Study / Web Design and Web Development |
| Book: | Submodule 14.1: Introduction to DOM |
| Printed by: | Guest user |
| Date: | Monday, 29 June 2026, 2:54 AM |
DOM definition
DOM (Document Object Model) is a tree-like representation of the HTML structure of Web pages. All objects of an HTML page are included and can be manipulated by the DOM.
By manipulation, we mean that we change the content ( eg add/delete HTML ), the structure ( move an HTML element to another place) and their appearance ( change their style).
To get a sense of the DOM structure copy the below code and paste it on the "Markup to test" field of the Live DOM Viewer webpage.
You can also see the DOM of a page in the console - elements and inspect these with the appropriate tool.

Exercise
- Open your editor, create a new file and save it as
exersice14.1.1.htmlin the folder "yourNameWEB2JS". - Copy the code below and paste it in the new file.
- Open the console to see the results.
Resources:
Parents-Children-Siblings within the DOM
A very important concept of the DOM is that each object has information about the relationship between that object and the other objects of the page.
The relationships between the different objects (elements) of a page are:
Parents -> the tags that contain the element
Siblings -> other tags that have the same parent with them
Children -> tags that these elements contain

As we will see later, these relationships are the key to enable you to manipulate the DOM.
Nodes and Dom traversing
Every object on the DOM tree is a node and elements are a specific type of node.
There are 12 types of nodes which you can find here.
The ones that you will often encounter are: element, attribute and text.
Knowing the node type is essential to be able to determine which properties you can use.
In the below code you will see how you can determine the node type and also distinguish between the children and childnodes.
Only elements can have children, however, nodes can have childnodes.
Exercise
- Open your editor, create a new file and save it as
exersice14.1.3.htmlin the folder "yourNameWEB2JS". - Copy the code below and paste it in the new file.
- Open the console to see the results.
The length of childNodes of H1 is: 1
The length of children of H1 is: 0
The next slibing of H1: [object Text]
The parentElement of H1: [object HTMLDivElement]
- Modify the above code to determine the console.log outputs of the ul tag.
The node type of ul is: 1
The length of childNodes of ul is: 7
The length of children of ul is: 3
The next slibing of ul: [object Text]
The parentElement of ul: [object HTMLDivElement]
Two things to note from the above example. First, that the console returns us the number of the nodeType as it is determined on the w3schools link above. Also, although in this case <h1> doesn't have children, it has 1 childnode which is the text that it contains.
With the above knowledge, you are now ready to get a first idea of how we can access the different nodes, a process that is known as traversing the DOM. Visit the Walking the DOM page to understand the properties that link nodes to other nodes.
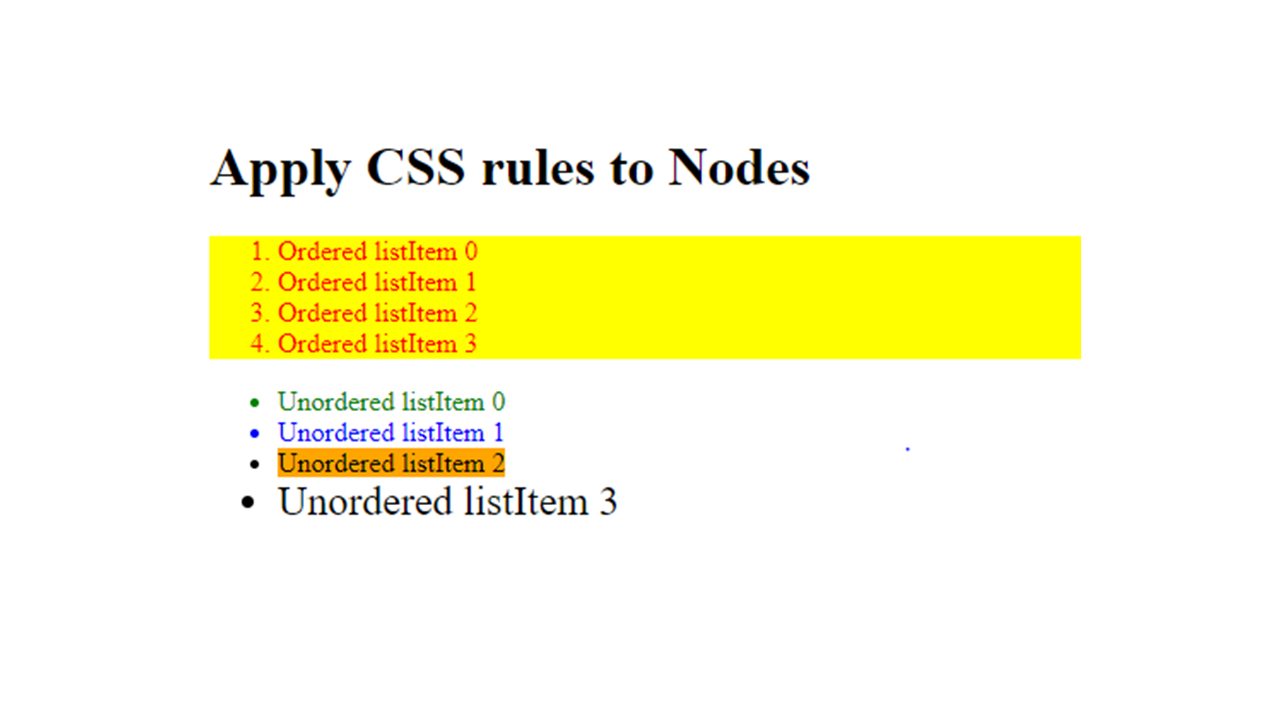
Apply CSS rules to Nodes
As you already know, we can change the styles of the HTML elements using DOM.
In order to be able to change the style, you should first define the element to which you want to apply the new style (using for example getElementById) and then write .style.property.
The general type to do that is: document.getElementById(id).style.property = new style
Additinaly, to apply styles to element's children the general type is: document.getElementById(id).children[x].style.property = new style
In the below code we will see some examples of changing the styles of element's children.
Exercise
- Open your editor, create a new file and save it as
exersice14.1.4.htmlin the folder "yourNameWEB2JS". - Copy the code below and paste it in the new file.
- See the results.
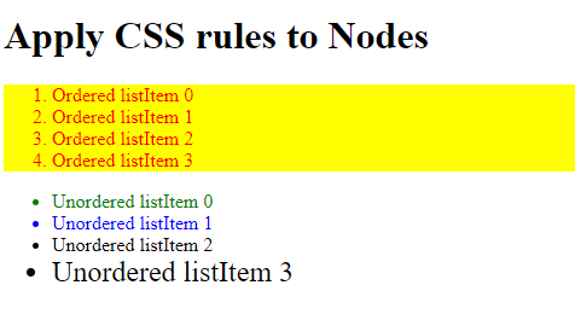
- Modify the above code to change the background of the third ul item to orange.