The 'Glow' circuit assembly
The 'Glow' circuit assembly
Assemble a simple, pre-made circuit with light that you can incorporate into your 3D designs.
2. 3D print the Glow holder
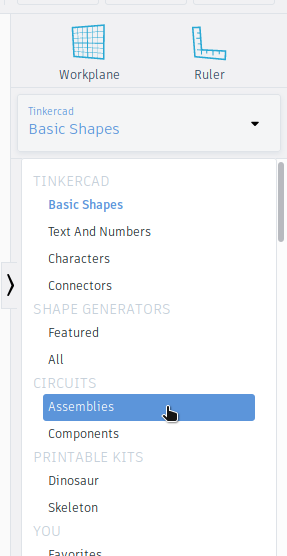
Open up a new 3D design in Tinkercad, then
click the Shapes panel dropdown and select Circuit Assemblies from the
list.
Move a Glow holder to the workplane. You'll notice that scaling is locked, so you can't resize it. This restriction is in place because specific, real life, electronic components need to fit into the holder.

Export the holder as a .STL file to prepare for printing. When you import the Glow holder onto the Tinkercad workplane, illustrations of the electrical components are shown, but will not export/print along with the holder. They are there only so you can see where the components sit in the holder.

Now it's time to 3D print your parts! The recommended settings are 20% infill with raft enabled, with supports disabled.