Book
Arduino programming
Arduino programming
Completion requirements
View
Blink a LED, the Arduino 'hello world'.
3. Blink a LED
A program designed for an Arduino board is called a sketch, and the process of transferring it to the board is called uploading.
We are now going to upload the first sketch. It will be one of the examples available on the IDE.
Open Blink sketch
Go to the File > Examples > 01.Basics > Blink.
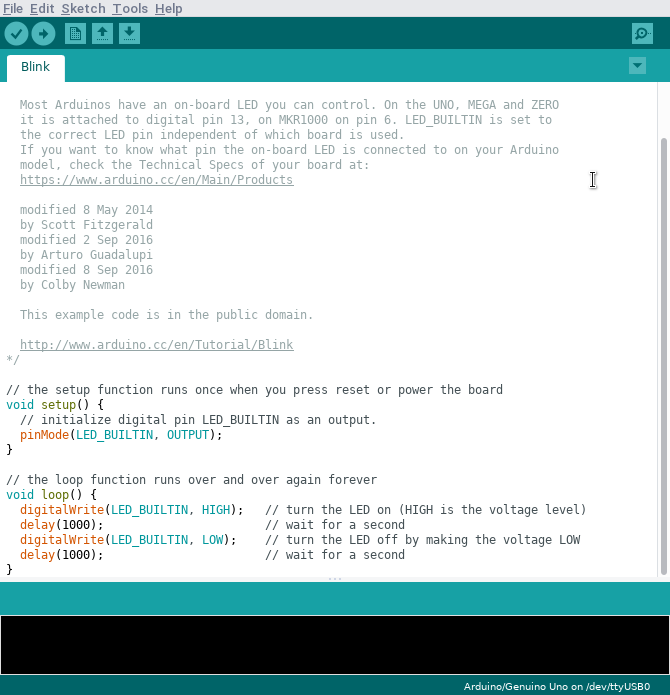
Verify the code
The first step to getting a sketch ready for uploading is to verify it. You can do this by clicking the 'tick' quick button, or opening the Sketch menu and selecting Verify/Compile. This will check it over for any errors and then translate it into a program
compatible with the Arduino hardware (compiling).

After a few seconds you should see the message Done compiling.
Upload to the board
Now that there are no errors in the code and it is compiled, it is ready for upload. Make sure the Arduino
is plugged in, the Power LED is on and the correct board and Serial
Port are selected.
Next, select Upload from the Sketch menu, or hit the horizontal arrow quick button.
Blink!
As the program is rather small, it will not take a lot of time to upload. You may notice the RX and TX LEDs blink during upload. When it is up and running, the LED marked L will start blinking on and off, 1 second on - 1 second off.