Relays
Relays
High power mode: control fans, lamps and other appliances.
2. Driving a relay with Arduino
The relays we will use are electromechanical (click-click). These relays support a wide
range of signal characteristics, from low voltage/current to high
voltage/current and from DC to GHz frequencies. For this reason, we can
almost always find an electromechanical relay that matches what we want to build.
Our control circuit is the Arduino Uno board which outputs 5V DC. More specifically:
Each of the 14 digital pins on the Uno can be used as an input or output, using pinMode(),digitalWrite(), and digitalRead() functions. They operate at 5 volts. Each pin can provide or receive 20 mA as recommended operating condition and has an internal pull-up resistor (disconnected by default) of 20-50k ohm. A maximum of 40mA is the value that must not be exceeded on any I/O pin to avoid permanent damage to the microcontroller.
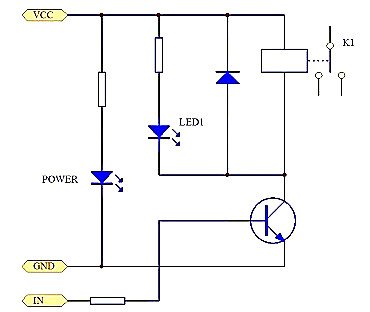
Usually this amount of current (20mA) is not enough to drive an electromechanical relay, which relies on mechanical contacts as a switching mechanism (coil > magnetic field > contacts > click-click!). This is why the Arduino output signal needs to be amplified.
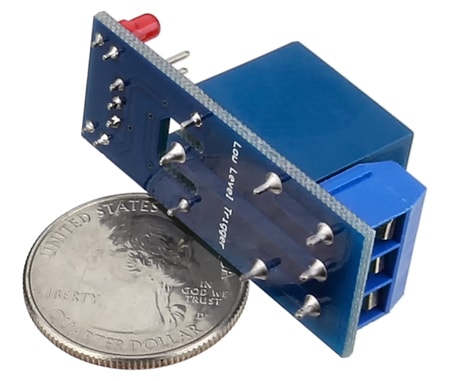
Fortunately, there are relay breakout boards do this for us and are ready to use with an Arduino board.