Input and output
Input and output
Switches, speakers, LEDs, and flashing unicorns.
2. Add a button
2.3. The pull-down resistor
You might now be wondering what the purpose of that big 10k resistor was.
At rest, the switch pins are not connected to one another. Pin 2 is
connected through a 10K resistor to ground (-). When the button is
pressed, the switch pins are connected, which allows pin 2 to be
connected to HIGH (5V/+), with no resistor. Since electricity takes the path
of least resistance, the pin will sense the connection to (+)
strongly, and ignore the weak (10K) connection to ground. But when no other
signal is present (when the switch isn't being pressed), that weak
connection to ground is all the pin can sense.
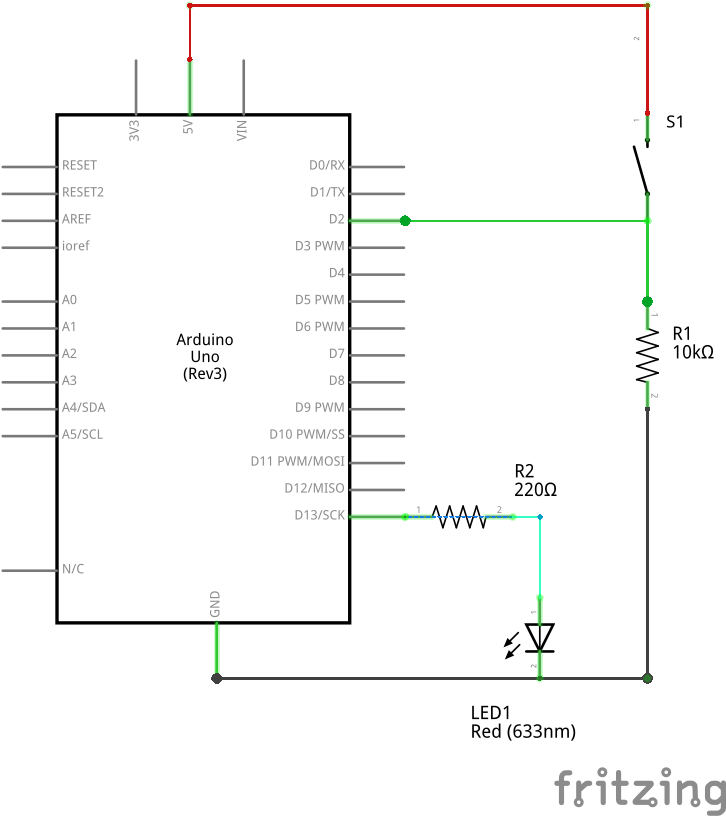
So the resistor is "pulling
the pin down" to ground and so it's called a pull-down resistor.
Without one, pin 2 would be not connected to anything until the button
is pressed. This is called "floating", and can result in random noise
from static electricity and electromagnetic interference.
You can test this by measuring the air's voltage levels with a multimeter!
Similarly a resistor can be used to tie a pin to (+), which is called a pull-up resistor.
Arduino pins have built-in pull-up resistors on many of the pins (tiny ones, inside the chip just for this purpose), and you can access one by enabling it in the setup:
pinMode(buttonPin, INPUT_PULLUP);