Input and output
Input and output
Switches, speakers, LEDs, and flashing unicorns.
3. Add a speaker
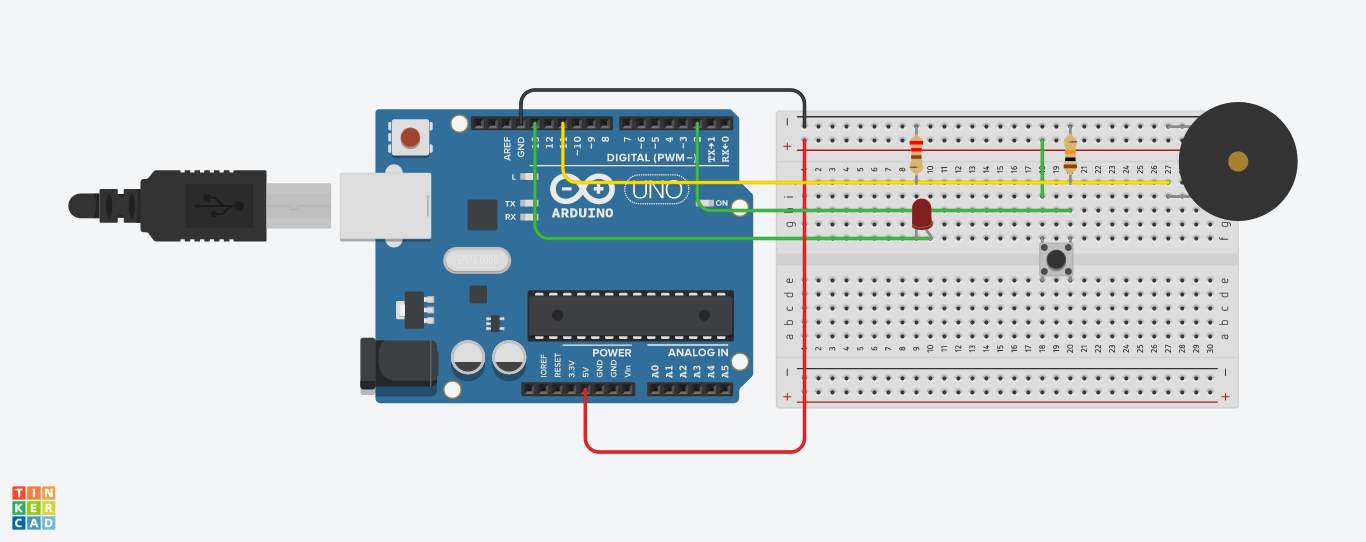
In this circuit, the button, LED, resistors, and jumpers will stay in the same place. You are simply adding a 8Ω speaker; everything else remains the same.
Before making changes to your circuit, remove it from power.
Attach one end of the speaker to pin 11 and the other to ground. For this example, it doesn't matter which end goes where.
Now let's take a look at the code.
First up, we need to add a variable for the speaker pin (11):
const int speakerPin = 11; //the number of the speaker pinThis will go on the top, outside setup() and loop().
Next, we shall initialise speakerPin in setup():
pinMode(speakerPin, OUTPUT);Finally, we need to output the buttonState value also to the speaker. We will do so by using the Arduino functions called tone() and noTone().
void loop() {
  // read the state of the pushbutton value:
  buttonState = digitalRead(buttonPin);

  // check if the pushbutton is pressed. If it is, the buttonState is HIGH:
  if (buttonState == HIGH) {
    // turn LED on:
    digitalWrite(ledPin, HIGH);
    tone(speakerPin, 440);
  } else {
    // turn LED off:
    digitalWrite(ledPin, LOW);
    noTone(speakerPin);
  }
}
tone() will generate a note or tone that can play through the speaker. When you use the tone() function, you need to tell Arduino on which pin to generate a tone and what note to play.
tone(which_pin, tone_frequency);We define notes by their frequency value. 440Hz famously is the note A. You can find a detailed list of acceptable notes for tone() here.
noTone() on the other hand stops the sound from being played on the pin specified. In this case, that’s speakerPin, which stores the value of the pin that has the speaker attached to it. If you leave out noTone() , then your note will play continuously once you press the button the first time.