Book
Revisiting the first circuit with Arduino
Revisiting the first circuit with Arduino
Completion requirements
View
Variables, loops and, in general, more stuff.
1. Arduino schematics
In electronics schematics, we only include the necessary and sufficient information for somebody to understand the circuit. This is why in Arduino schematics for projects, we do not include all the details of the Arduino board.
This is the schematic of what we are going to make next:
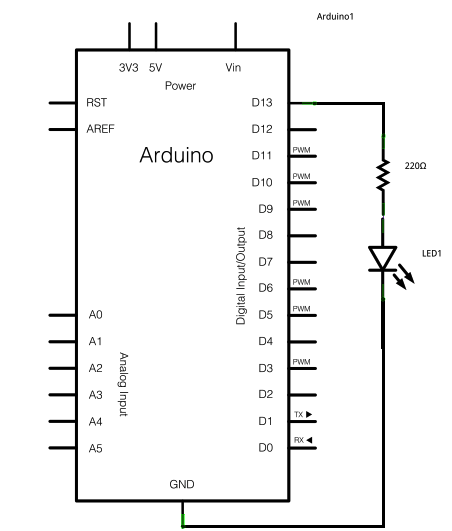
It is the equivalent of this:
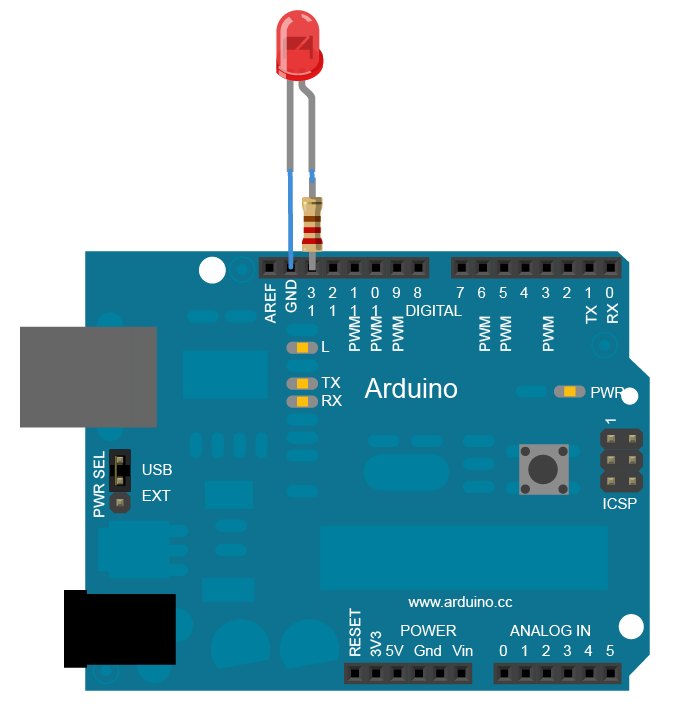
It is the same circuit from Electronics crash course, only this time we are controlling a LED with an Arduino. We are also going to use the Blink sketch, only this time with an external LED connected to pin 13.
There are many ways to make these connections with a breadboard. Here is what else you will need:
- LED (red)
- 220 Ohm resistor (red, red, brown, gold)
- Jumper wires