Revisiting the first circuit with Arduino
Revisiting the first circuit with Arduino
3. Variables
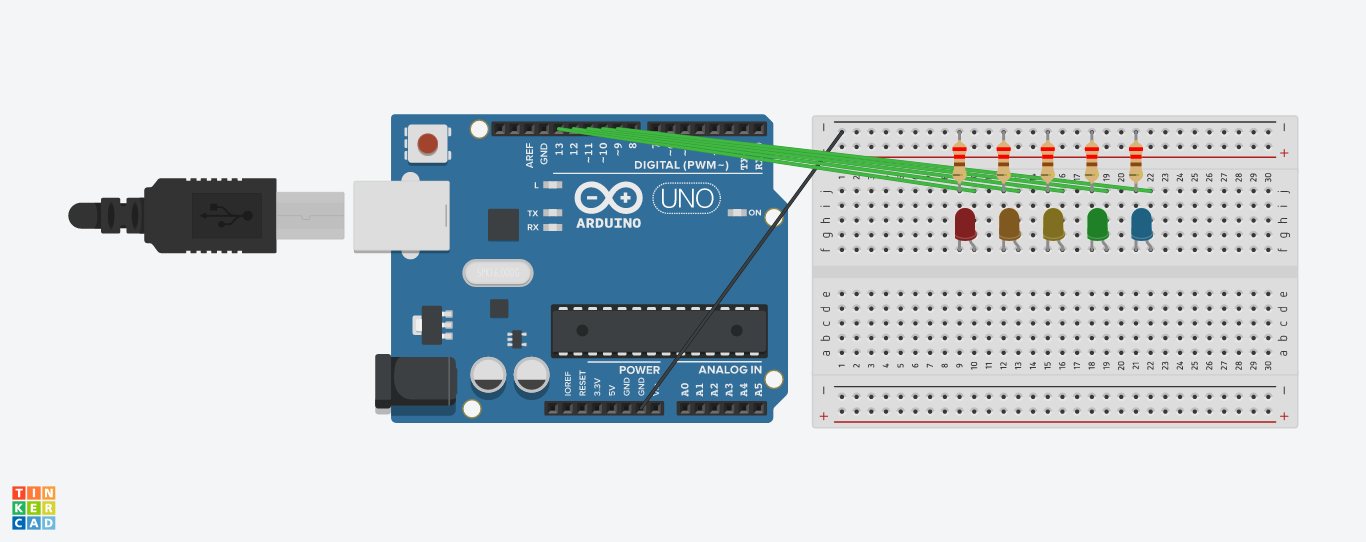
This is an implementation using pins 9-13.
The code used:
void setup()
{
  pinMode(13, OUTPUT);
  pinMode(12, OUTPUT);
  pinMode(11, OUTPUT);
  pinMode(10, OUTPUT);
  pinMode(9, OUTPUT);
}

void loop()
{
  digitalWrite(13, HIGH);
  delay(1000); // Wait for 1000 millisecond(s)
  digitalWrite(13, LOW);
  digitalWrite(12, HIGH);
  delay(1000); // Wait for 1000 millisecond(s)
  digitalWrite(12, LOW);
  digitalWrite(11, HIGH);
  delay(1000); // Wait for 1000 millisecond(s)
  digitalWrite(11, LOW);
  digitalWrite(10, HIGH);
  delay(1000); // Wait for 1000 millisecond(s)
  digitalWrite(10, LOW);
  digitalWrite(9, HIGH);
  delay(1000); // Wait for 1000 millisecond(s)
  digitalWrite(9, LOW);
}
As you can see, this time we mentioned the pin numbers directly and initialised all of them separately as output pins.
Now if we want to change the delay time in this sketch for all the LEDs, it will be quite hard, as the delay() function is used a few times. One way to get passed this is to create a place that we would store the delay time information and every time we call delay() we would use its name.
int delayTime = 1000;This place is called a variable. With the statement above, we are declaring a variable that we named 'delayTime', of type integer and we initialised its value to 1000.
Now we can use it inside a function:
delay(delayTime);Aside from this handy feature, variables have many other advantages, such as changing their value inside the program. We will look more into this later.
One important thing to clarify is that where a variable is declared in the program affects where it can be used and where not.
- If on the top of the program, outside setup() and loop(), the variable is global and can be used everywhere in the program.
- If you want to use it inside a single function, such as setup() or loop() it will be declared there.