Book
Sensing the analog world
Sensing the analog world
Completion requirements
View
Measuring the environment with 1024 bits.
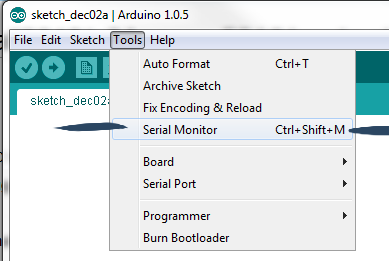
1. The serial monitor
Keeping track of everything going on in your program can be an uphill
battle. The serial monitor is a way to check in on different spots in
your code by reporting back to the computer over the USB cable.
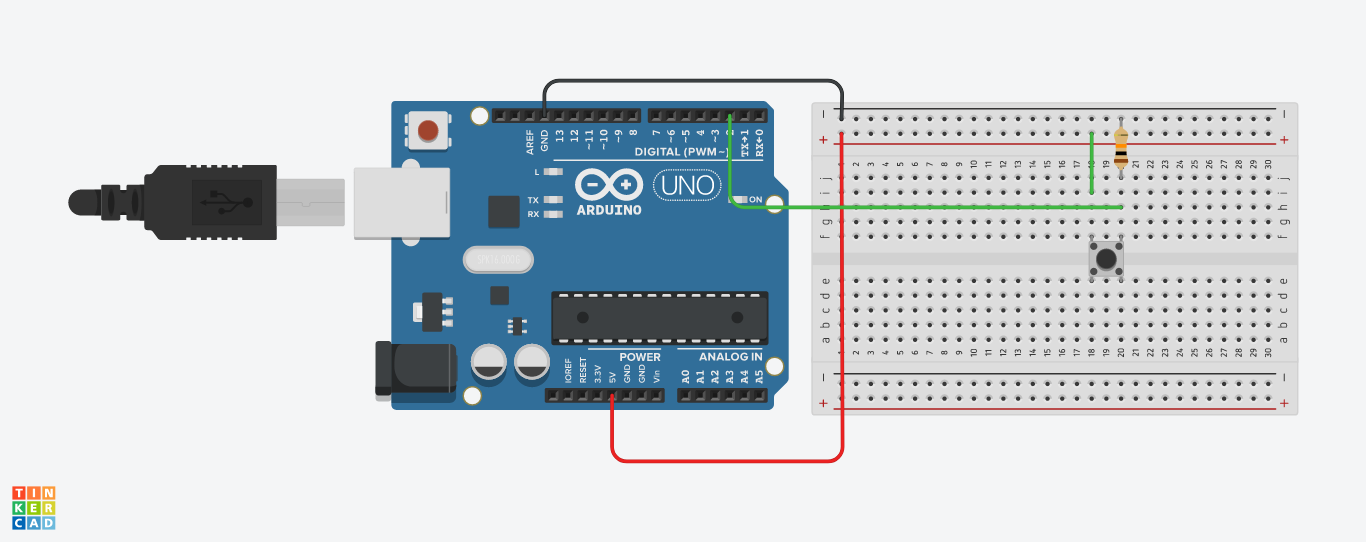
This circuit uses a button setup similar to the previous examples, but without a LED. Navigate to File >
Examples > 01.Basics > DigitalReadSerial and load the example sketch.
Upload this code to
your board and click the Serial Monitor button in the upper right of the
sketch window or go to Tools > Serial Monitor.
Serial.begin(); inside setup(). The number 9600 is the baud rate, or data speed, in bits per second (bps). Inside the loop(), we use Serial.print(); to send information to the serial port. Serial.println();
does the same thing, but prints on a new line. Serial.println(buttonState);